

TGarthConnelly
-
Posts
427 -
Joined
-
Last visited
-
Days Won
8
Content Type
Profiles
Forums
Events
Posts posted by TGarthConnelly
-
-
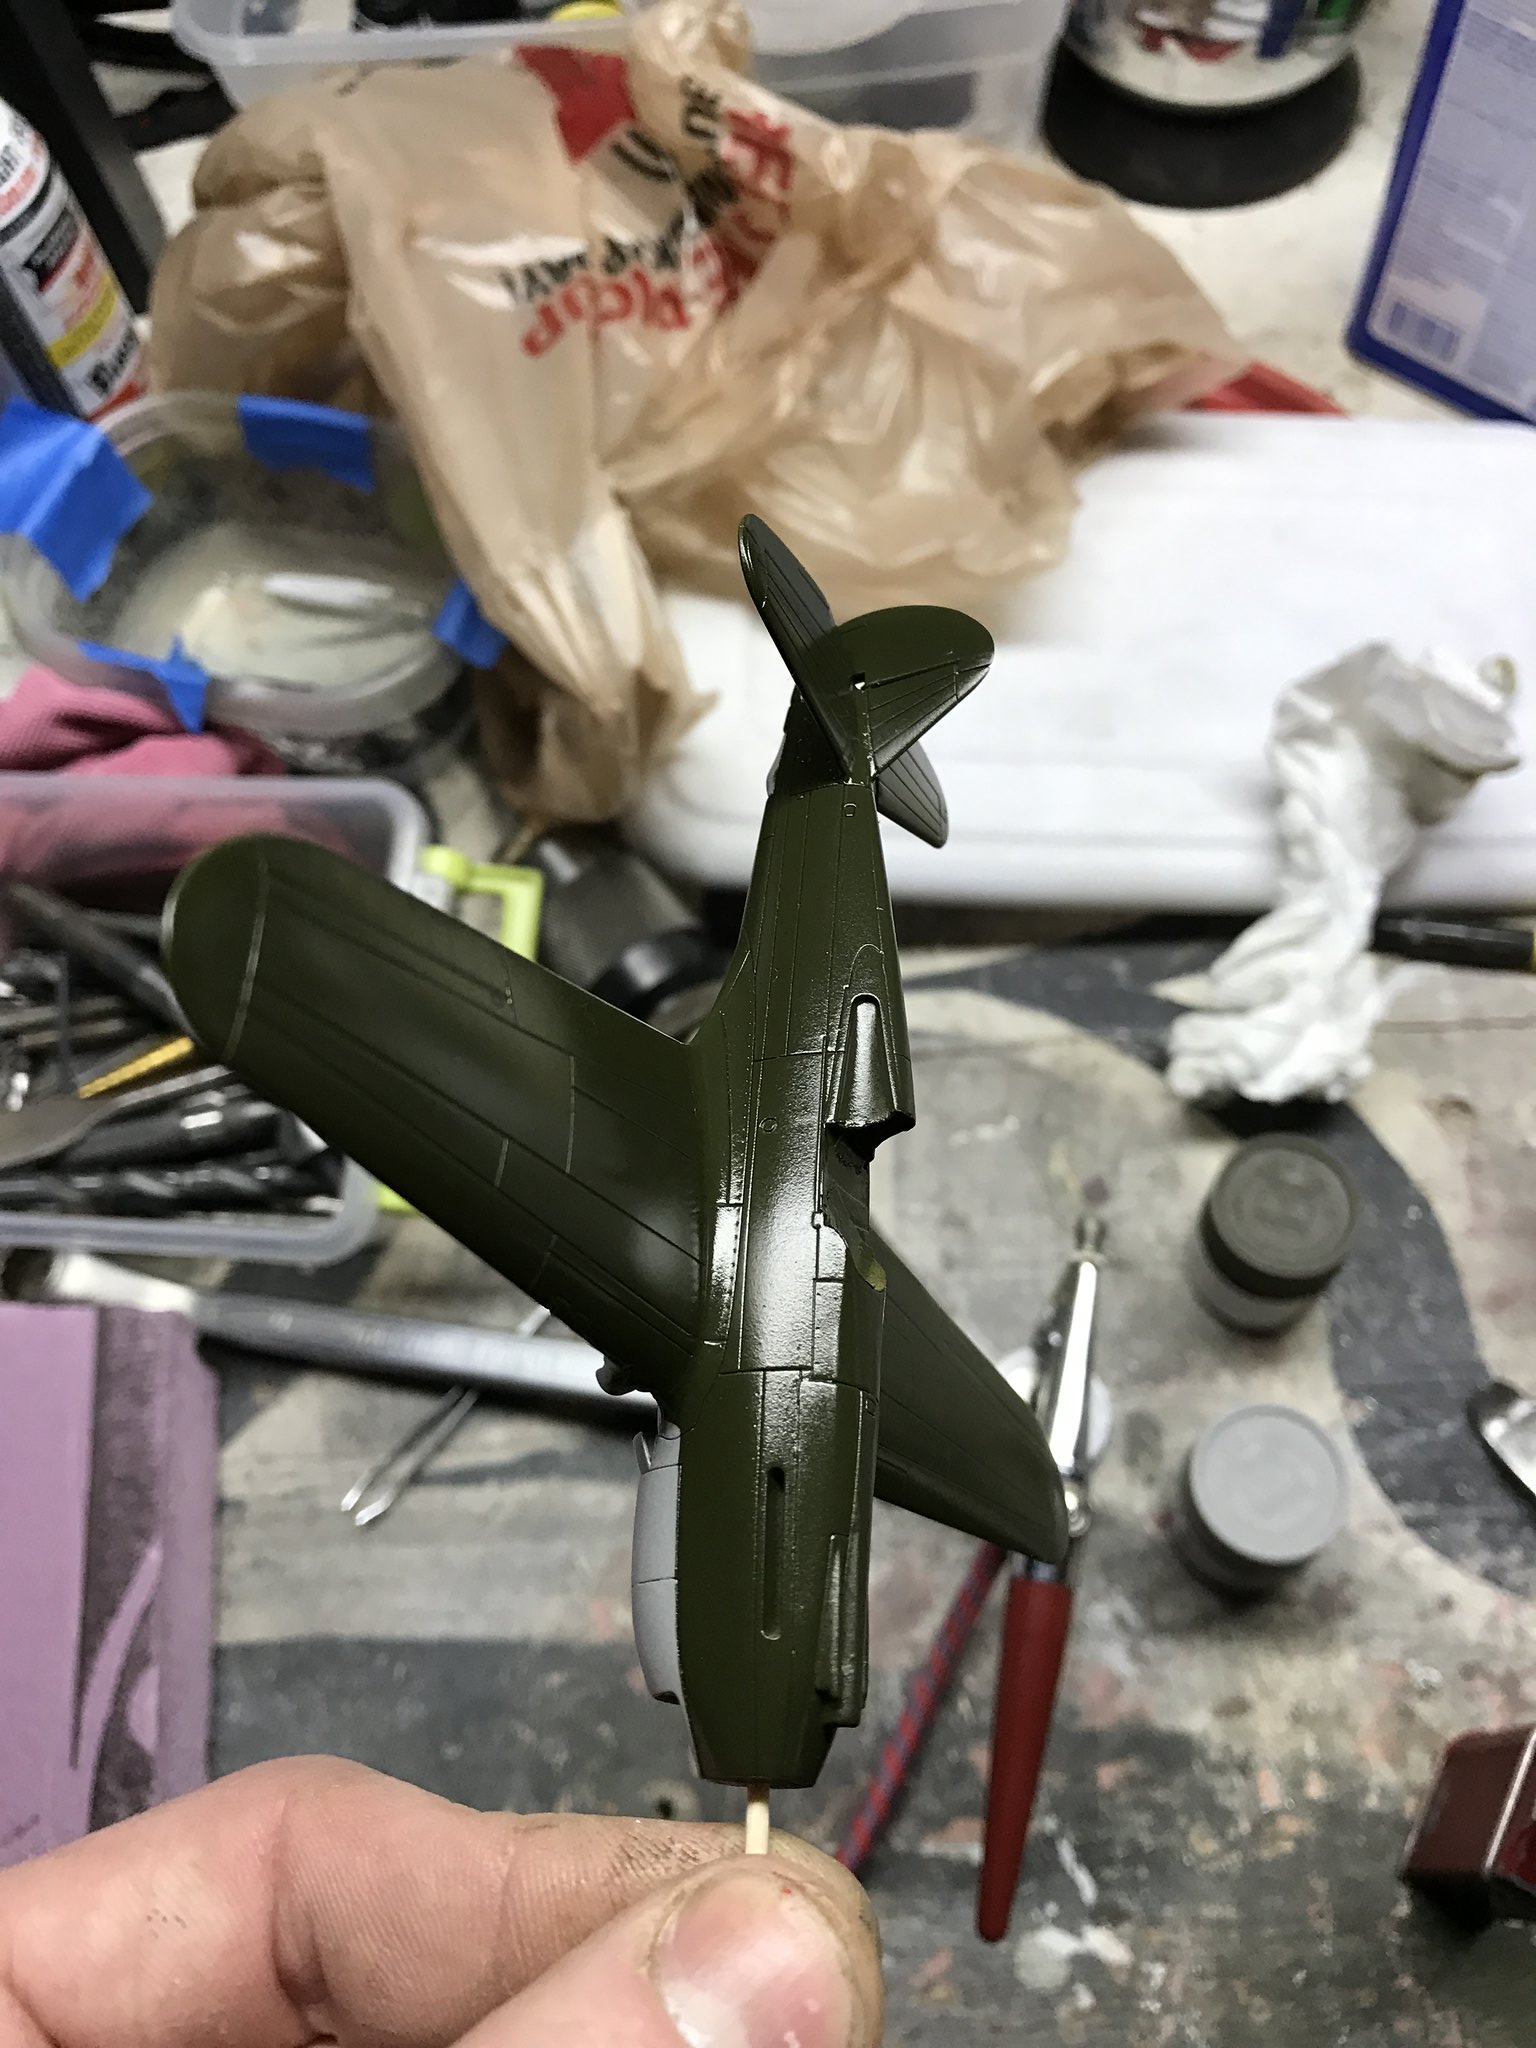
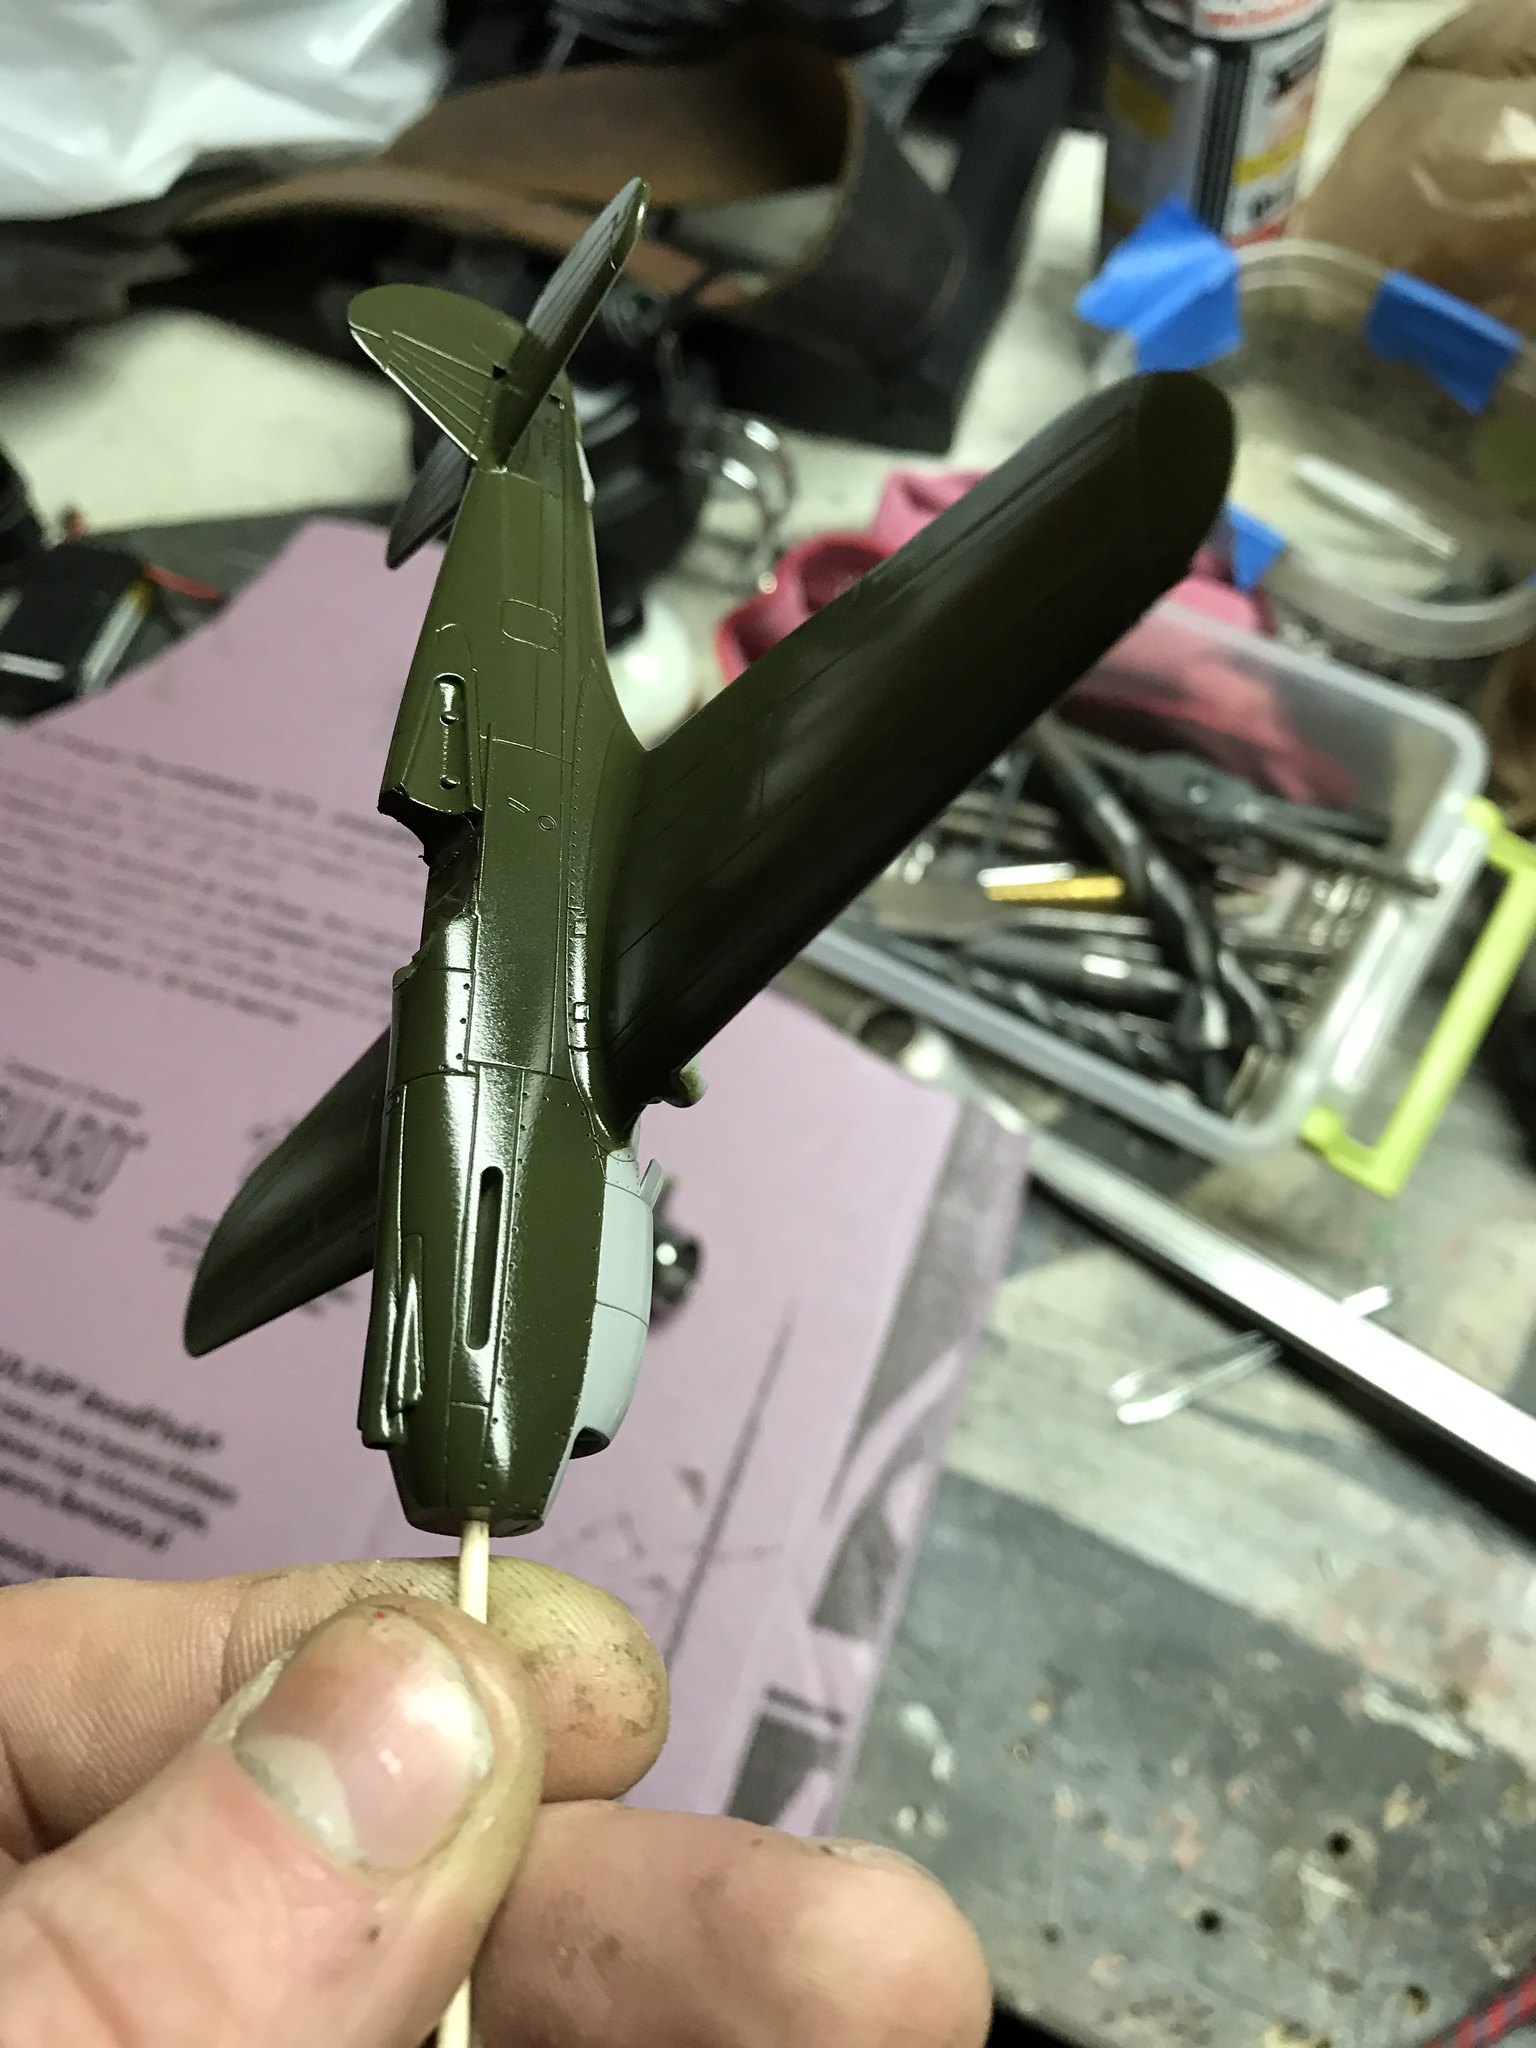
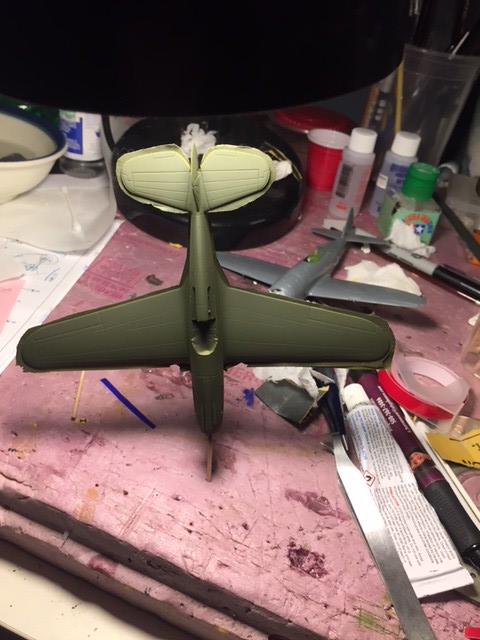
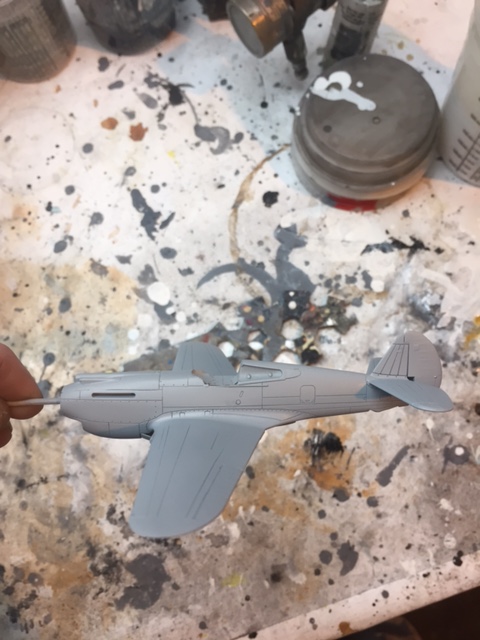
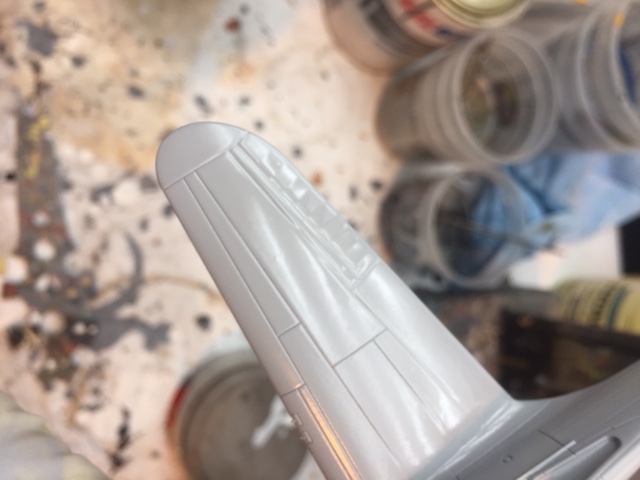
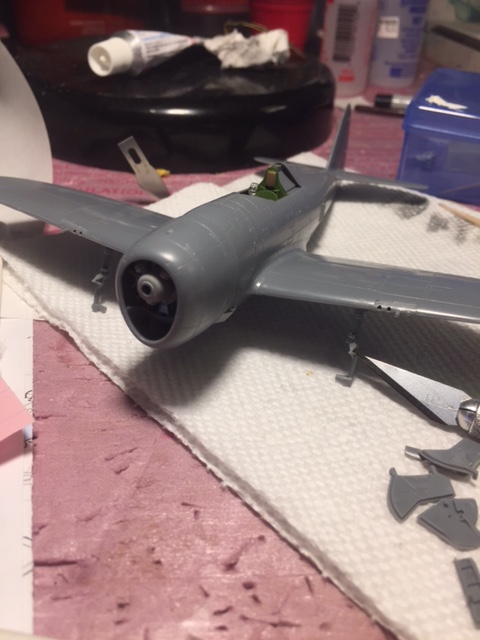
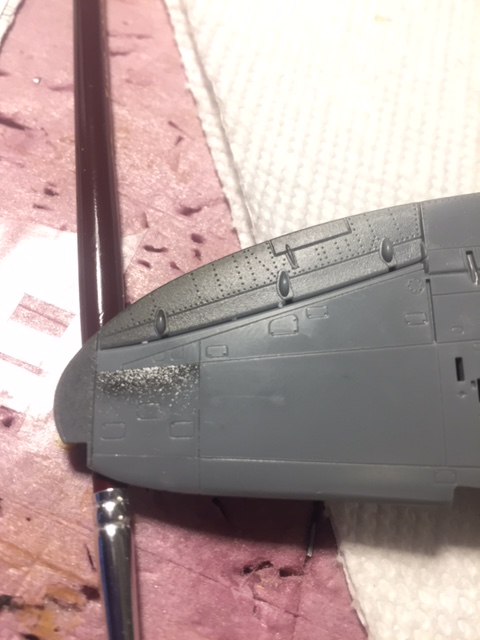
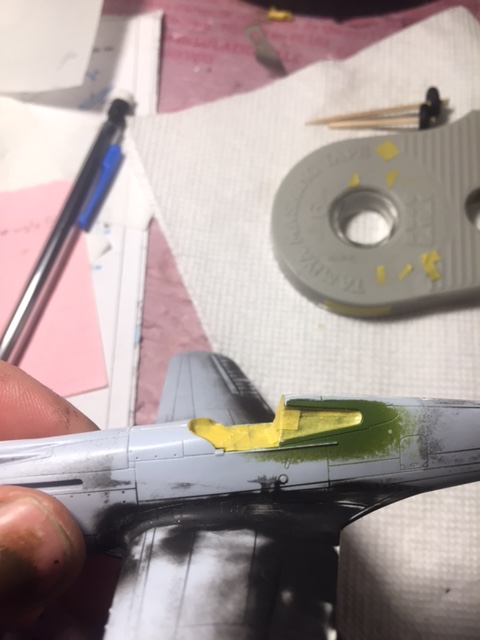
Kyle sent me an update on my RAF P-47, and this is what he said, “Here she is in white primer. False alarm about those rivers, they came back just fine as the primer dried. I'll give this a day to cure, smooth out with 1500 and start by shooting the wheel wells with yellow zinc primer color.”
Here are some photos:
 P47BUILD64 by Tim Connelly, on FlickrP47BUILD65 by Tim Connelly, on FlickrP47BUILD66 by Tim Connelly, on FlickrP47BUILD67 by Tim Connelly, on FlickrP47BUILD68 by Tim Connelly, on Flickr
Tim
-
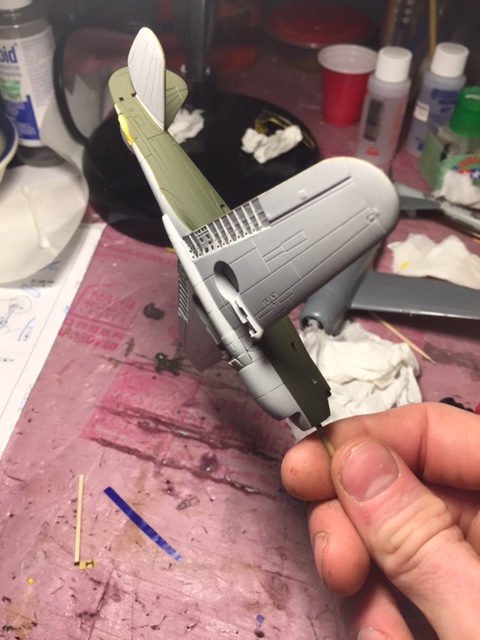
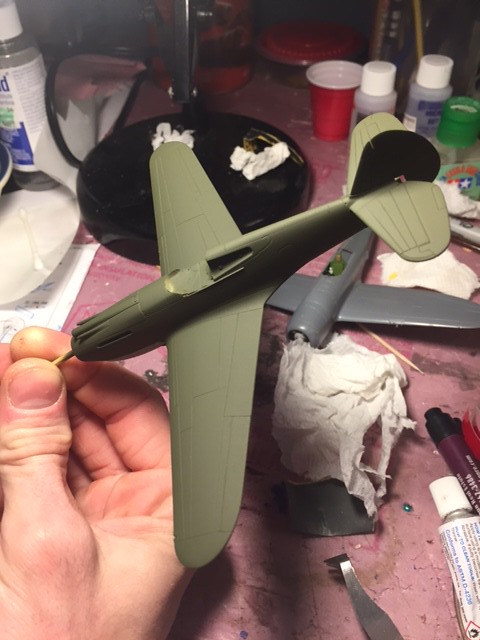
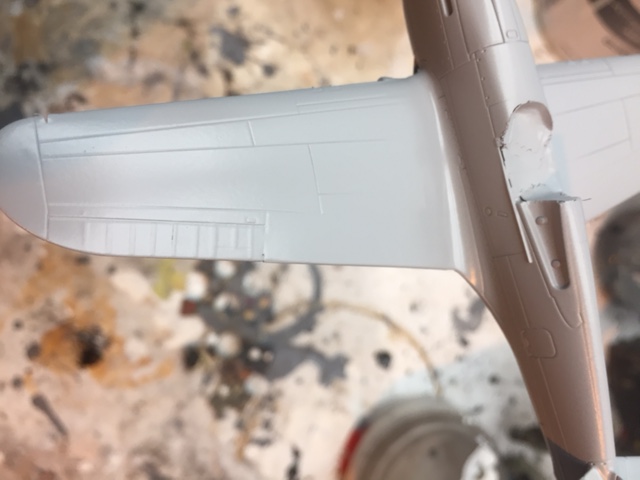
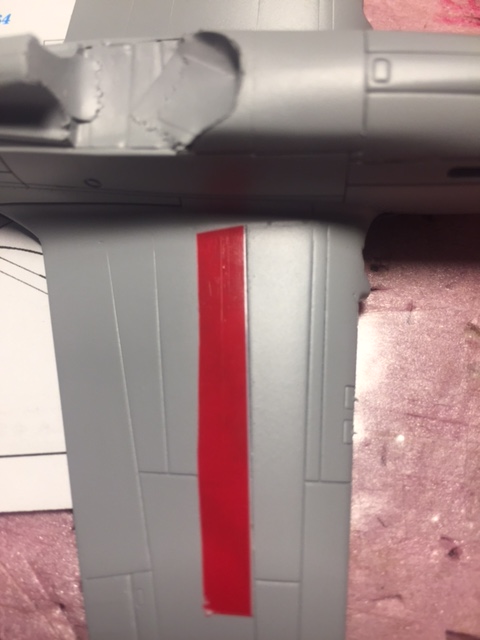
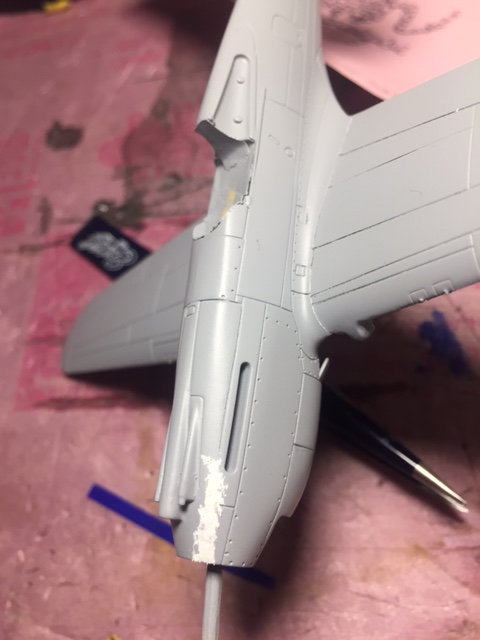
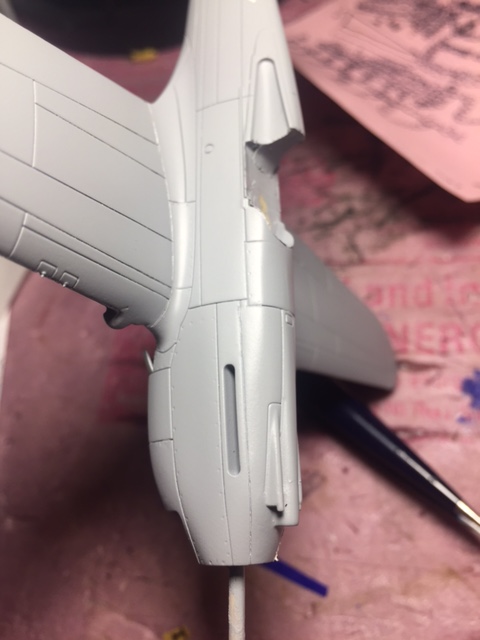
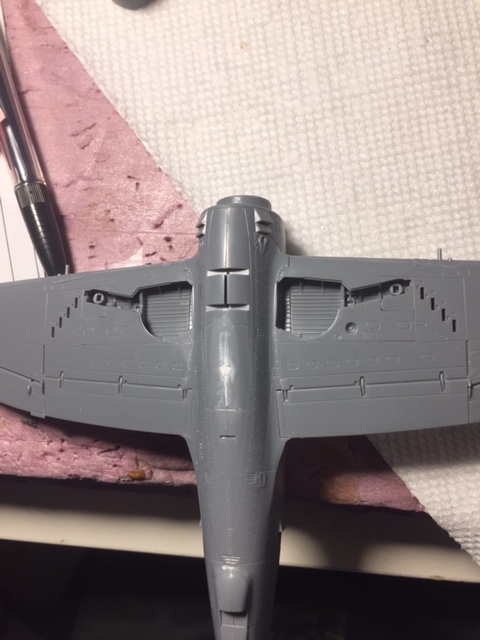
Kyle sent me an update on my RAF P-47, and this is what he said, “The gap for the outer pylon was also filled and wiped smooth. I drilled the holes for the rocket launcher. Yes, they're marked from the inside but in my excitement, I joined the wings first before drilling. When I made the first hole I was off a bit, so that hole got filled with some styrene rod and will be cut filled and sanded smooth. After another round of sanding and minor putty she'll be ready for masking and primer.”
Here are some photos:P47BUILD54 by Tim Connelly, on FlickrP47BUILD55 by Tim Connelly, on FlickrP47BUILD56 by Tim Connelly, on FlickrP47BUILD57 by Tim Connelly, on FlickrP47BUILD58 by Tim Connelly, on FlickrP47BUILD59 by Tim Connelly, on FlickrP47BUILD60 by Tim Connelly, on FlickrP47BUILD61 by Tim Connelly, on FlickrP47BUILD62 by Tim Connelly, on FlickrP47BUILD63 by Tim Connelly, on FlickrTim
-
 1
1
-
-
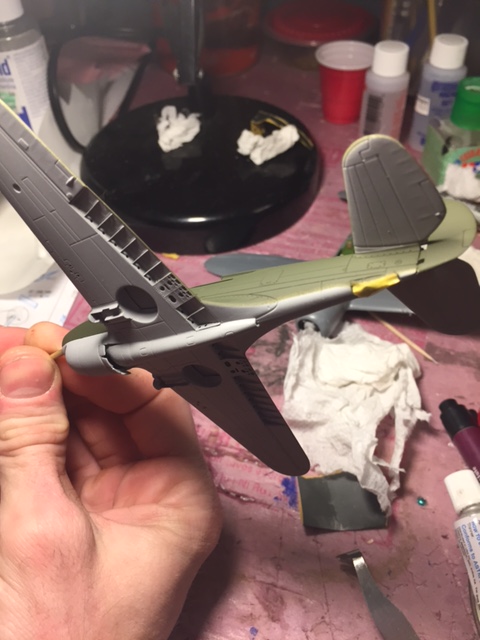
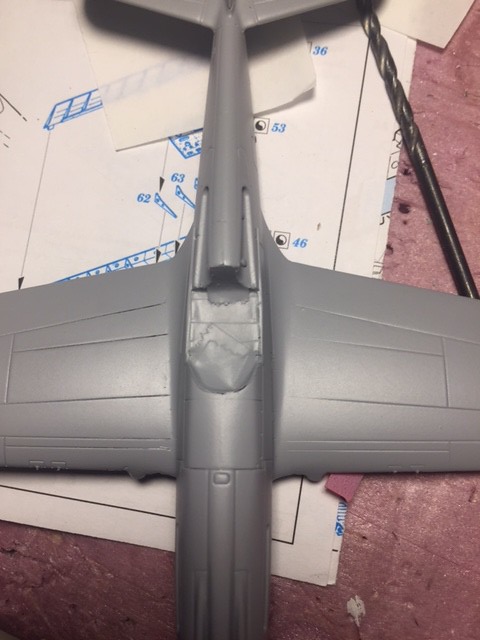
Kyle sent me an update on my RAF P-47, and this is what he said, “Only had an hour last night to work so I'm still chipping away at seam filling and smoothing. I mounted the outer wing pylons as well. One side will require minor filling to blend it into the wing. I used Tamiya lacquer thinner instead of acetone to clean the putty and the results were much nicer. I'll have a few more days of cleaning seams but hopefully by this weekend I can get some primer on it.”
Here are some photos:P47BUILD48 by Tim Connelly, on FlickrP47BUILD49 by Tim Connelly, on FlickrP47BUILD50 by Tim Connelly, on FlickrP47BUILD51 by Tim Connelly, on FlickrP47BUILD52 by Tim Connelly, on FlickrP47BUILD53 by Tim Connelly, on FlickrTim
-
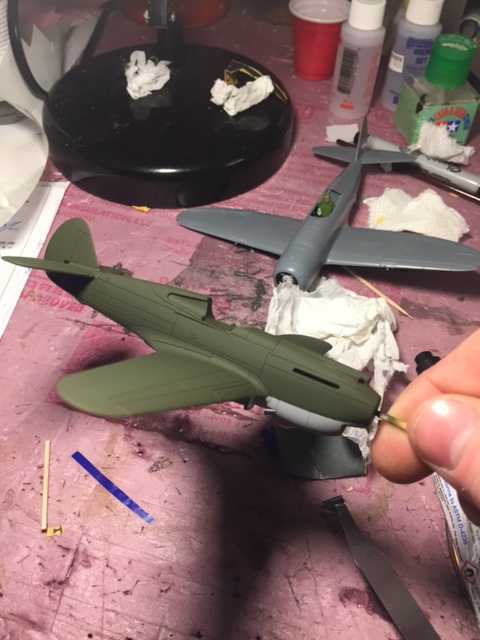
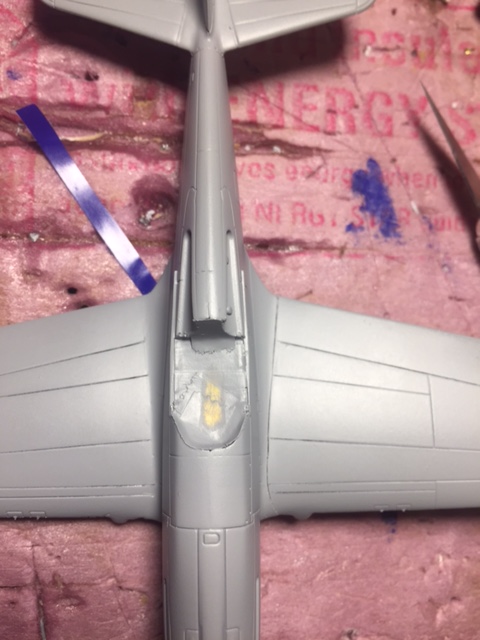
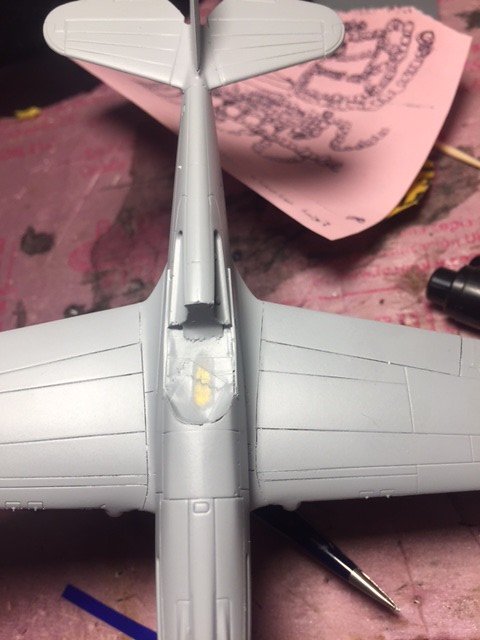
Kyle sent me an update on my RAF P-47, and this is what he said, “With the P-40 approaching the finish line I set aside some time for the Jug. I started doing some fills. The panels on the bottom of the wing were smoothed back with acetone. The fills in the wing fillets will need sanding as there was a step going from the wing to the fillet. I also assembled the rocket launchers and wing pylons.”
Here are some photos:P47BUILD44 by Tim Connelly, on FlickrP47BUILD43 by Tim Connelly, on FlickrP47BUILD45 by Tim Connelly, on FlickrP47BUILD46 by Tim Connelly, on FlickrP47BUILD47 by Tim Connelly, on FlickrTim
-
-
Kyle sent me an update on my Pearl Harbor P-40, and this is what he said, “Just a quick update. I got the exhausts put in and finally unmasked the cockpit. Some minor touching up to do but most of it will be hidden underneath the canopy. I'm close to the finish line on this one. Next couple days I'll get back on the Jug and start filling seams and masking in preparation for primer. On a side note, I appreciate your patience. It seems as though lately I haven't had very much time to model and it frustrates me a bit. Things will smooth over soon and I'll be able to get back to my steady pace.”
Here are some photos:P40BUILD144 by Tim Connelly, on FlickrP40BUILD145 by Tim Connelly, on FlickrP40BUILD146 by Tim Connelly, on FlickrP40BUILD147 by Tim Connelly, on FlickrTim
-
Kyle sent me an update on my Pearl Harbor P-40, and this is what he said, “I got the gear doors painted and attached in the P-40. I also put the gear strut supports on. They were painted the same aluminum as the gears. I also put the linkages on that control the trim tabs and the rudder hinge. The sights went on up front. These will get painted tonight in preparation for an overall flat clear. I broke one of the guns off, so I decided to remove the other three and will make replacements from a hypodermic syringe. I didn't not it until after the pictures but there's a small point on the rudder hinge, that will get filed off tonight.”
Here are some photos:P40BUILD143 by Tim Connelly, on FlickrP40BUILD135 by Tim Connelly, on FlickrP40BUILD136 by Tim Connelly, on FlickrP40BUILD137 by Tim Connelly, on FlickrP40BUILD138 by Tim Connelly, on FlickrP40BUILD139 by Tim Connelly, on FlickrP40BUILD140 by Tim Connelly, on FlickrP40BUILD141 by Tim Connelly, on FlickrP40BUILD142 by Tim Connelly, on FlickrTim
-
Kyle sent me an update on my Pearl Harbor P-40, and this is what he said, “I sprayed the inside of the flaps and attached them to the wings. They were bent at the same time so the angles would match. I attached the doors for the tail gear. I dunked the canopy into future floor polish, it pooled a bit so I'm going to remove it tonight and give the application a second go. I also bent the inner gear doors and just now I hit them with primer. Tonight, I plan to spray them grey, paint the insides and hopefully get them attached.”
Here are some photos:P40BUILD125 by Tim Connelly, on FlickrP40BUILD126 by Tim Connelly, on FlickrP40BUILD134 by Tim Connelly, on FlickrP40BUILD127 by Tim Connelly, on FlickrP40BUILD128 by Tim Connelly, on FlickrP40BUILD129 by Tim Connelly, on FlickrP40BUILD130 by Tim Connelly, on FlickrP40BUILD131 by Tim Connelly, on FlickrTim
-
Kyle sent me an update on my Pearl Harbor P-40, and this is what he said, “Quick update I got the P-40 standing on her own legs. I took out what I could for height but it wasn't much, any more and they wouldn't have any strength.”
Gil, hi. Sorry, I don't know what he used.
Here are some photos:P40BUILD121 by Tim Connelly, on FlickrP40BUILD122 by Tim Connelly, on FlickrP40BUILD123 by Tim Connelly, on FlickrTim
-
Kyle sent me an update on my Pearl Harbor P-40, and this is what he said, “Quick update, I've sprayed clear over the plane to seal in the decals. Tonight, I’m hoping to mask and spray the green on the inside of the wheel wells and the flap bays. I applied the decals to the prop as well. This is ready for another sealer of clear.”
Here are some photos:P40BUILD114 by Tim Connelly, on FlickrP40BUILD115 by Tim Connelly, on FlickrP40BUILD116 by Tim Connelly, on FlickrP40BUILD117 by Tim Connelly, on FlickrP40BUILD118 by Tim Connelly, on FlickrTim
-
Kyle sent me an update on my Pearl Harbor P-40, and this is what he said, “Decals including all the nomenclature are on. It occurred to me after the main issue with the bottom decal was in the clear section, so I opted to very carefully cut away the clear leaving the letters. I also burnished the decals into the panel lines. It's officially ready for a layer of gloss clear, then in a few days I'll do the zinc on the interior parts.”
Here are some photos:P40BUILD109 by Tim Connelly, on FlickrP40BUILD111 by Tim Connelly, on FlickrP40BUILD110 by Tim Connelly, on FlickrP40BUILD112 by Tim Connelly, on FlickrP40BUILD113 by Tim Connelly, on FlickrTim
-
Kyle sent me an update last night, on my Pearl Harbor P-40 and my RAF P-47, and this is what he said, “All the parts here received a coat of Tamiya white primer. The prop for the P-47 was based in black and is ready for clear and decals. The spinner to the P40 was painted olive drab. I primed an assortment of gear doors. The P-40 doors and flaps were painted the underside grey, and the P-47 doors will be painted when the underside of the Jug is painted gray…”
Here are some photos:P47BUILD43 by Tim Connelly, on FlickrP47BUILD44 by Tim Connelly, on FlickrP40BUILD108 by Tim Connelly, on FlickrP40BUILD107 by Tim Connelly, on FlickrP40BUILD106 by Tim Connelly, on FlickrTim
-
Kyle sent me an update earlier today, on my Pearl Harbor P-40, and this is what he said, “Here are photos of the decals. Solvaset didn't work as well as I hoped but I was more careful applying the 155s. These are some tough decals.”
Here are some photos:P40BUILD99 by Tim Connelly, on FlickrP40BUILD100 by Tim Connelly, on FlickrP40BUILD101 by Tim Connelly, on FlickrP40BUILD102 by Tim Connelly, on FlickrP40BUILD103 by Tim Connelly, on FlickrP40BUILD104 by Tim Connelly, on FlickrP40BUILD105 by Tim Connelly, on FlickrTim
-
Kyle sent me an update last night, on my Pearl Harbor P-40, and this is what he said, “
Started the decals tonight. The numbers and red dots will go on tomorrow.”Here are some photos:
P40BUILD94 by Tim Connelly, on FlickrP40BUILD95 by Tim Connelly, on FlickrP40BUILD96 by Tim Connelly, on FlickrP40BUILD97 by Tim Connelly, on FlickrP40BUILD98 by Tim Connelly, on FlickrTim
-
Hello James,
Nice to hear from you again. I can only assume/presume that the photo was taken in Italy or the South of France. I understand the type of the MSC 63s (the Type 293) were utilized in Special Ops in the MTO.
Tim
-
Kyle sent me an update this afternoon on my Pearl Harbor P-40, and this is what he said, “Here is the P-40, if my test holds up this evening to decal solvent then I can start applying decals. If not I'll give it a couple days to dry.”
Here are some photos:
P40BUILD93 by Tim Connelly, on FlickrP40BUILD91 by Tim Connelly, on FlickrP40BUILD90 by Tim Connelly, on FlickrTim
-
Kyle sent me an update this morning on my Pearl Harbor P-40, and this is what he said, “I got the gray and OD Green on the P-40. I will try to get some gloss clear on today in preparation for decals. I’ll have to let the clear cure for 3-4 days before I can decal.”
Here are some photos:
P40BUILD83 by Tim Connelly, on FlickrP40BUILD87 by Tim Connelly, on FlickrP40BUILD87 by Tim Connelly, on FlickrP40BUILD86 by Tim Connelly, on FlickrP40BUILD84 by Tim Connelly, on FlickrP40BUILD85 by Tim Connelly, on FlickrP40BUILD88 by Tim Connelly, on FlickrTim
-
Thanks, Gil.
-
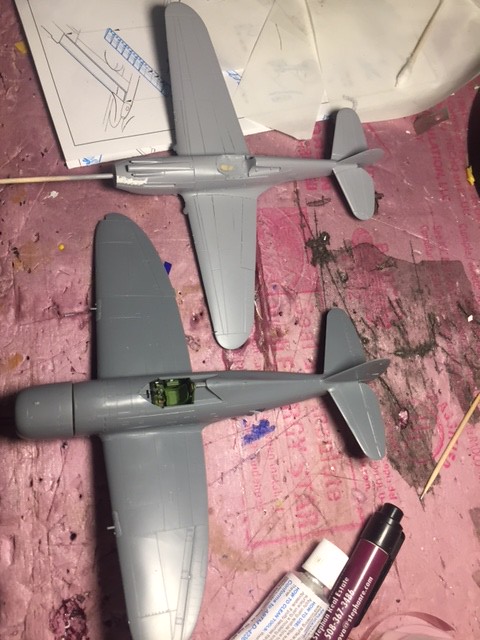
Kyle sent me an update last night on my Pearl Harbor P-40 and my RAF P-47 builds, and here is what he said, “Made some progress in the past two days. The P-40 was primed. The first shot is of when it's still wet. I got the remaining panels and gun mounts into the Jug. I test fit the engine into cowling. I also test fit the gear on the plane. Today after the primer was dried, I re-scribed the lines into the top of the wing. I decided to scribe a line on the wing running parallel to the wing fillet. It looked off just having the wing lines end nowhere. Lastly, I took a shot of both your 1:72 planes. Slow but steady they're moving along.”
Here are some photos:
P40BUILD71 by Tim Connelly, on FlickrP40BUILD72 by Tim Connelly, on FlickrP40BUILD73 by Tim Connelly, on FlickrP40BUILD72 by Tim Connelly, on FlickrP40BUILD73 by Tim Connelly, on FlickrP40BUILD74 by Tim Connelly, on FlickrP40BUILD76 by Tim Connelly, on FlickrP40BUILD77 by Tim Connelly, on FlickrP40BUILD78 by Tim Connelly, on FlickrP40BUILD79 by Tim Connelly, on FlickrP40BUILD80 by Tim Connelly, on FlickrP40BUILD81 by Tim Connelly, on FlickrP40BUILD82 by Tim Connelly, on FlickrP47BUILD38 by Tim Connelly, on FlickrP47BUILD39 by Tim Connelly, on FlickrP47BUILD40 by Tim Connelly, on FlickrP47BUILD41 by Tim Connelly, on FlickrP47BUILD42 by Tim Connelly, on FlickrTim
-
Hello All,
I have a question, ...
To the small craft knowledgeable who visit here; please look at the photo herein and please, please, please tell me what color the boat is wearing, please? I know that the bottom would have been Copperoyd, but what's the color of the boat? I'd say a gray. Do you concur? Also, do you guys see any depth charge racks on board? For a time frame, most probably late-43 into 1944.
It's a 63-foot ARB (MSC Type 293) which was used for Special Operations. I'm having Kyle build this boat for me.ARB22 by Tim Connelly, on FlickrTim
-
Kyle sent me an update last night on my Pearl Harbor P-40, and here is what he said,”I shot some primer this evening. The first picture is after one coat, the next two are after a second coat. The panel lines are very, very deep, at first I thought about getting the primer to bridge the lines, but decided against it because that much primer would cause other issues. This is fresh out of the can, I'll evaluate it tomorrow after it's dried and go from there. At the very least I'll be re-scribing the lines where they intersect the wing fillet.”
Here are some photos:
P40BUILD71 by Tim Connelly, on FlickrP40BUILD72 by Tim Connelly, on FlickrP40BUILD73 by Tim Connelly, on FlickrTim
-
Kyle sent me an update last night on my Pearl Harbor P-40, and on my RAF P-47, here is what he said, “The P-40 is officially ready for primer. I knocked back my aileron repair with some 1200 wet until the lines felt softer. I carefully taped and filled the flap gap, washed back to the tape with acetone then sanded smooth with 600 wet. I'm hoping to shoot the primer tomorrow, then I'll have to wait until I can get some sky gray from the hobby store to start the color coats. On the P-47 I glued a panel to the underside of the wing. Oddly this panel didn't fit too well and I had to shorten it a tad. I sanded the putty on the belly pan that I applied the other day up to 600 grit wet. I also painted the tires flat black. I actually took pictures yesterday only to see in the pictures my lines were off, so I went back with that Windsor Newton 0000 brush and got as close to the hub as I could. I have a few more pieces to add to the wing, and I have to open up the holes for the rocket tubes and I'll be ready to do more putty on it.”
Here are some photos:
P40BUILD70 by Tim Connelly, on FlickrP40BUILD71 by Tim Connelly, on FlickrP40BUILD73 by Tim Connelly, on FlickrP40BUILD74 by Tim Connelly, on FlickrTim
-
Kyle sent me an update this morning on my Pearl Harbor P-40, here is what he said, “I buckled down and masked the P-40. Wasn't as bad as I thought to do. I also glued the rudder back on as I accidentally popped it off a while back. All that is left is to fill where the inner flap meets the wing and smooth over the ailerons. Hopefully I'll be able to shoot some primer after work tomorrow.”
Here are some photos:
P40BUILD66 by Tim Connelly, on FlickrP40BUILD67 by Tim Connelly, on FlickrP40BUILD68 by Tim Connelly, on FlickrTim
-
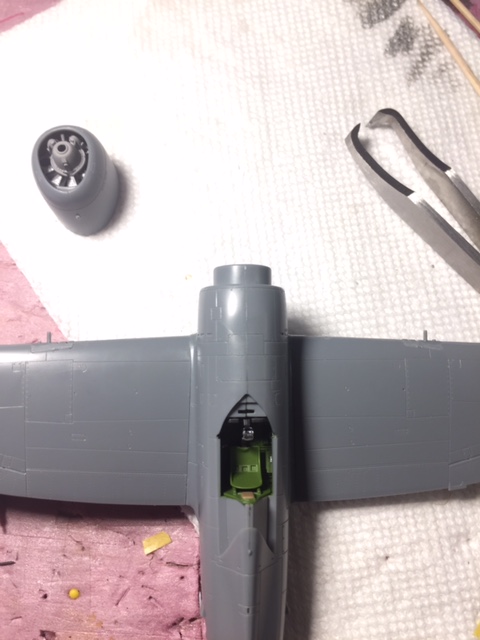
Kyle sent me an update this morning on my RAF P-47 build. Here is what he said; “I washed the prop with soap and water to remove and mold release. The plans have you glue onto little dimples on the hub. This didn't seem very strong to me so I opted to drill through the hub and leave some of the stem on the blades. They are a snug fit and I think much less likely to pop off. I still have to put a tiny drop of thin super glue to hold them but I wanted to do that with fresh eyes.”
Here are some photos:
P47BUILD27 by Tim Connelly, on FlickrP47BUILD28 by Tim Connelly, on FlickrP47BUILD29 by Tim Connelly, on FlickrP47BUILD30 by Tim Connelly, on FlickrP47BUILD31 by Tim Connelly, on FlickrP47BUILD32 by Tim Connelly, on FlickrTim


1:72 Tamiya P-47 Thunderbolt, Razorback variant (RAF markings) by Kyle Lord for Tim Connelly
in Aircraft
Posted
Thanks, Gil.
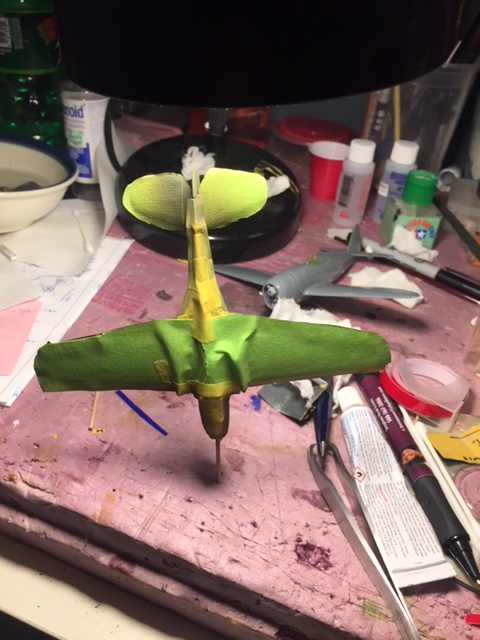
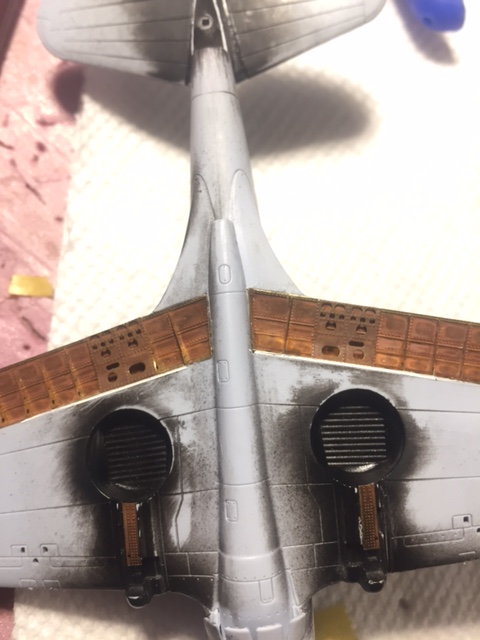
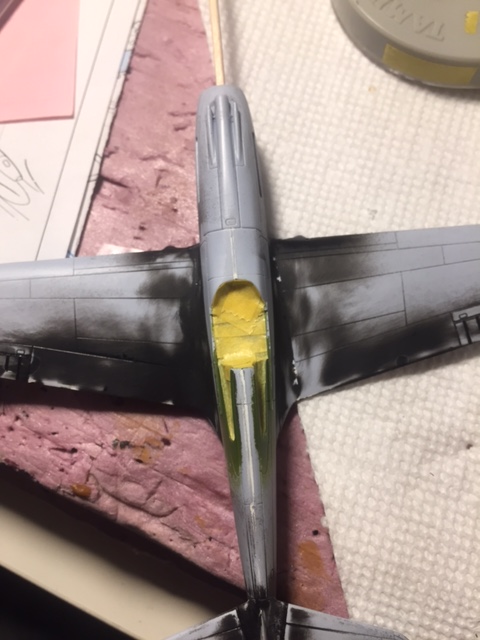
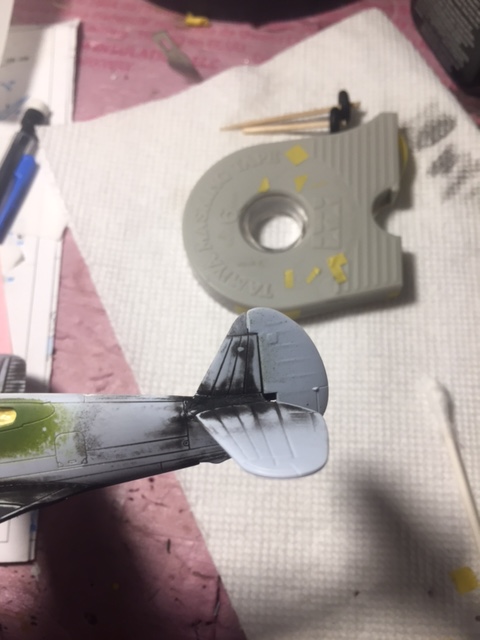
Kyle sent me an update on my RAF P-47, and this is what he said, “Just wanted to shoot off a picture of the zinc coated wheel wells. I used Tamiya lacquer thinner to reduce the Tamiya acrylic paint. I'm please with the way it behaved.”
Here is a photo:
Tim