


Nortley
-
Posts
53 -
Joined
-
Last visited
-
Days Won
6
Content Type
Profiles
Forums
Events
Posts posted by Nortley
-
-
Sometimes I'll pull an ancient kit from the stash and see what I can make of it. I have started a Gowland & Gowland/Revell Highway Pioneers Fiat tourer, date on the instructions is 1953. Someone had started it, but the well dried glue residue peeled off easily. I tried Testors and Tamiya liquid cements, neither would bite into the plastic to make a joint. The instructions said to use "model airplane cement" or acetone. I tried the acetone, which bit into the plastic, but I question the strength of the joint. The plastic seems slicker and different from styrene, so I'll try ABS cement next. Has anyone else ran into such a situation? Any ideas?
-
'Twas the day after Christmas
And out of my room
Came aroma of Testors
And some rock'n'roll boom
The Brits had invaded
The Animals and Airfix
While Revell and Renwal
Also offered great picks
The short stack of boxes
Gave me good cheer
The model kits in them
Would begin my new year
-
 2
2
-
-
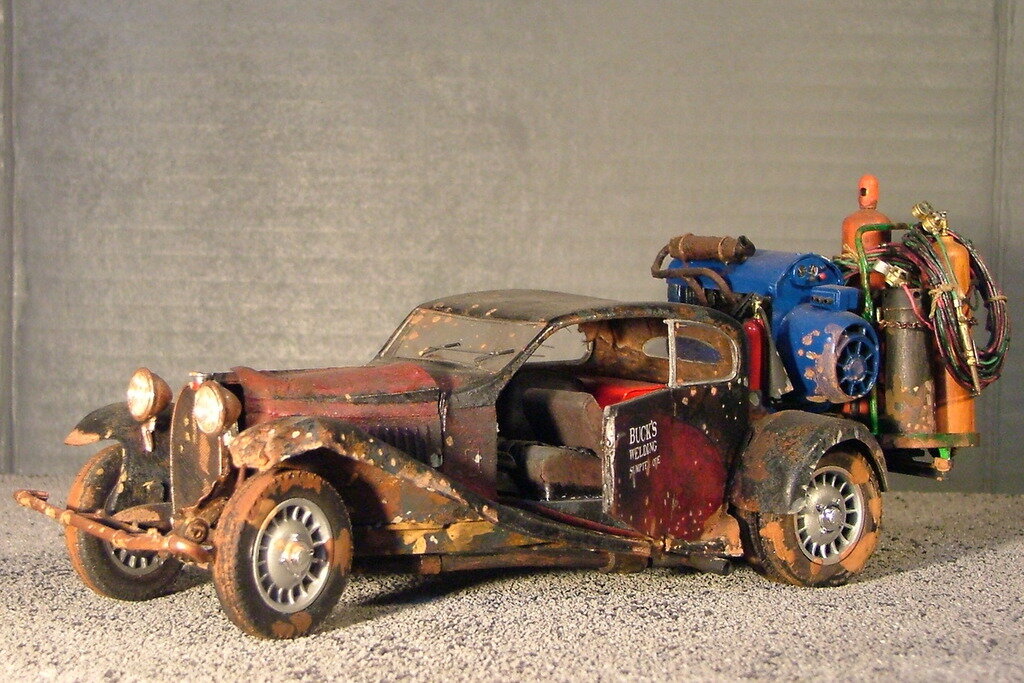
Another site had a link to a Leno "presentation" of an interesting car so I took a look. Ten minutes or so of him blathering on while blocking most of the car with his face or bulk. The move he made to block the view of the engine as he lifted the hood looked well rehearsed. One could tell the color of the car, not much else.
-
This model of a normally shiny car brought home a trophy from Seattle Recon 7 back in the late 80s. Ya never can tell what someone might like.

-
1
-
-
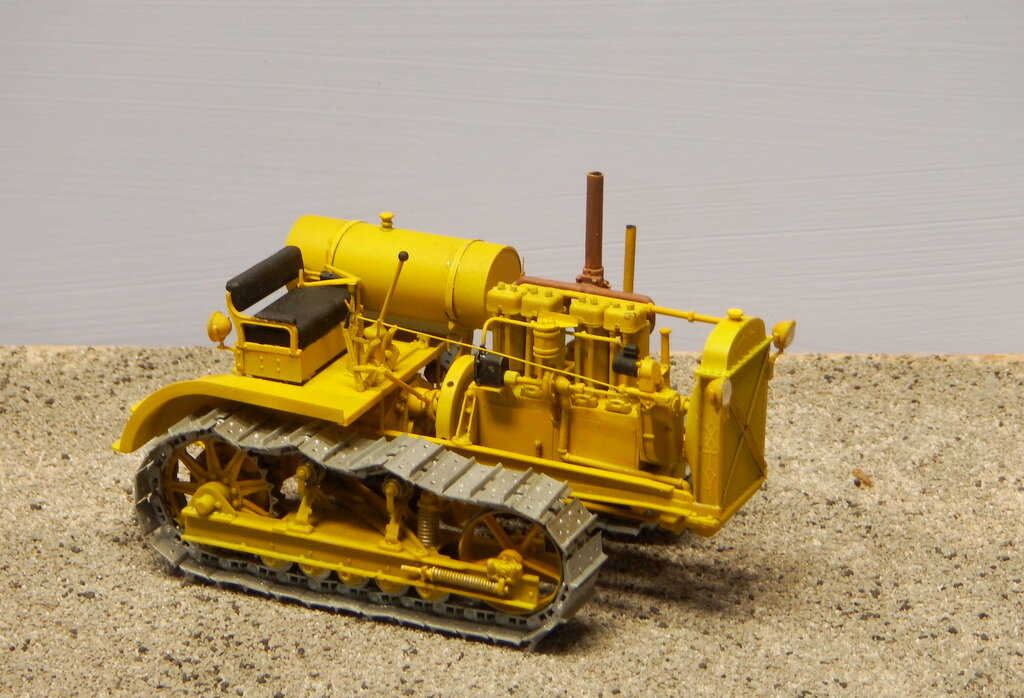
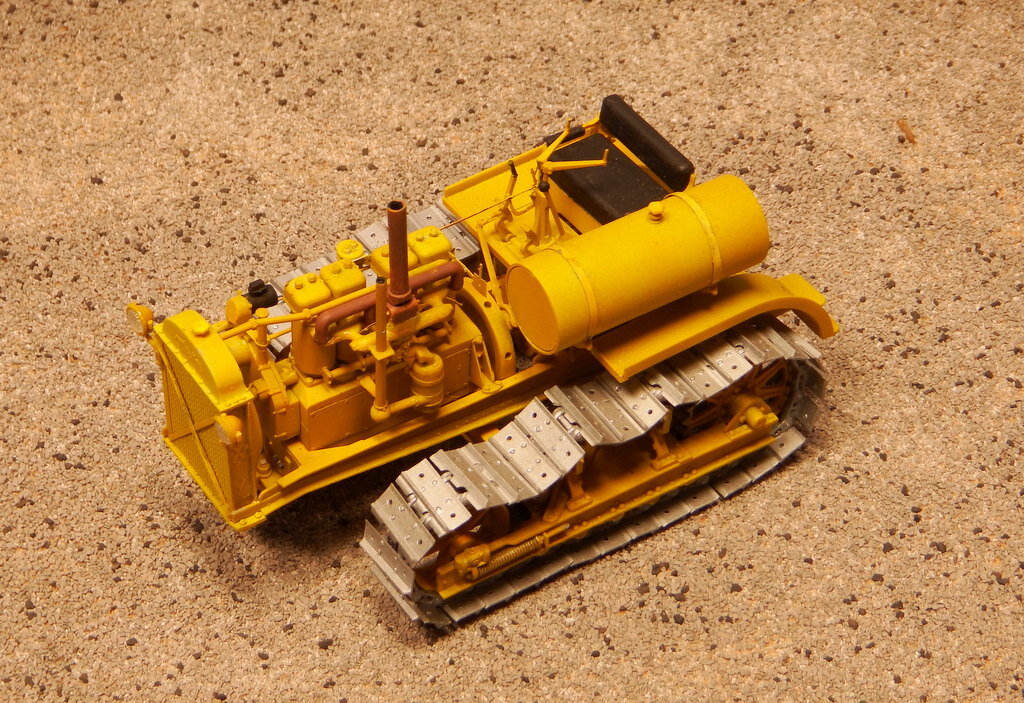
This is an out of the box build. I like machines that show their machinery. The kit was a collection of nice looking pieces that didn't quite fit together. Most every joint required "adjustment" of pins, pegs, tabs, and their variously shaped holes. One step has the builder trim the track adjusters. I did so, used the specified number of links - fewer would not mate up - and got sag that would look bad on a KV tank. The instructions did offer good illustrations, EXCEPT that the arrowed lines are too faint and hard to see, not eased by the squiggly path some lines take. Rearrange the steps to suit yourself, I think that following them in order would not work so well. But, here is the completed model. It does capture the look of the Caterpillar Sixty.
-
2
-
-
"the objective is to accumulate as many kits as humanly possible" True words.
-
2
-
-
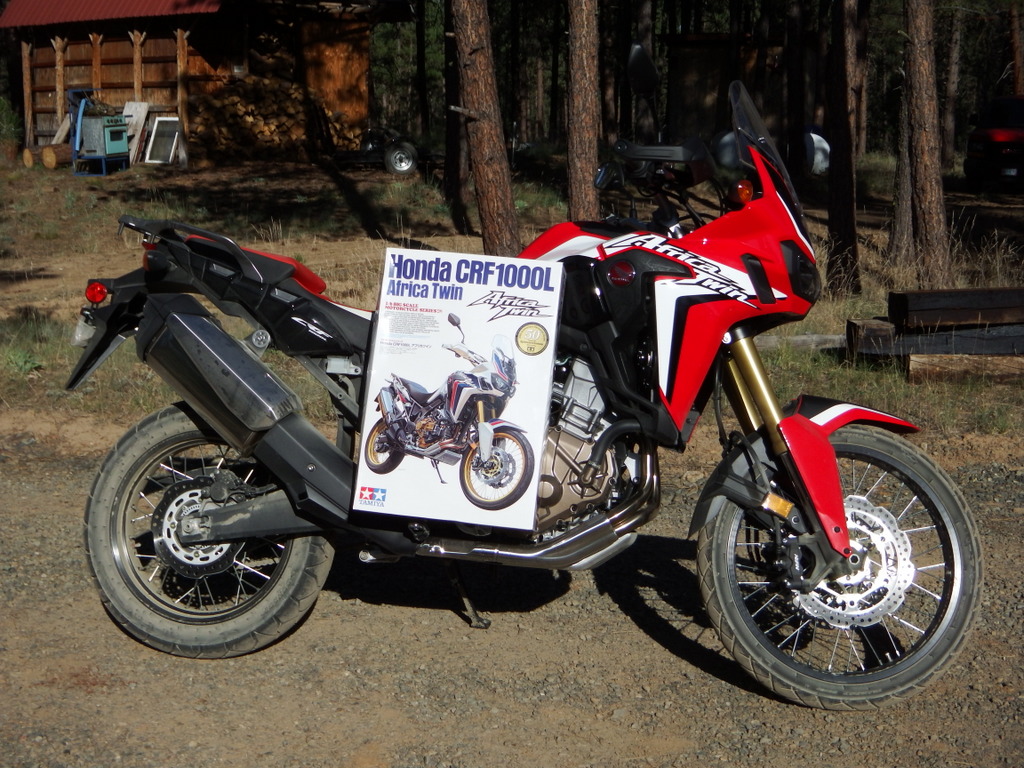
A 1/12 scale motorcycle kit builds up as a few plastic sub assemblies which are then assembled with metal screws. While the screws are structural, not detail parts, the little phillips heads are visible when the model is completed. Mixed media?
-
Model railroaders have standard sized modules which can be connected to form a layout. Maybe a standard oversize base which could accommodate a large aircraft or more than one smaller model and also fit predictably on the tables would work. A very large ship might take a base two modules long, that would fit too.
-
The decals from these kits would go on my bicycle. The decal locators on the models made pretty good painting guides.
-
If you are trying to lower the surface tension, a tiny drop of dish detergent in a quantity of water will make the water "wetter".
-
There are a couple of the old Heller 6:1 scale insects in the stash. Would a really big foot suffice as a figure?
-
Dreimal hoch!
-
To cut sandpaper- crease it along the desired cut line. Lay it face down on a flat surface. Lay a length of straight metal, like a good heavy steel rule or framing square along the crease line, on the side you wish to keep. While firmly holding the straight edge down, pull up on the waste side of the sandpaper starting at one end, and carefully tear it along the crease. If the tear runs out into the waste (this is why the straight edge is laid on the keep side), just re-crease and pick up where it strayed. I read this in one of the popularly mechanical scientific magazines a long time ago and it has always worked. It saves the blades, but on the other hand, don't use your good precision rule for the straightedge.
-
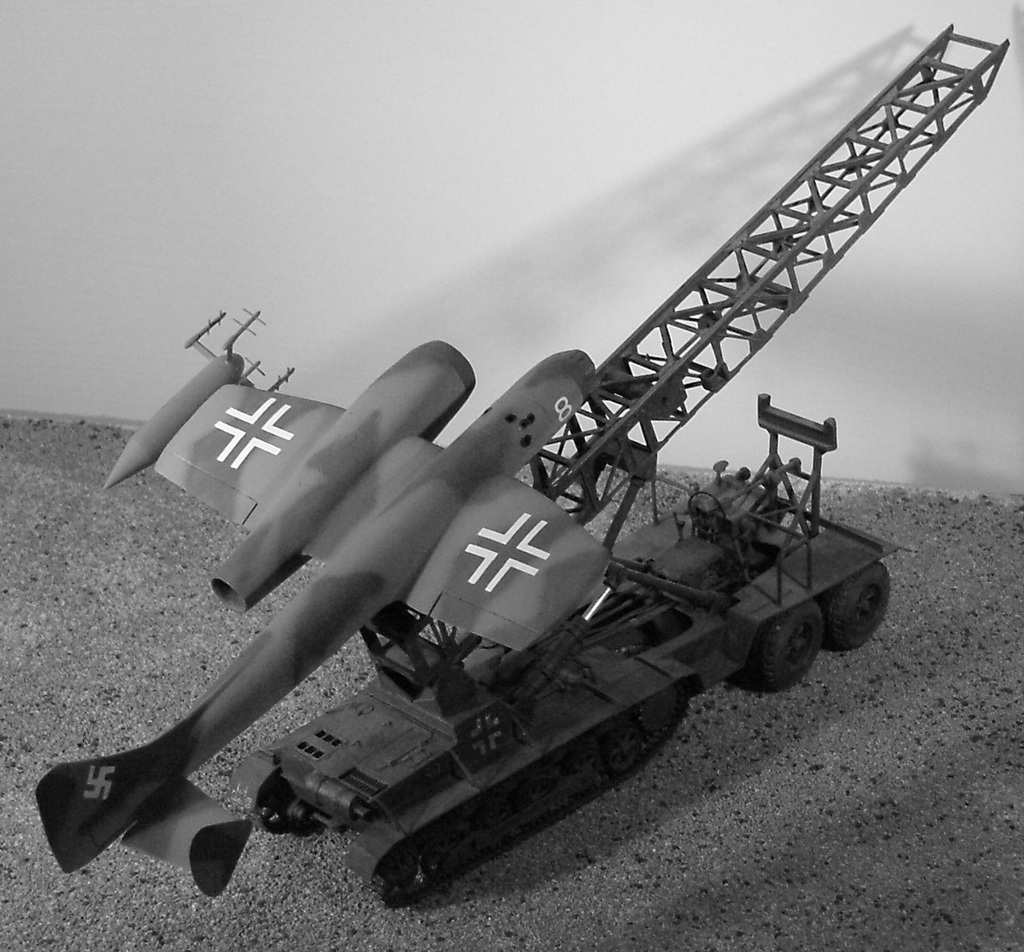
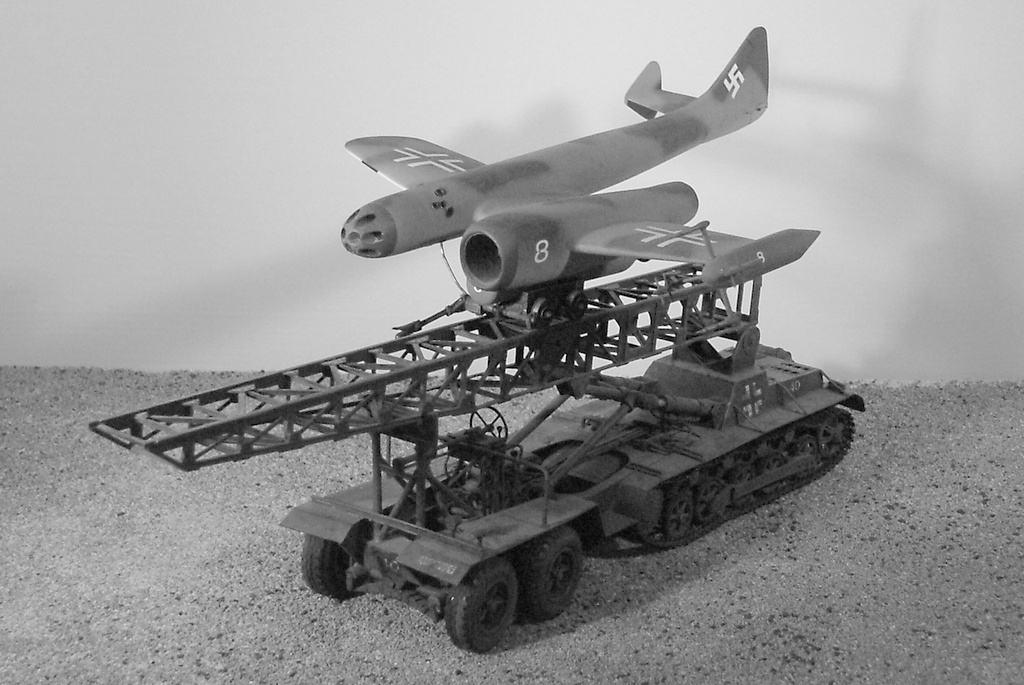
The Roman Candle is my own design. I believe that the real purpose of some of the outlandish late war weapons designs was to send nice pictures to the boss, who in turn would keep these engineers off the front so they could draw more nice pictures for him... The Roman Candle would be loaded onto the launcher, fueled, armed, fresh batteries, and all sitting on a loaded booster, ready for instant flight. The launcher would hide somewhere along a likely bomber track until a bomber stream approached, when it would roll out into position, then move and elevate the missile and launch rail, and activate the missile. Simultaneously, a two seat fighter equipped with control radio would approach from behind the missile, establish radio control, and launch the Roman Candle. The booster fires, the pulse jet starts, and the fighter chases the missile up and away, guiding it toward the bombers by radio. At a moderate range from the bombers, the missile's radar locks onto the bombers and takes over guidance. When the missile approaches to a predetermined closeness to the bomber stream, the name Roman Candle is explained. Each of the ten holes in the nose is a launch tube holding an end to end stack of unguided time fused anti air missiles. These are launched in rapid salvo at a distance calculated to match the timed burst to the aircraft. After their short flight, the swarm of AA missiles would tear into the bombers. The launch fighter crew must track and observe the missile, particularly noting where the spent remains come to earth, for recovery. I suppose I should have more of those drawings in the pocket of Grandpa's Ike jacket translated.
-
That's good news about the Hobby Boss kit. The Roman Candle started out as the Airfix 1/72 kit, but the parts fit and surface details were so bad that I was about to give up, when I remembered that I had an unused Hasegawa naval catapult and a Panzer I hulk and just started playing around. The rest is scratch and junk box.
-
The body shape makes me think Divco. Notice the right cargo door is smooth on the inside, like an insulated van would be. Was T. Myrvik in the dairy or grocery business in Namsos? The van has apparently been pressed into military service, or Norway had some very well armed gangsters. Every picture tells a story, but sometimes we can only guess at it. An old Namsos phone book might help.
-
1
-
-
There is reference above to cutting out images from the printed decal sheet. Would any of the available laser or spinning blade cutters be suitable for cutting out decals?
-
Hi, This site will be getting some use in my 1:1 shop as well. Thank you.
-
Good documentation is essential to the completion of an accurate model. After ordering the model, I bought the documentation. The model arrived today. The plan is to make an in-depth study of the prototype until the snow flies, then apply the accumulated knowledge to the building of the model. The prototype should, by then, display authentic weathering.
-
3
-
-
A short cut for matching threads to each other could be to find barb fittings to fit your hose with threads on the other end to fit the places you need to screw to. Cut the improper fittings from the hose ends, push in the barb fittings, and secure with small hose clamps or wire. Barb fittings look like a stack of cones, push in easily but resist pulling out. At airbrushing pressures they're more than adequate, I use them at full pressure with shop air tools.
-
700! -great work on a big job. And, here's a coincidence, the Renwal repop and Dragon models. Similar pose, similar differences in size.
-
Does your compressor have a built in pressure regulator? 125 psi won't hurt the airbrush, but could blow the hose out, which is a rude surprise. Sears sells a combination regulator-filter-moisture trap. You'll be spraying at 25 psi or much less, and the regulator will give you clean, almost dry air at the pressure you need.
-
Use the "other" stuff for cleanup, use brand name with brand name for thinning paint.
-
That's a persistent "blood" stain. It could be useful dating photos.


Highway Pioneers plastic question
in General Modeling
Posted · Edited by Nortley
I tried Styrene Tack It 2, a Tenax knock off, it smelled right but didn't even mar the surface. 5 minute epoxy seems to be working. The kit has sat somewhere since I was 5 years old, so I'm not rushing the job. The good news is that AV primer sticks, and the paint on to that.