Leaderboard


Popular Content
Showing content with the highest reputation on 07/30/2022 in all areas
-
Hey Gang, been a while. I still haven't fully gotten my mojo back, tho it is getting a little easier to force myself out of the chair , and up the stairs to my hobby room. This time I have CGS' Wyatt Earp, in 200mm. The arms were separate from the body, and hands, which were in the rifle. So it was a bit of a juggling match to line everything up. Another problem was the rifle barrels were warp, and needed the hot water treatment to straighten The other thing I noticed was that the head was sculpted separately from the body, and the pupild were sculpted in looking straight ahead. Putting the head on the bod where he should be looking down the barrels in the movie, he was looking off to the side. IMHO it looked silly and had to repaint the eyes over at the very end. All in all it was a good kit. Thanks for looking.1 point
-
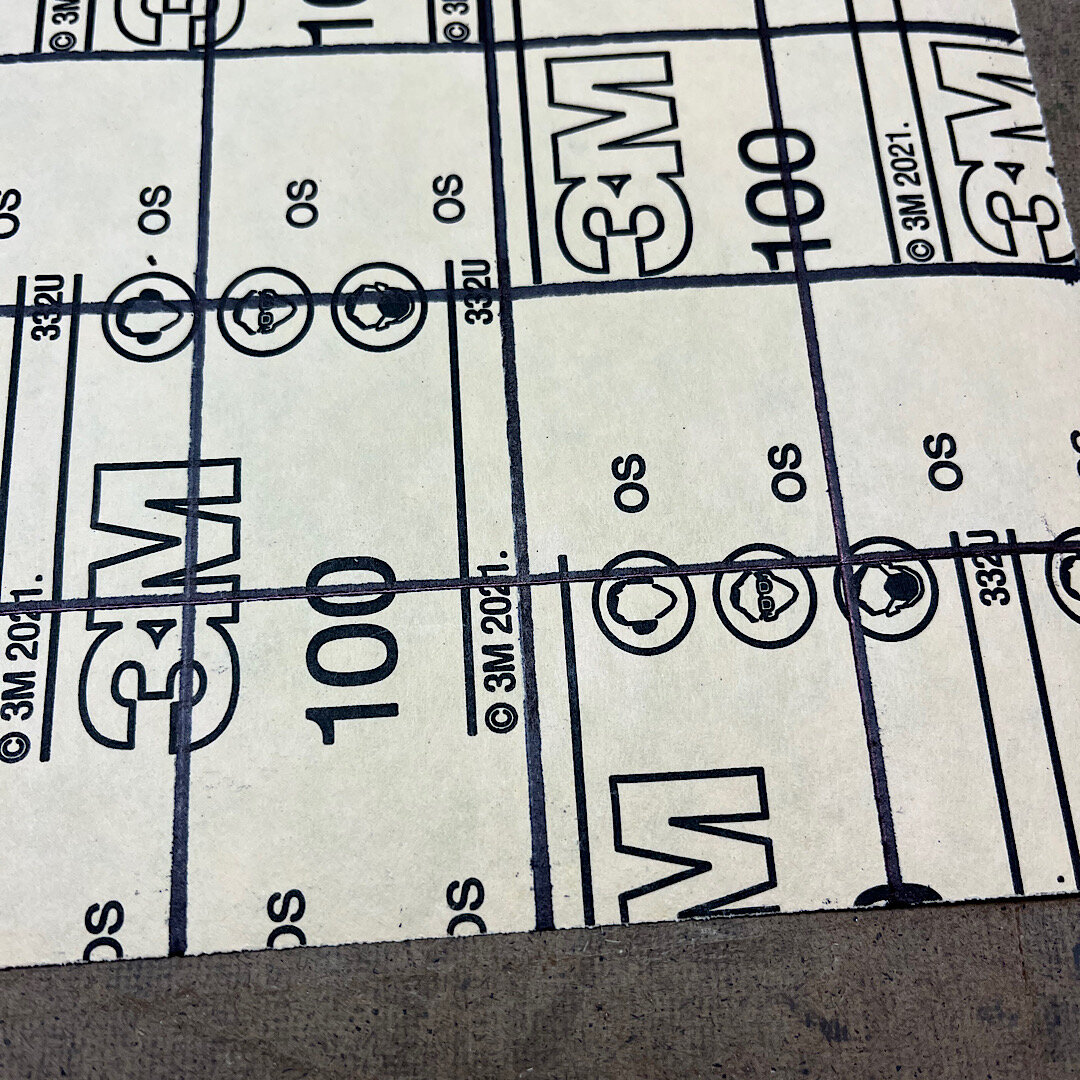
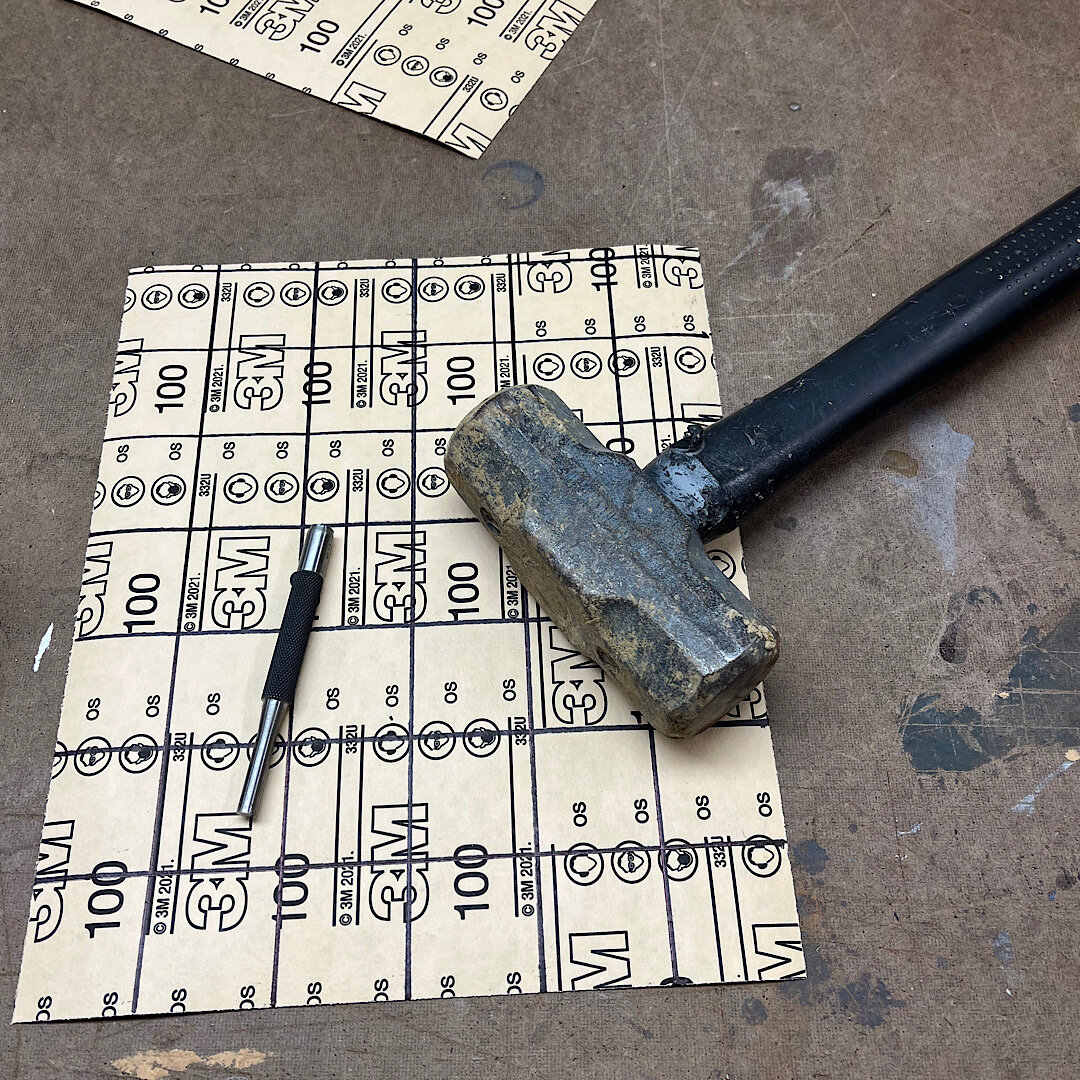
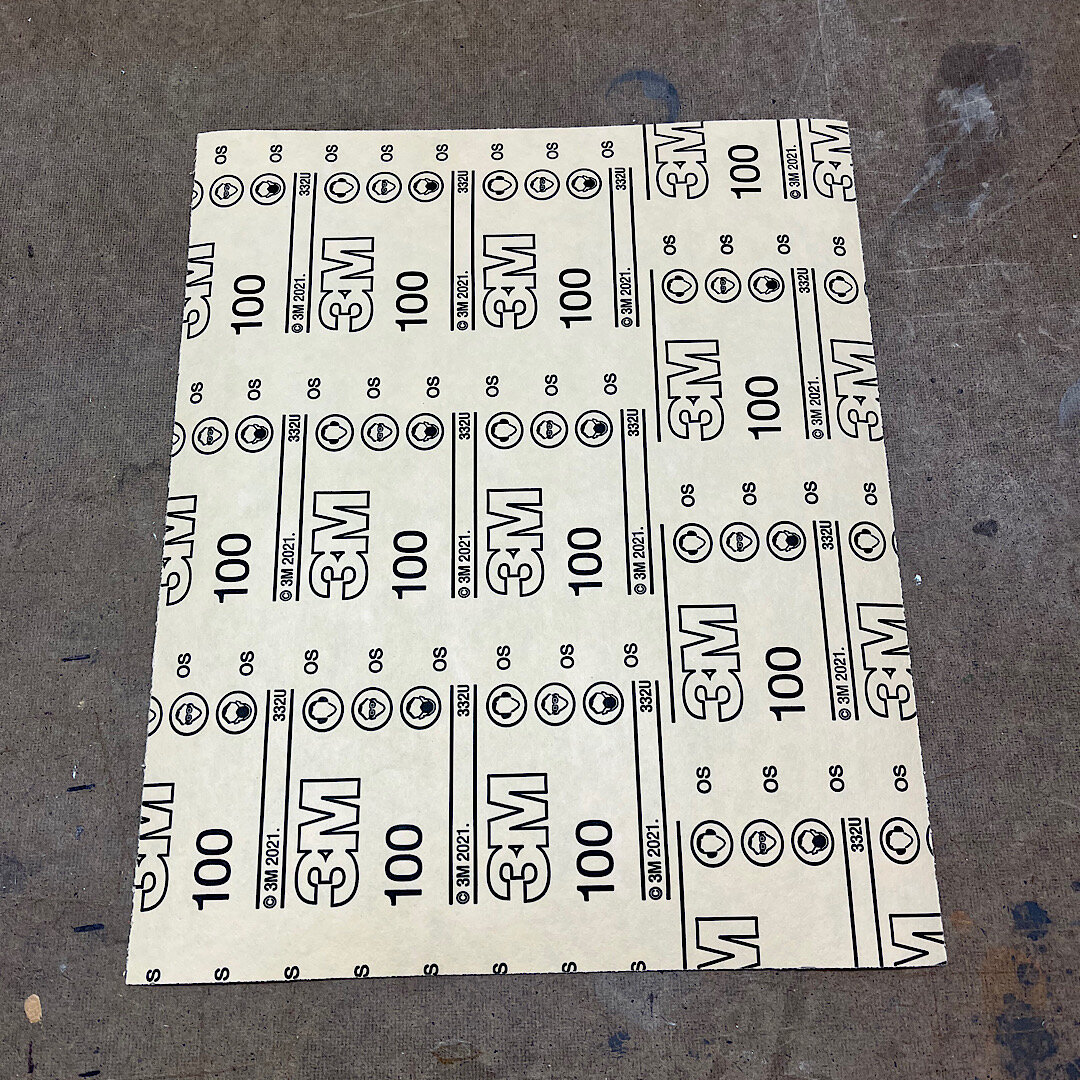
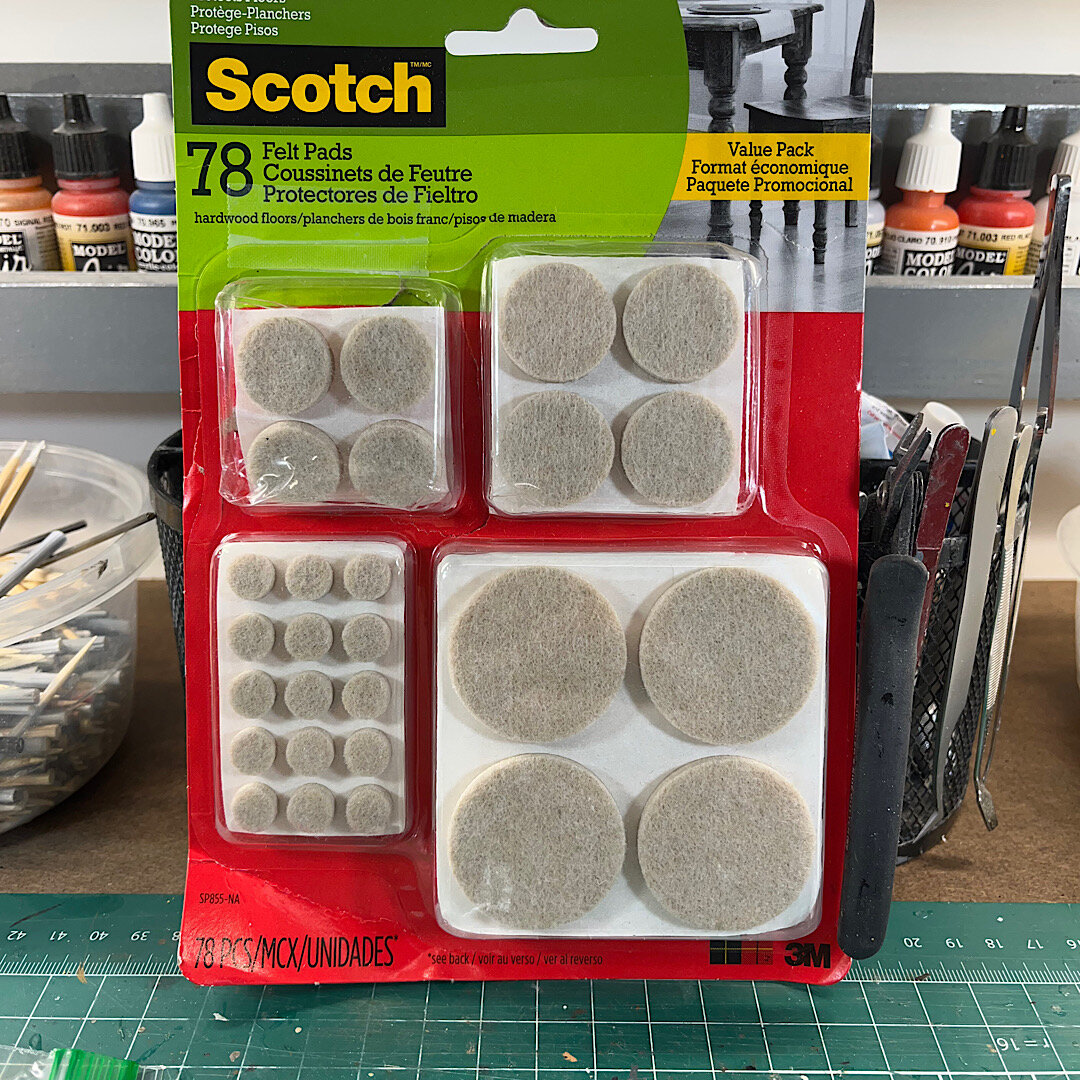
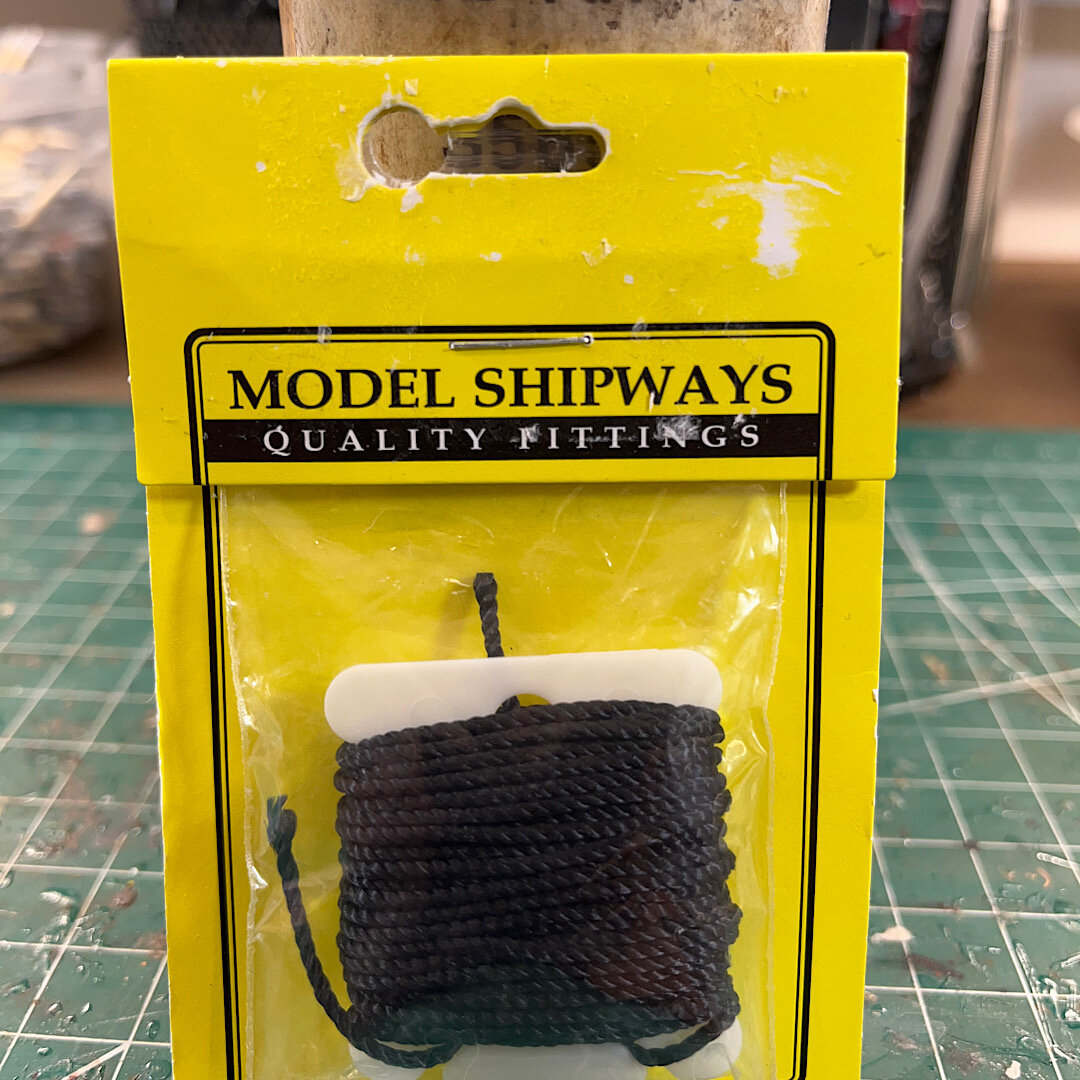
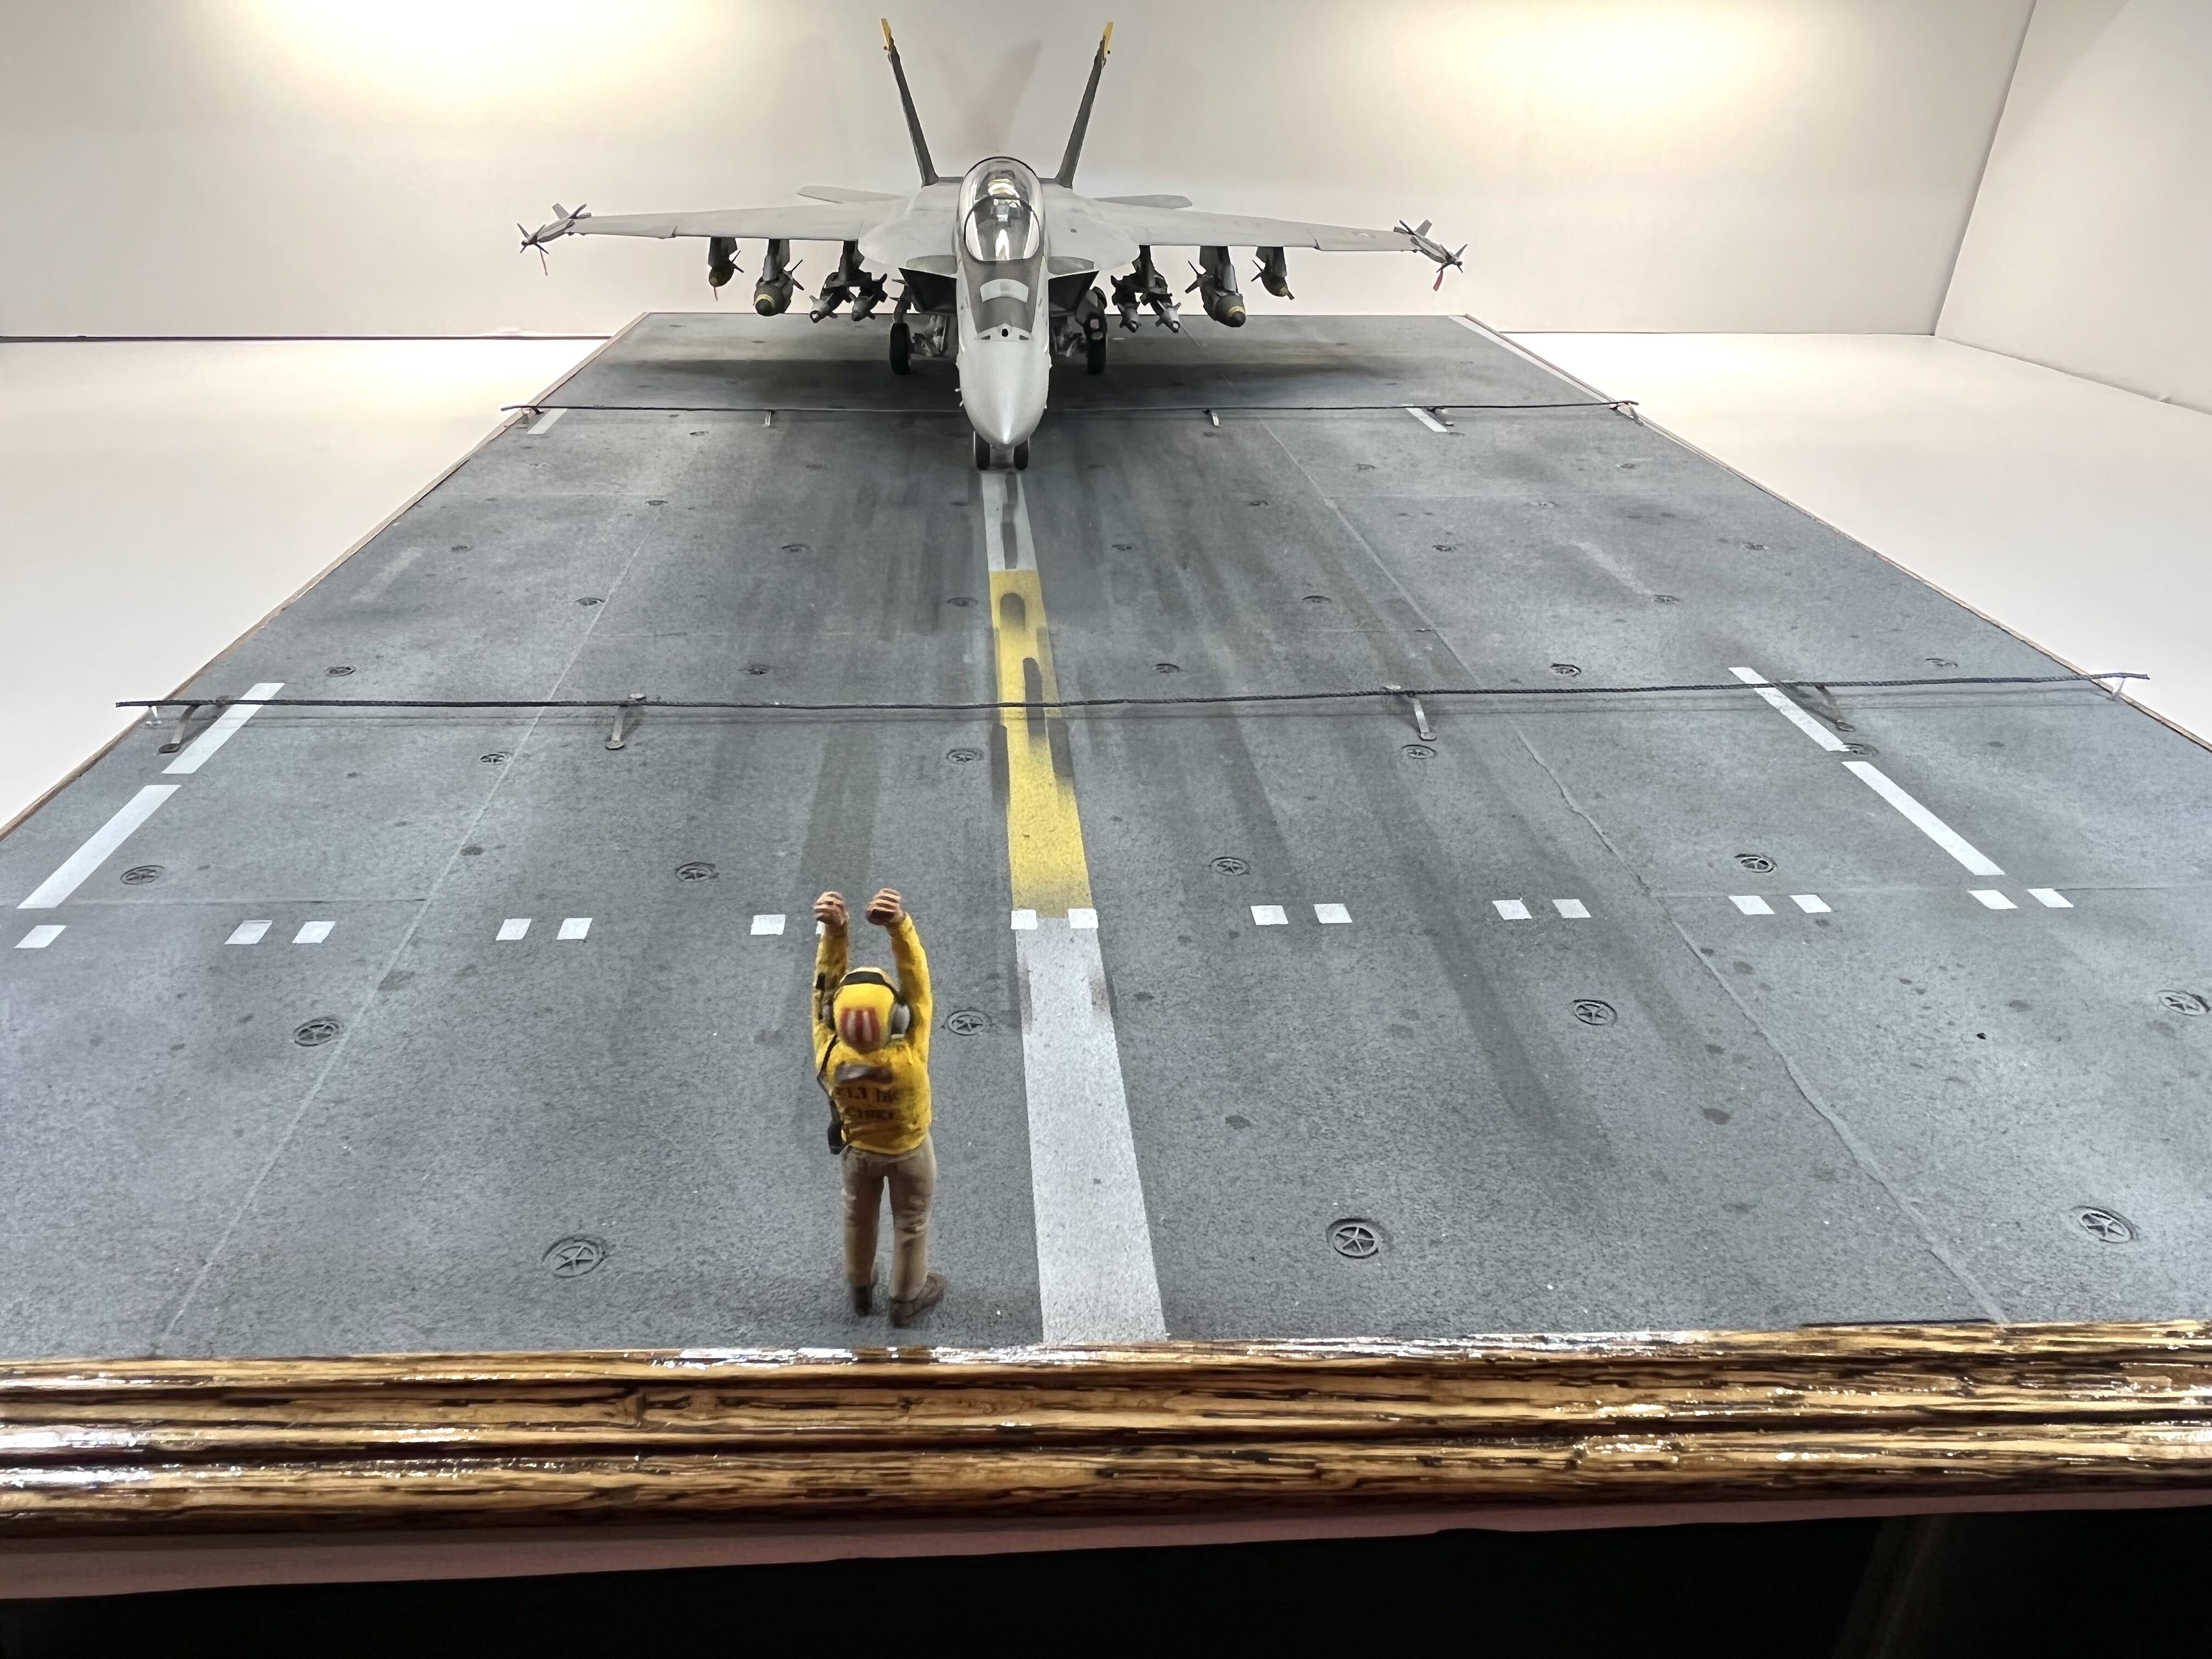
I’ve built a couple of these in the past. They are relatively cheap, and easy to build. You can buy most of the material from any home improvement store. I use Lowe’s (they offer a military discount with an I.D.). The scene that my diorama depicts is a fully armed F-18 taxing towards a catapult for launch, with the aid of a plane director. Aircraft routinely taxi over the arrestor cables to get to the catapults. SUPPLIES: These are the following item that you need. 1. 2’x4’ 3/4” CDX plywood. The going price for a 2’ x 4’ sheet right now is around $34 dollars. . I build large bases. I can usually cut two bases out of one piece . You can build several small diorama bases out of a 2‘ x 4‘ sheet. 2. 3M 100 grit sandpaper pack. (Paint section)This is the easiest way to simulate the nonskid surface. (Ground based runways, Taxiways as well)3. Loctite contact adhesive. (Paint section) (To glue the sand paper to the plywood. 4. 3/4” high oak trim. (For a finished edge on the plywood) 5. Wood stain for the oak trim. ( paint section). They sell very small cans. Polyurethane clear coat (optional) 6. Miter box and miter saw. To cut the oak trim. (Tool world section). 7. Trim nails to attach the oak trim to the edge. (Hardware section). 8. Wood glue. (To spread on the edge of the plywood before you nail the oak trim to it, paint section) 9. Nail set. To counter sink the trim nail heads just below the surface. (Tool World section). 10 Felt pads. Put these on the bottom of the plywood so that it can be easily slid, or picked up.(Hardware section) These are the following model supplies that you will need; 1. Tom’s Model Works aircraft tie downs. They come in different scales. 2. Paint to airbrush the lines on. Either enamels, or acrylics. 3. Tape to paint the lines. 4. Some type of string to simulate the cable. I used Model Shipways. 5. Scrap photo etch. (To simulate the leaf springs that keep the wire suspended above the deck). CONSTRUCTION: 1. Choose the size of your base, cut to size. A good manual hand saw can be used, with good results. Make sure to draw the outline of the base on the plywood using a pencil and ruler. Make sure everything is square. 2. Prep the sandpaper to glue on to the plywood. Take a piece of sandpaper, and turn it, print side up. Take a ruler and draw intersecting lines. Where the lines intersect, is where you will punch a hole in the sandpaper so that you can glue the tie down in the center of the hole. 3. Glue the sandpaper to the plywood once all of the holes have been punched. It’s a good idea to take a ruler and draw a starting line on the plywood to line each piece of sandpaper up. Take painters tape and mask off the surrounding area of the plywood that you do not want to get contact adhesive on. Spray both the plywood and sandpaper with adhesive and wait 3-5 minutes. Line up the edge of the sandpaper on the line that you’ve drawn on the plywood. Press the sandpaper firmly down on the plywood. When all of the sandpaper has been attached, take superglue and glue each tie down in the center of each punched hole. 4. Airbrush various shades of gray to get the desired base color. 5. Once dry, measure and tape off the lines you wish to put on. 6. Add oil and grease stains once everything is painted and dry. 7. Stain and attach oak trim to the edge of the plywood. If anyone is interested in building one of these, and you have questions, feel free to message me. I’d be glad to help.
 1 point
 -
Ship judges at Omaha after completing the Best Ship decision1 point
-
So where are Vince, Tommy and Nikki? 😆 Well done gentlemen! I’ll get my coat and let myself out.1 point
-
“You tell ‘em I’m comin, and I’m bringing Hell with me”. Awesome figure. The eyes are extremely convincing😳. Chris1 point
-
Just make sure you have some debonder handy. 😁1 point
-
This month has been a month of completing a couple of shelf queens, with possibly more on the way. This has been under construction for more than five years. The Maddog Manufacturing Shipyards has launched this RAF Rescue Launch for shakedown cruise and delivery to my British Navy: That is the ancient Airfix original issue of that kit in 1/72 scale. It took some doing, and some parts are still missing but for a started kit that I got in our Distressed Kit Auction, it looks pretty good to me. Thanks for looking in.1 point
-
Subject: Gran Sasso Raid. I tried to recreate the scene of the rescue of Italian Fascist dictator Benito Mussolini from the Gran Sasso d'Italia massif by German paratroopers and Waffen-SS commandos in September 1943, during World War II. Enjoy the pics...1 point
-
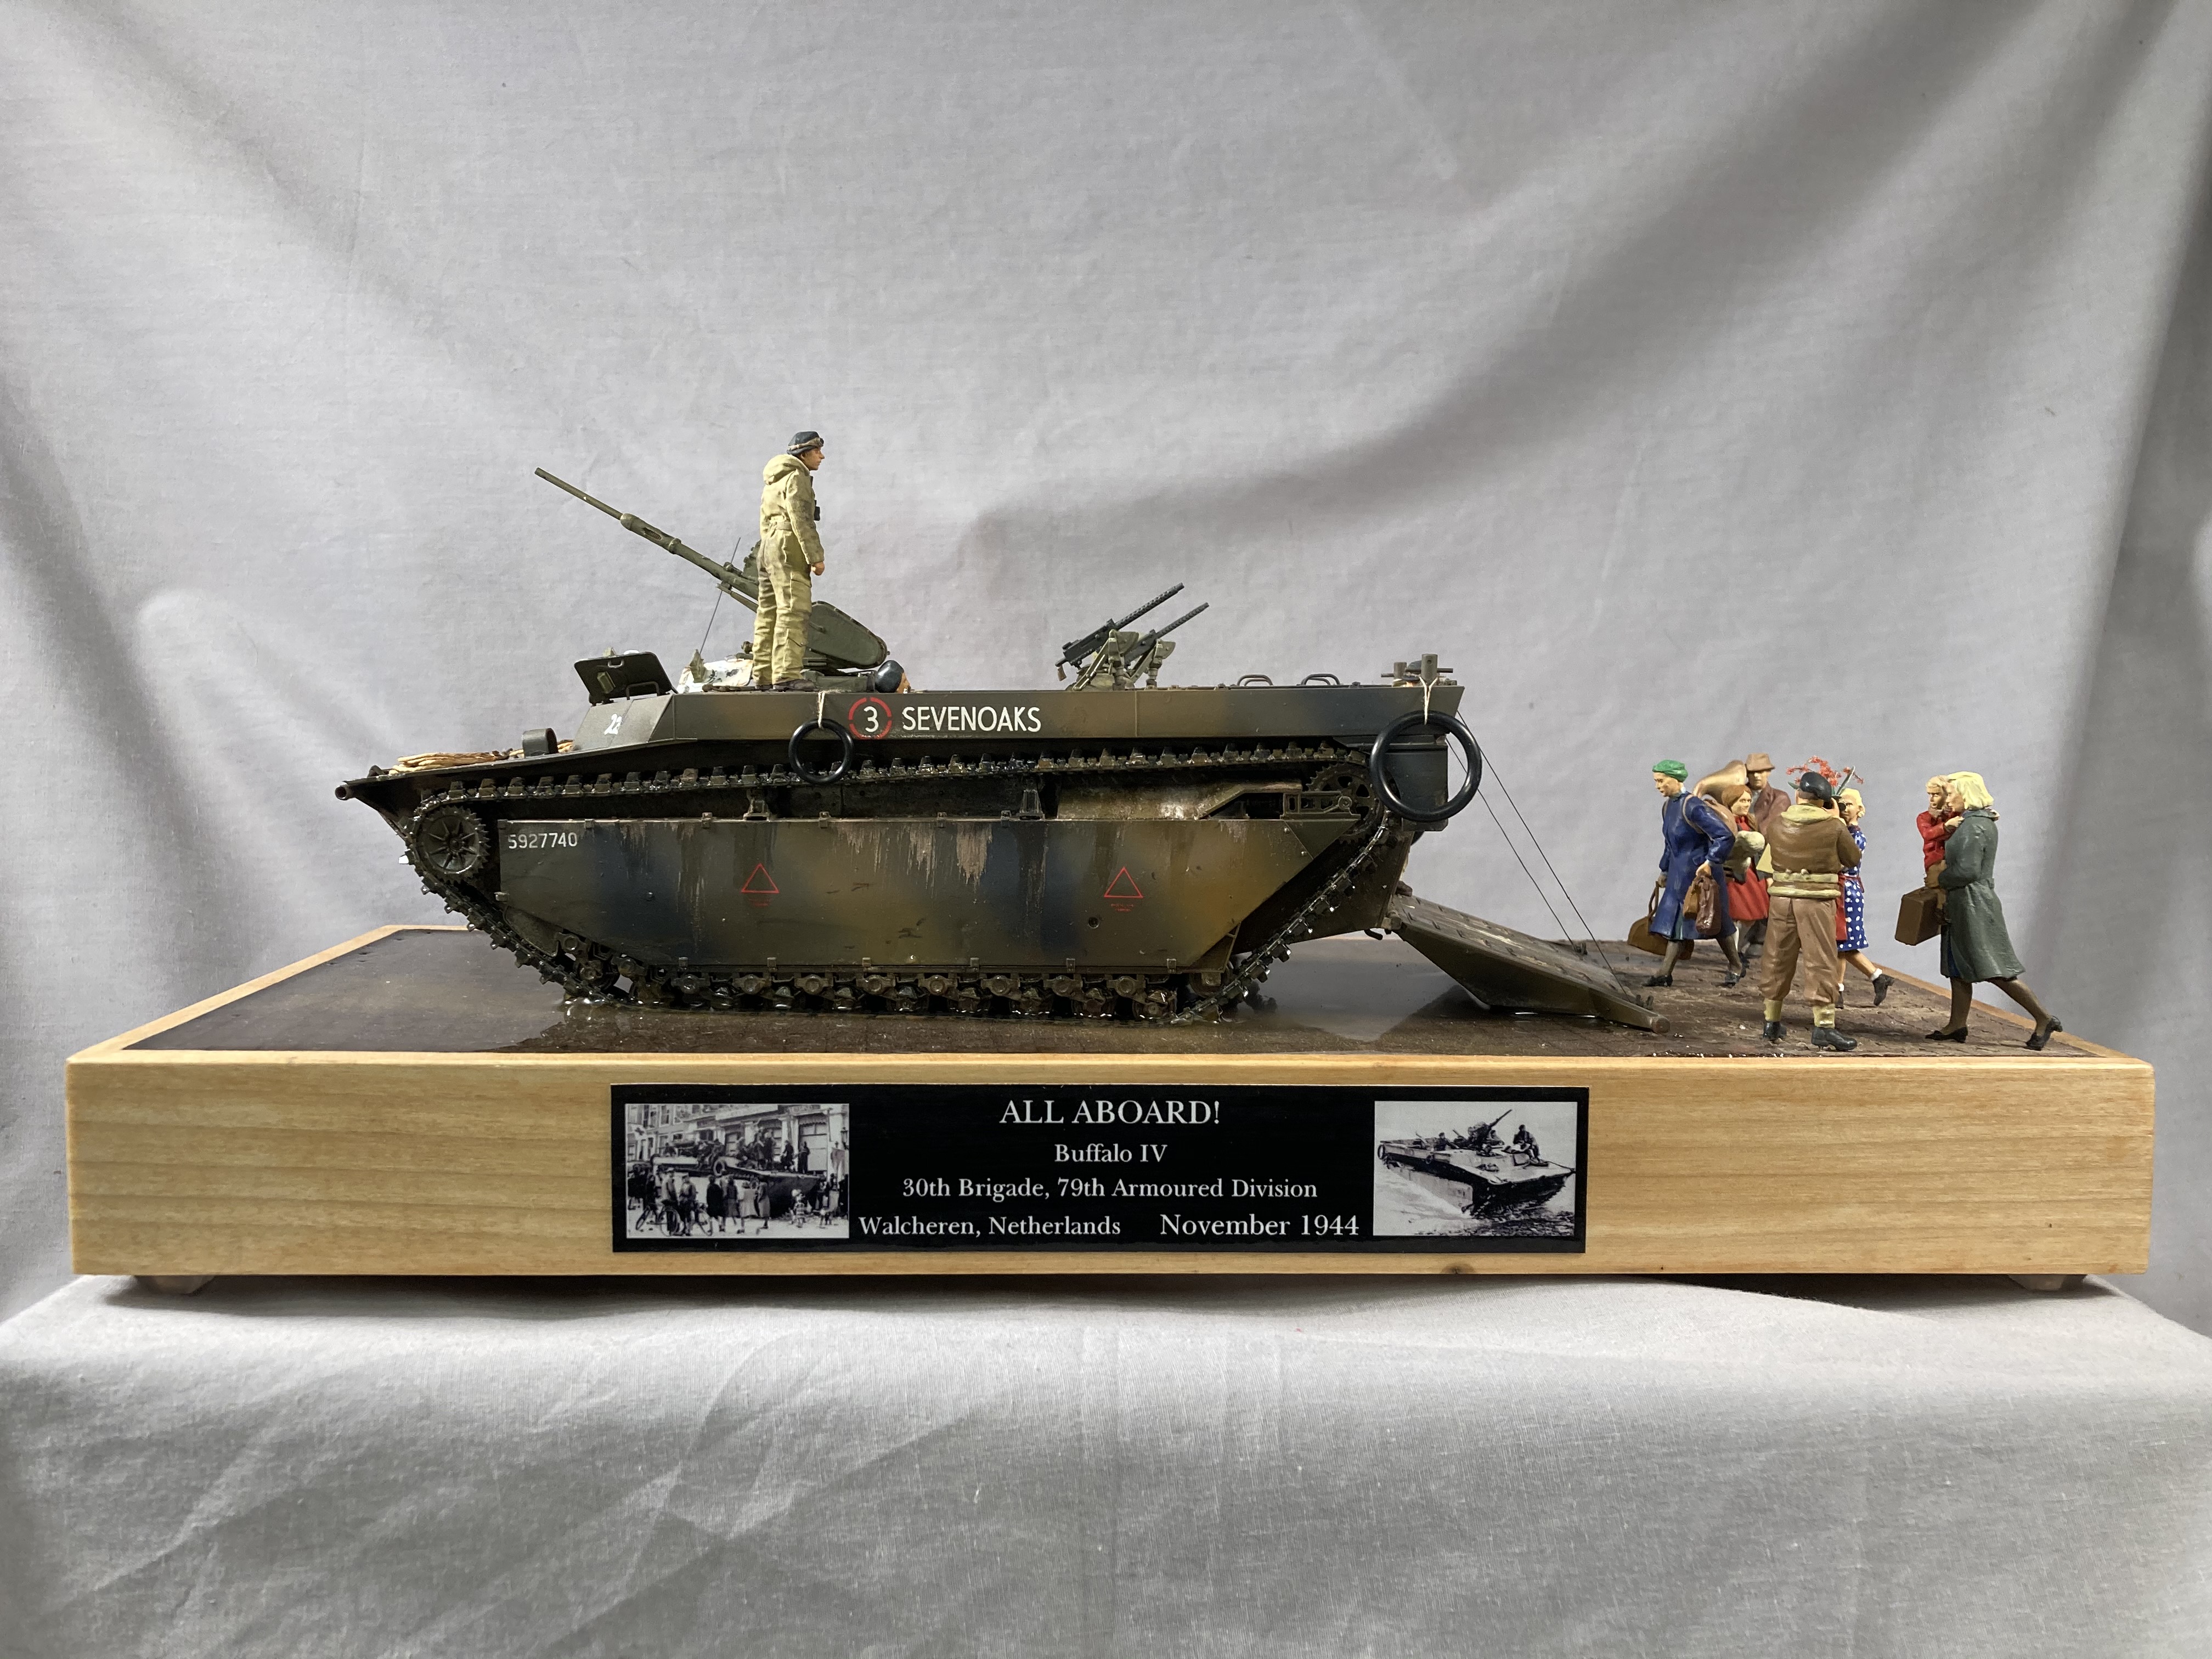
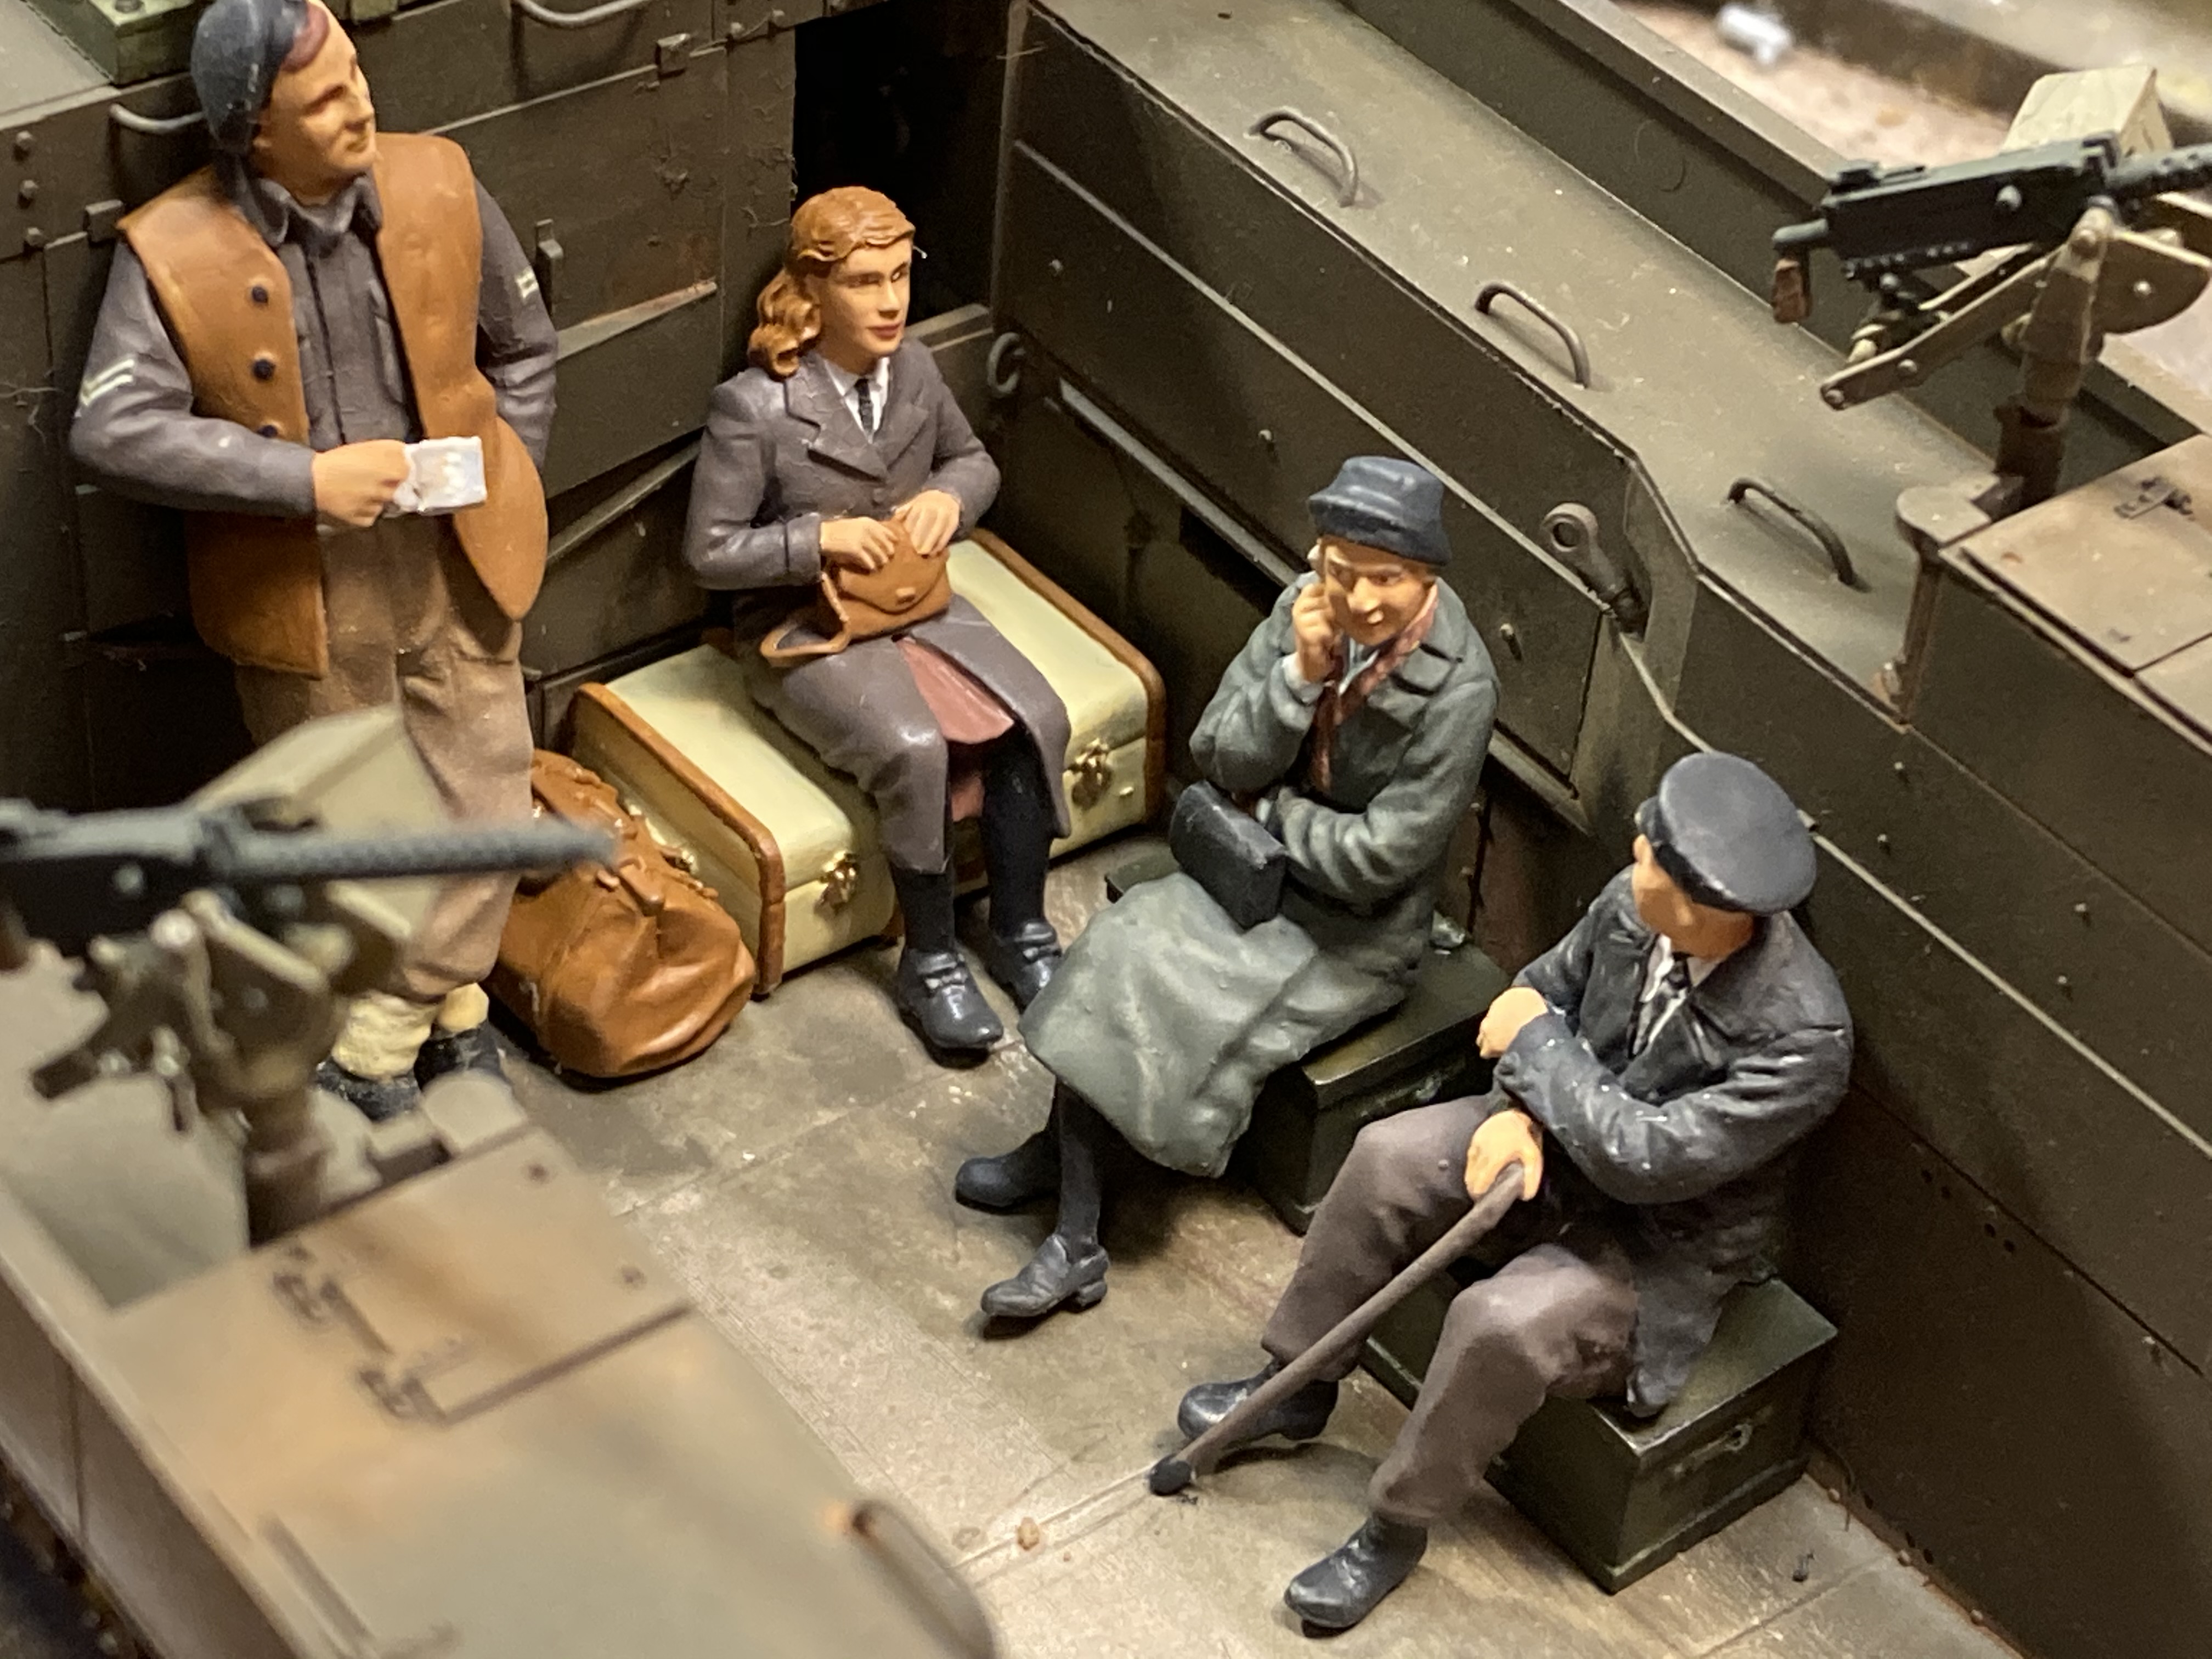
AFVCLUB kit with the Resicast Polsten 20mm added. Various figures. Yes, the civilians are being evacuating from an area flood when the dikes were bombed. Dak
1 point
-
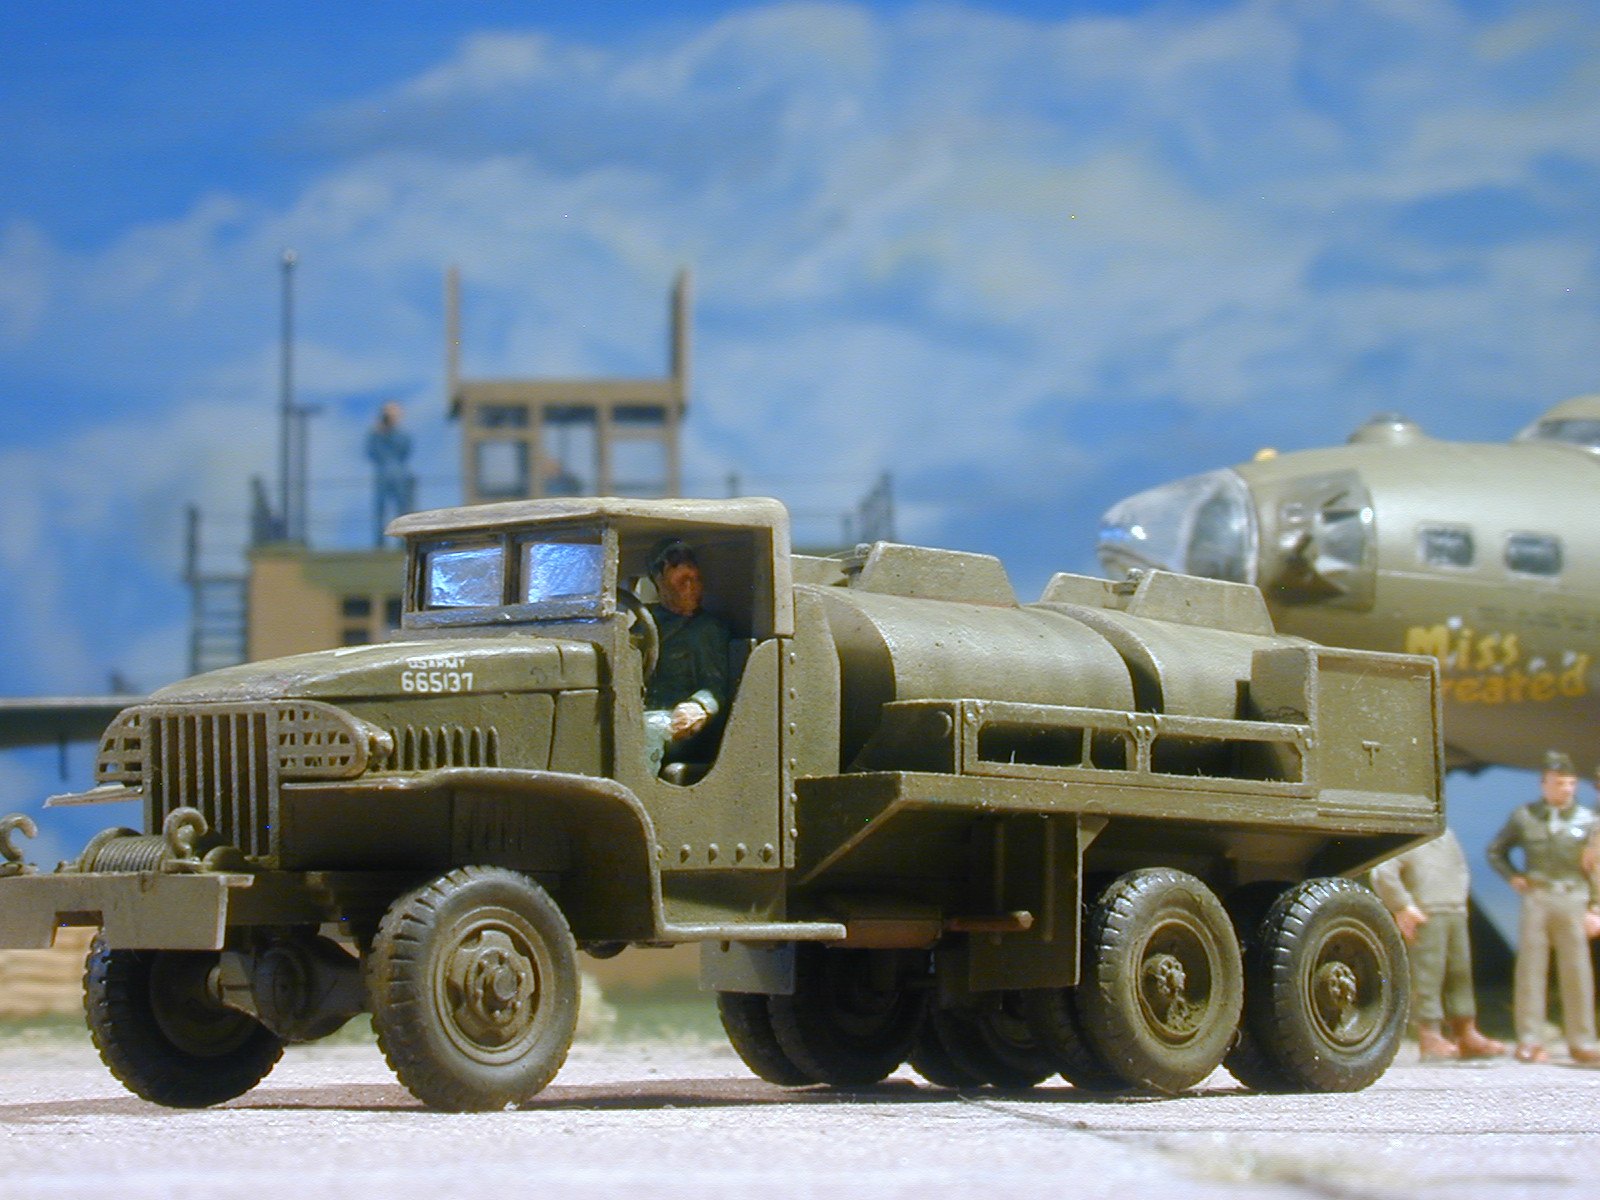
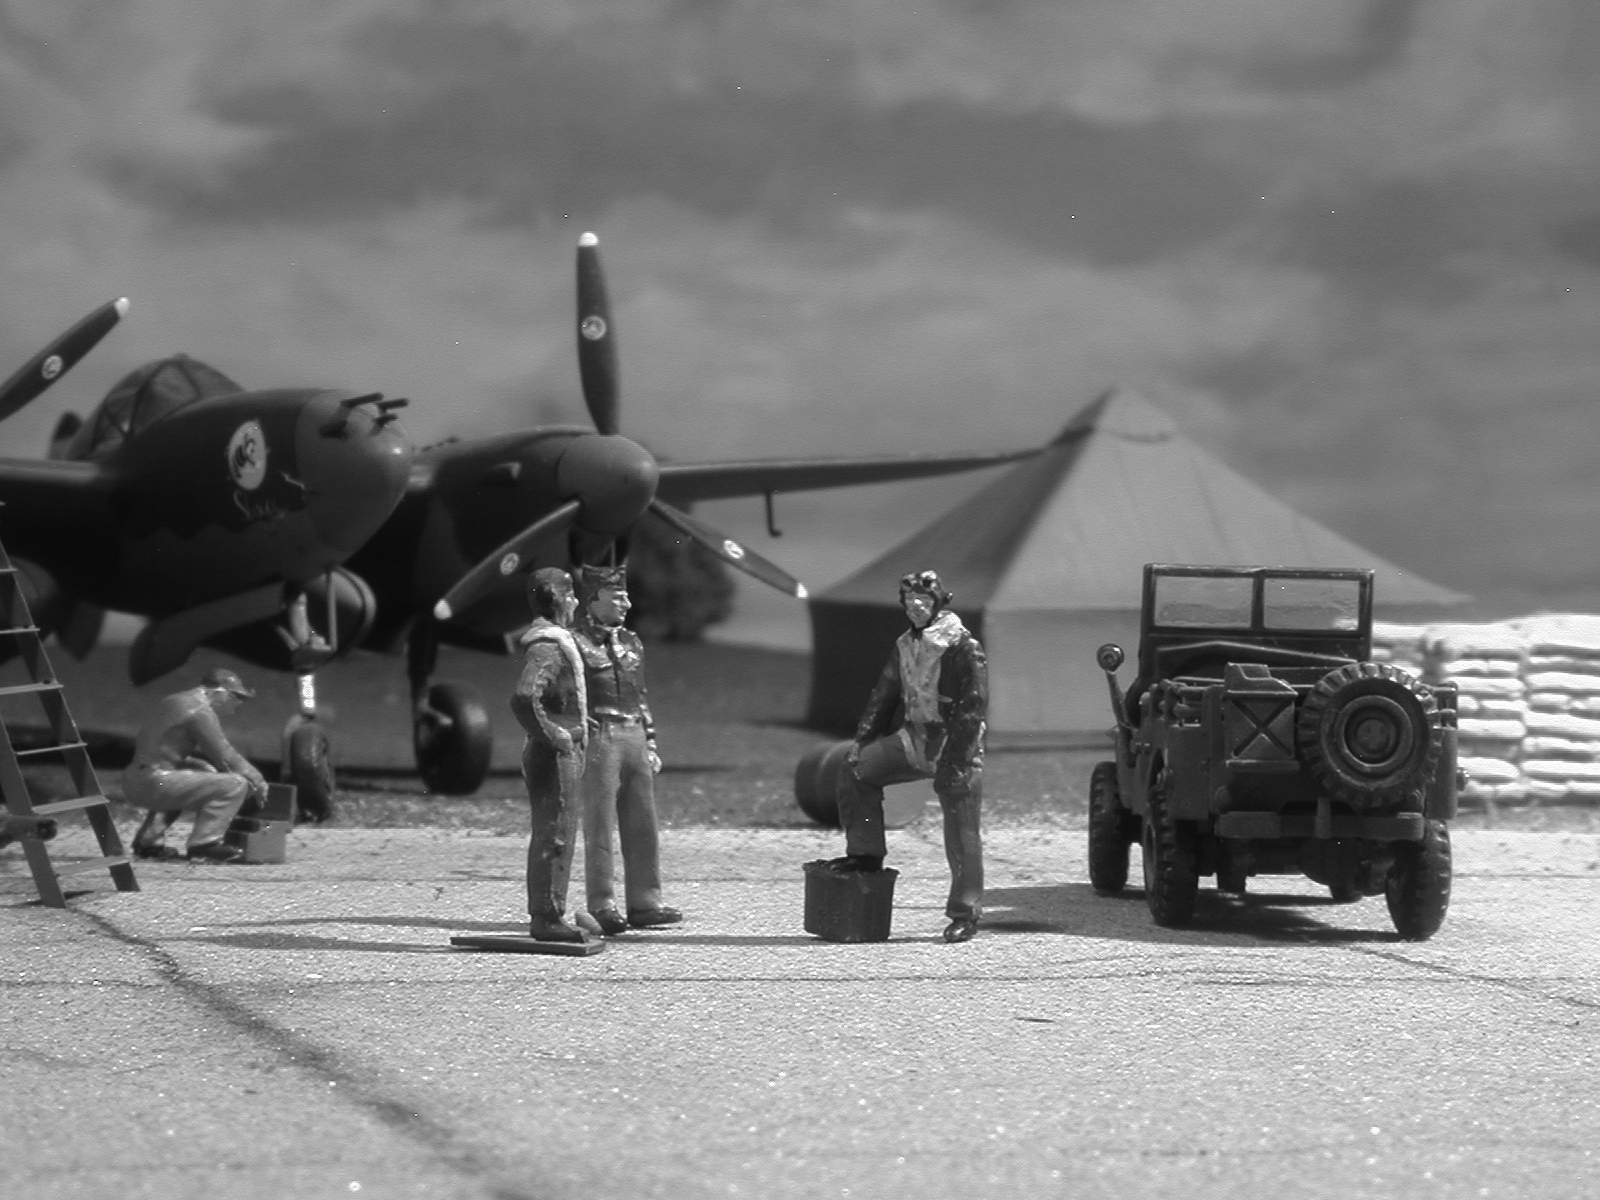
I enjoy photographing my models as much as I do building them. These are scenes made just for the camera and are not diorama per say. I use Nikon 950 Coolpix series cameras for these shots. Very cheap on eBay ($20 or so) and have great depth of field. Figures are from various sources; Revell, Preiser, Kit Figures etc. Odds and ends are from ebay. Background is handpainted. P-47D, fuel truck and P-38 are Hasegawa and jeep and B-17 are Academy. Control tower is by Airfix.
1 point