Leaderboard


Popular Content
Showing content with the highest reputation on 04/24/2021 in all areas
-
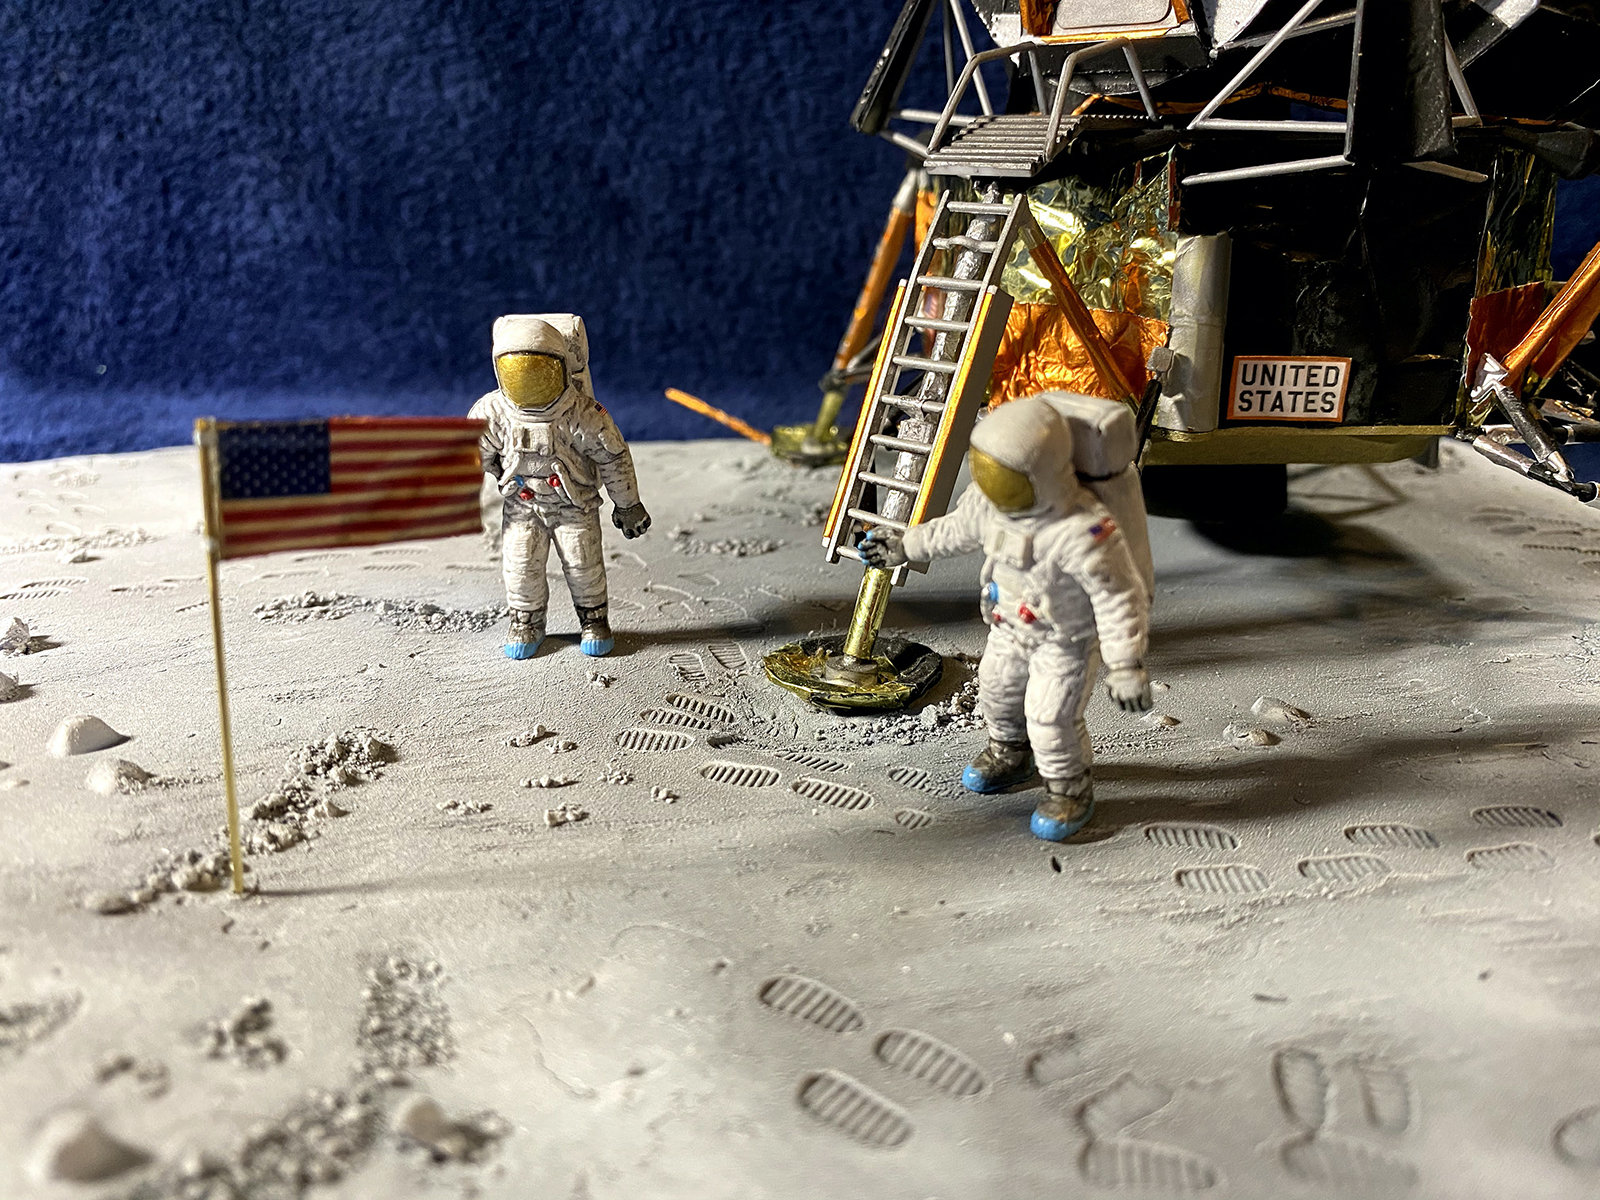
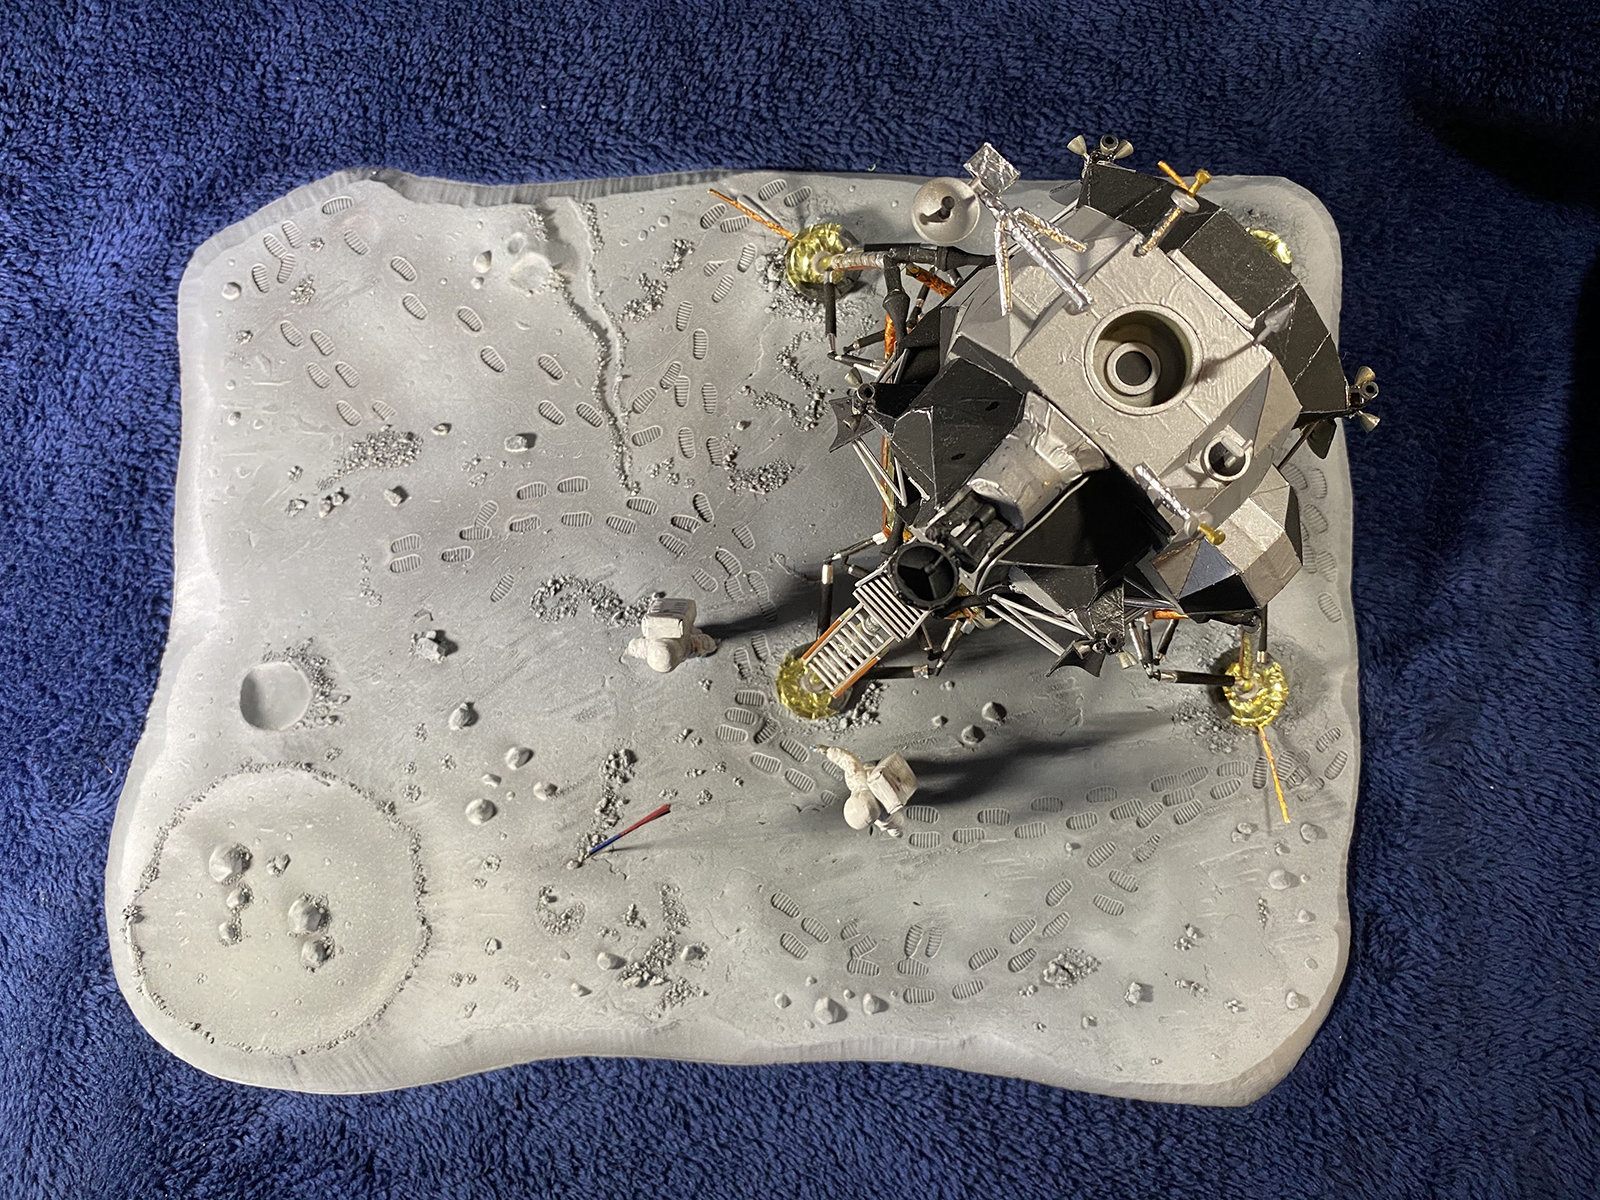
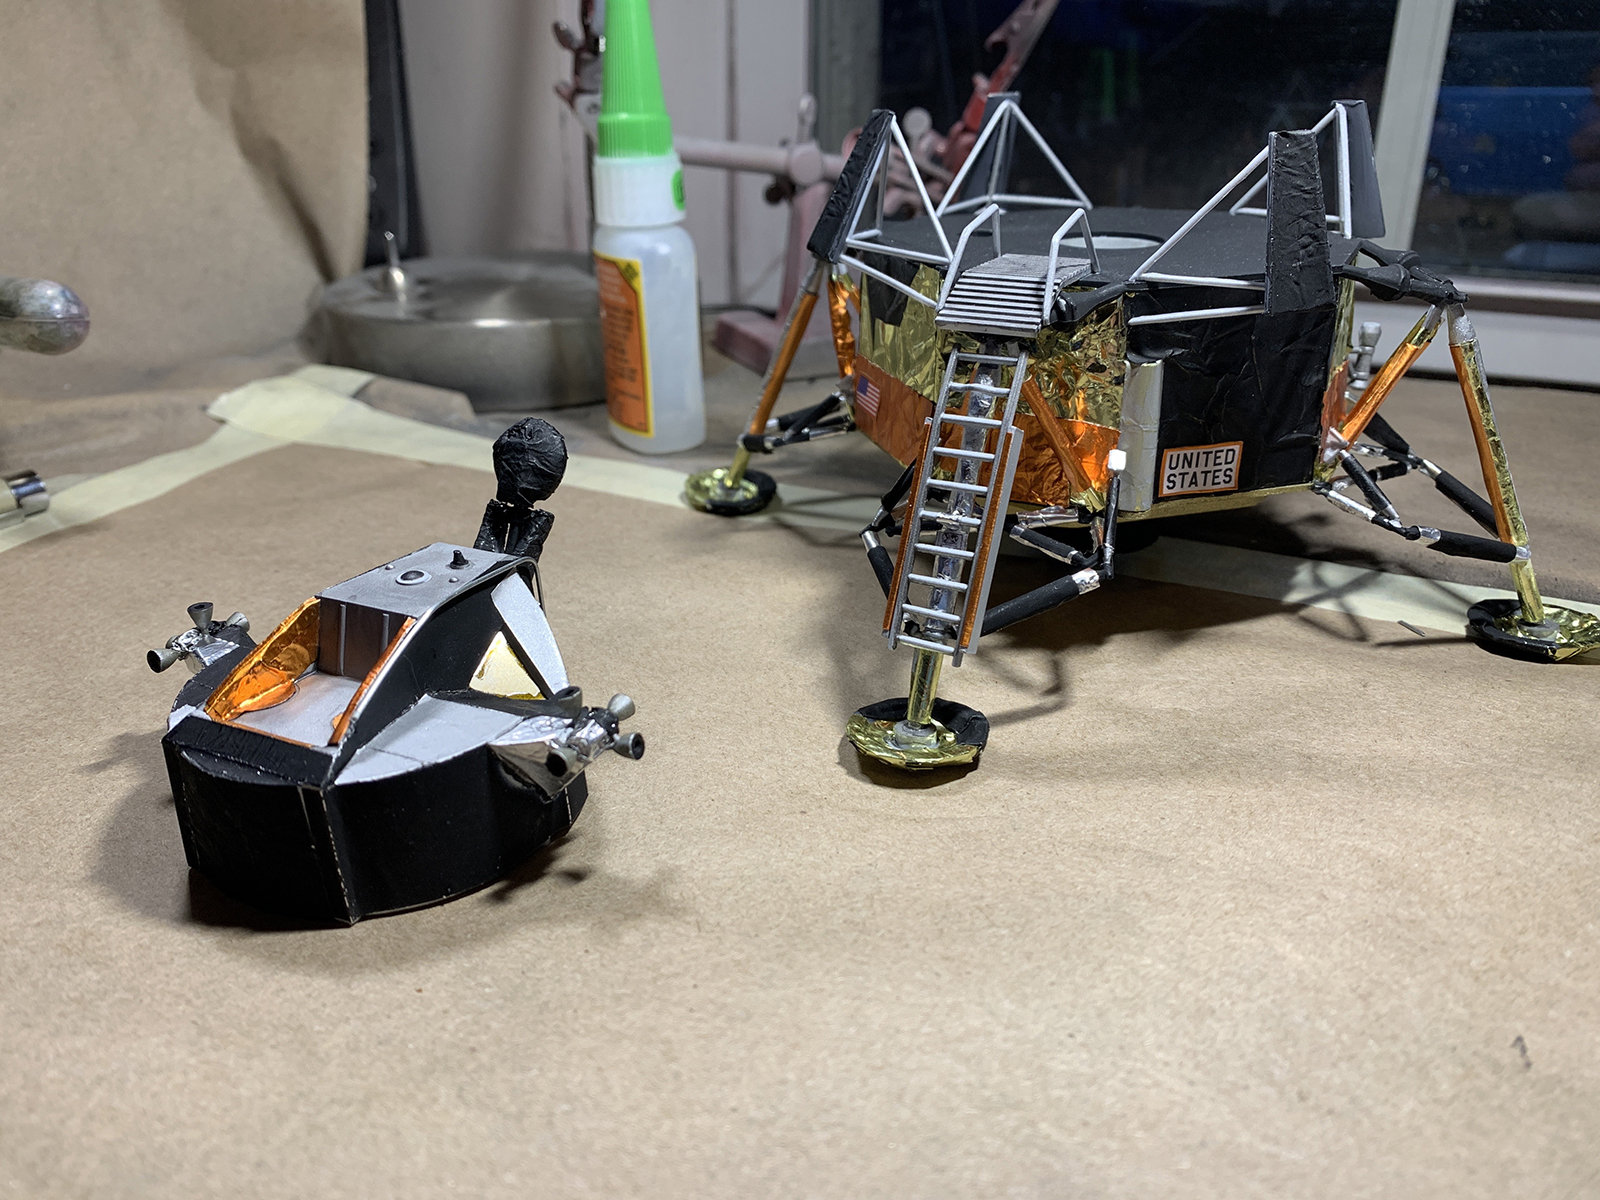
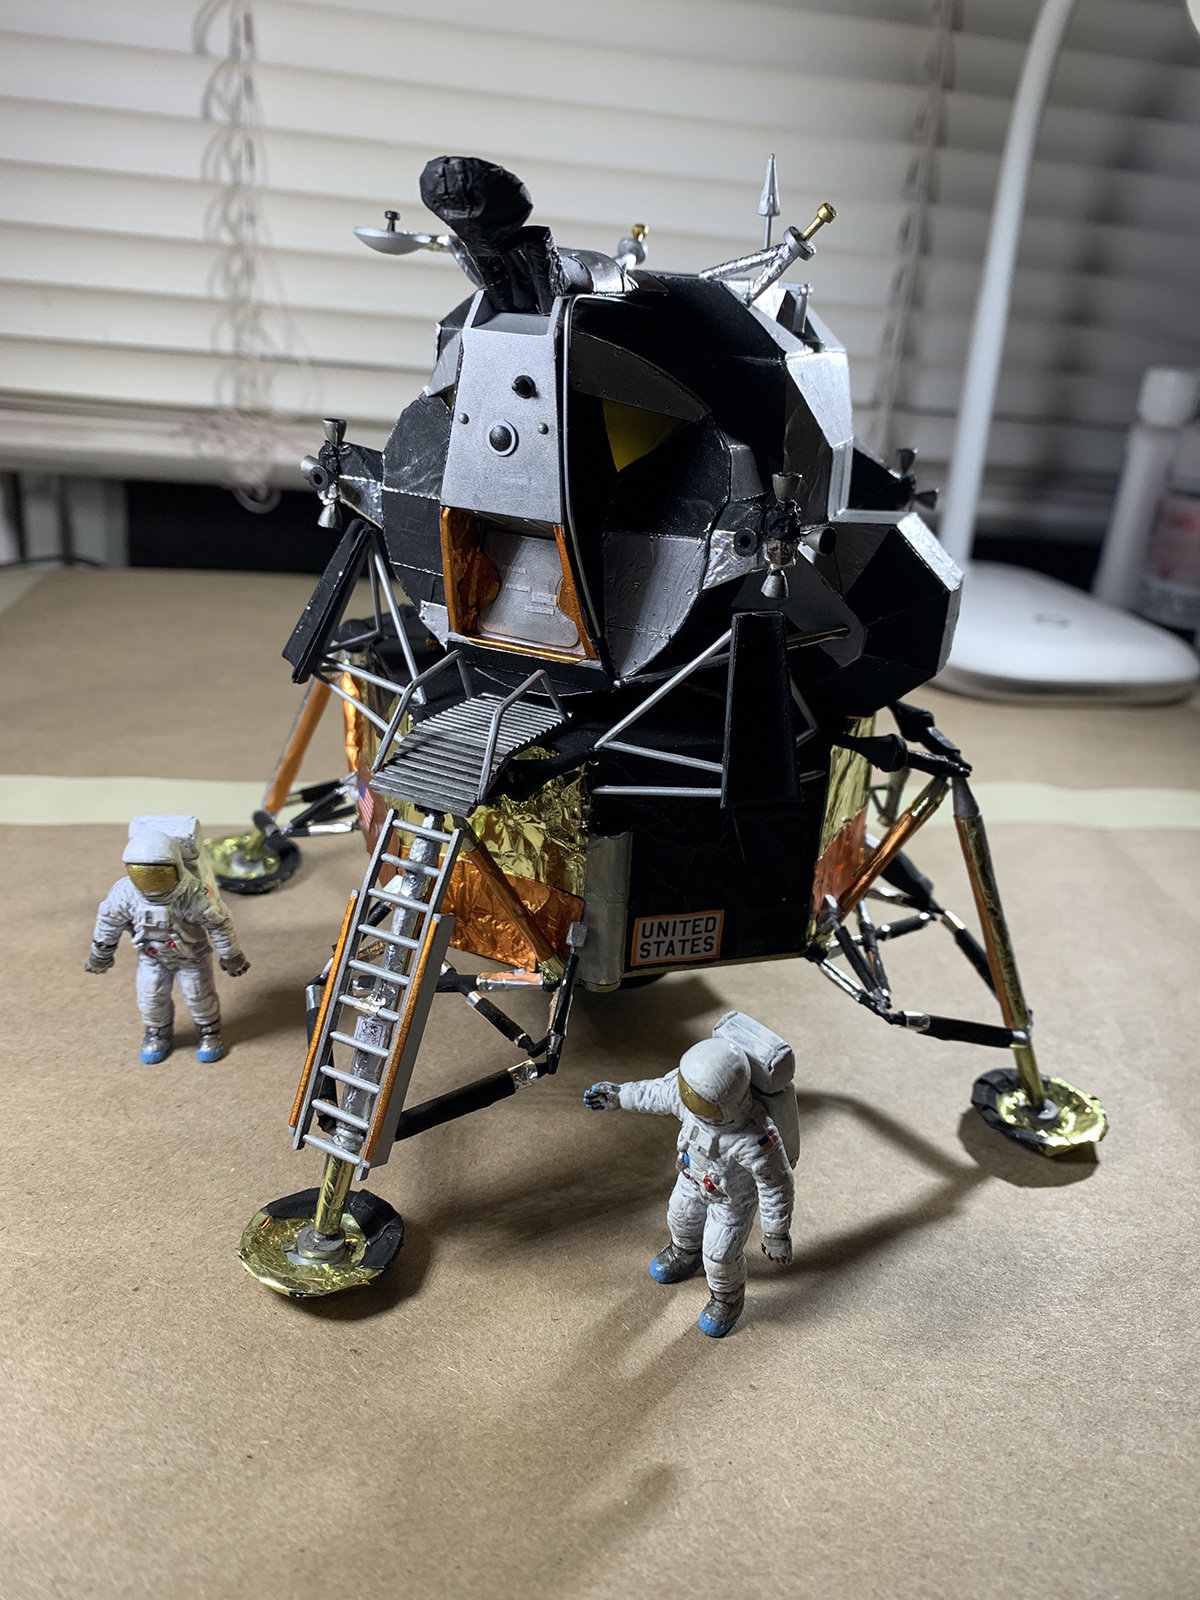
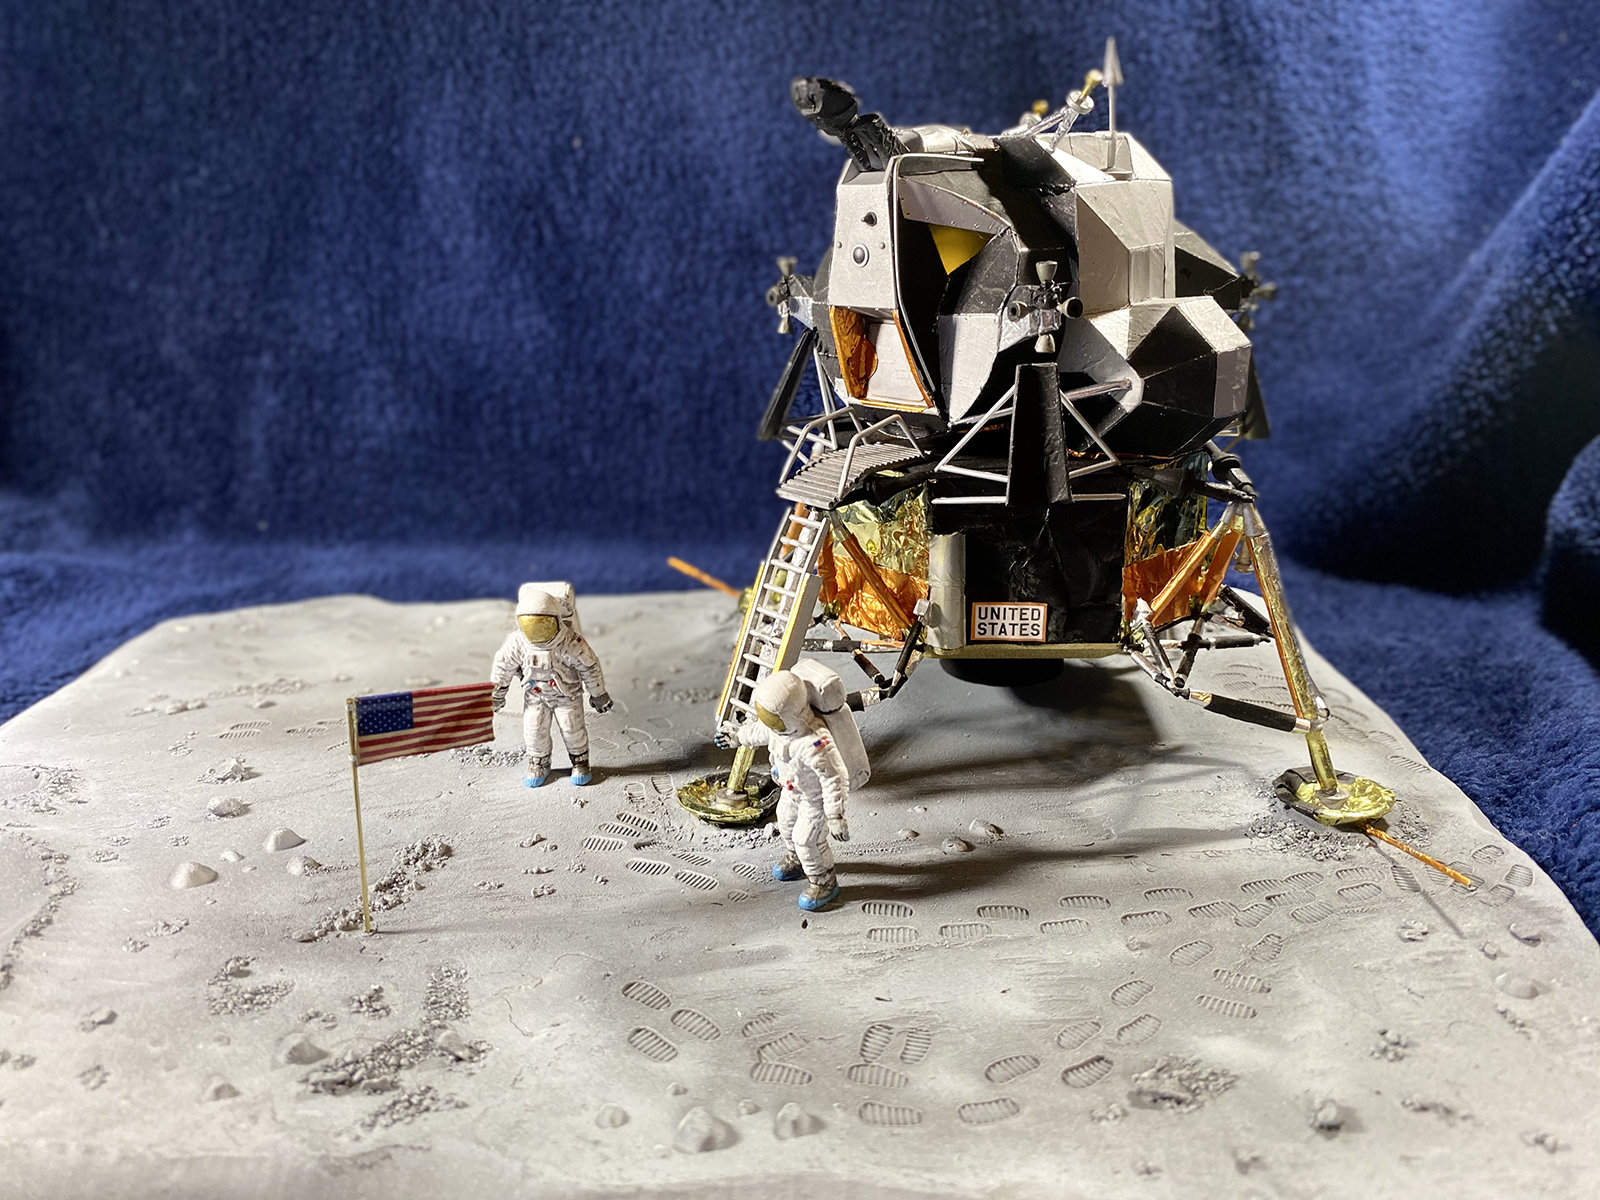
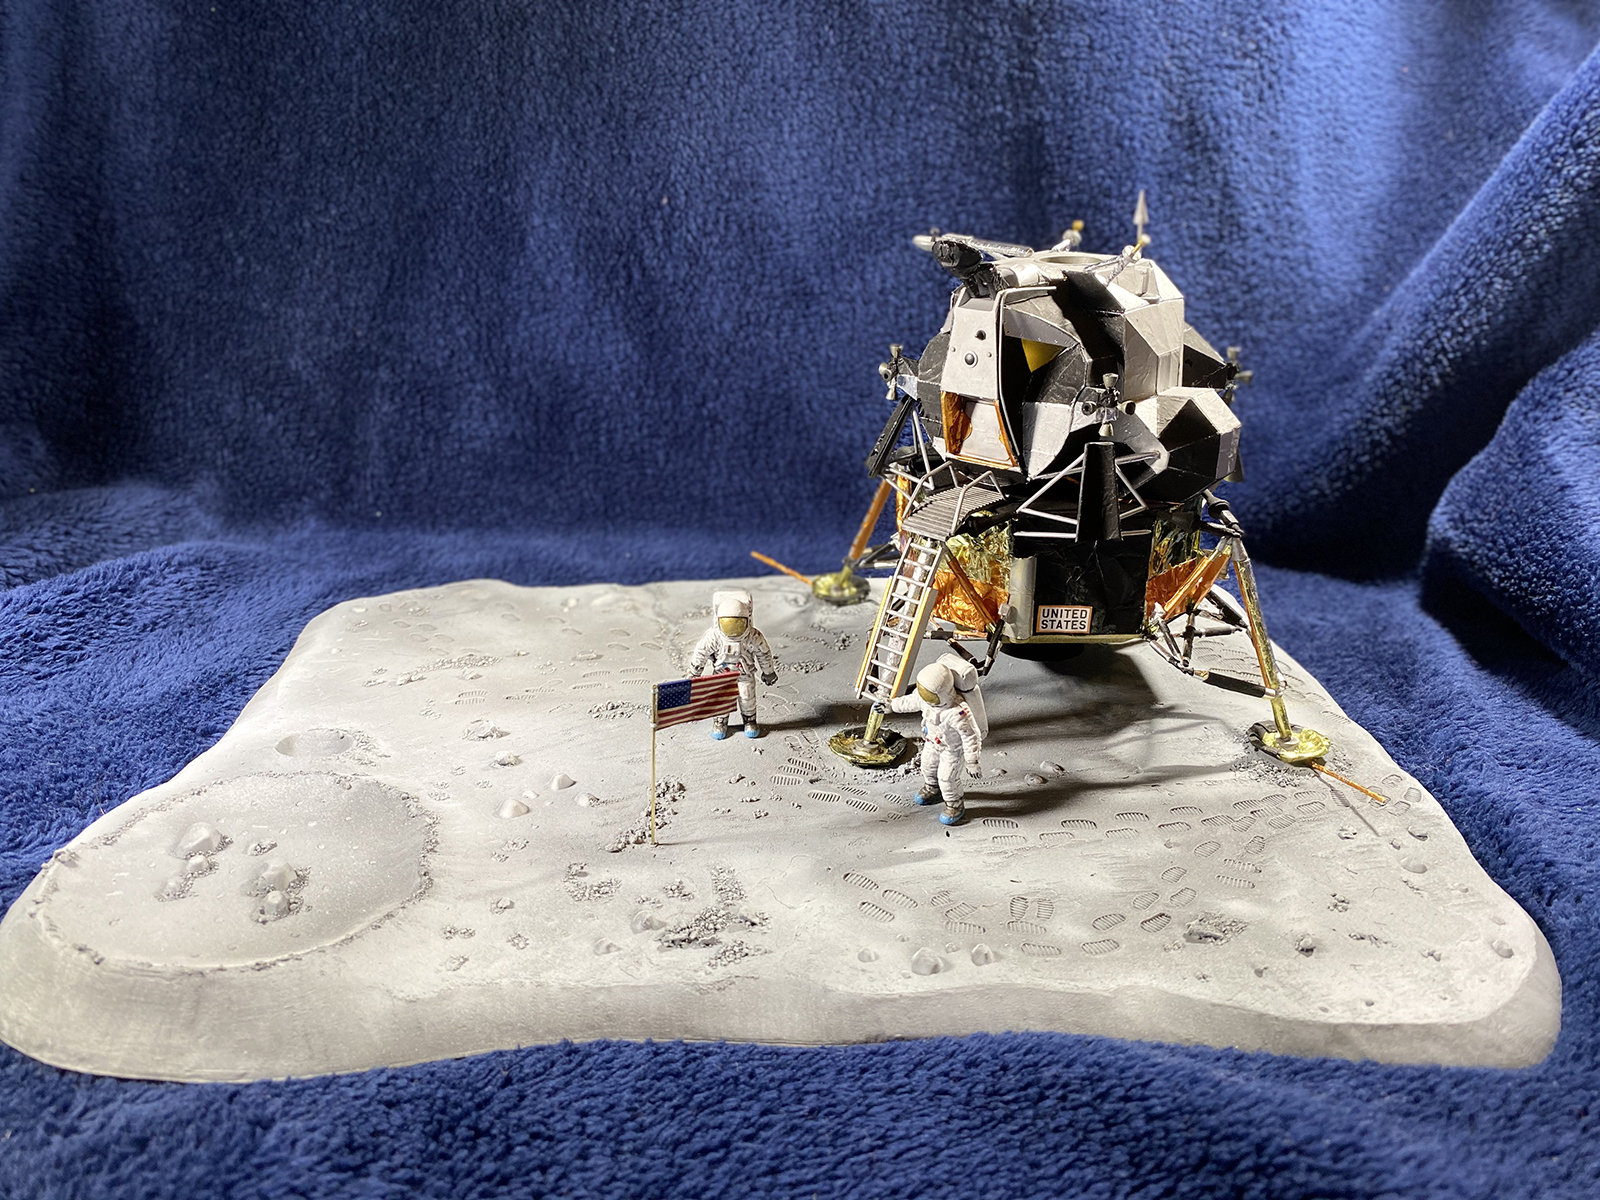
Hi All, Here is my Apollo 11 build. This was built from the vintage Monogram kit. The kit was terrible and I could only really use it for general shapes, most of this was recreated using metal and sheet styrene. I did lots of research and worked mainly from photos. I hope you enjoy! Rick
 1 point
 -
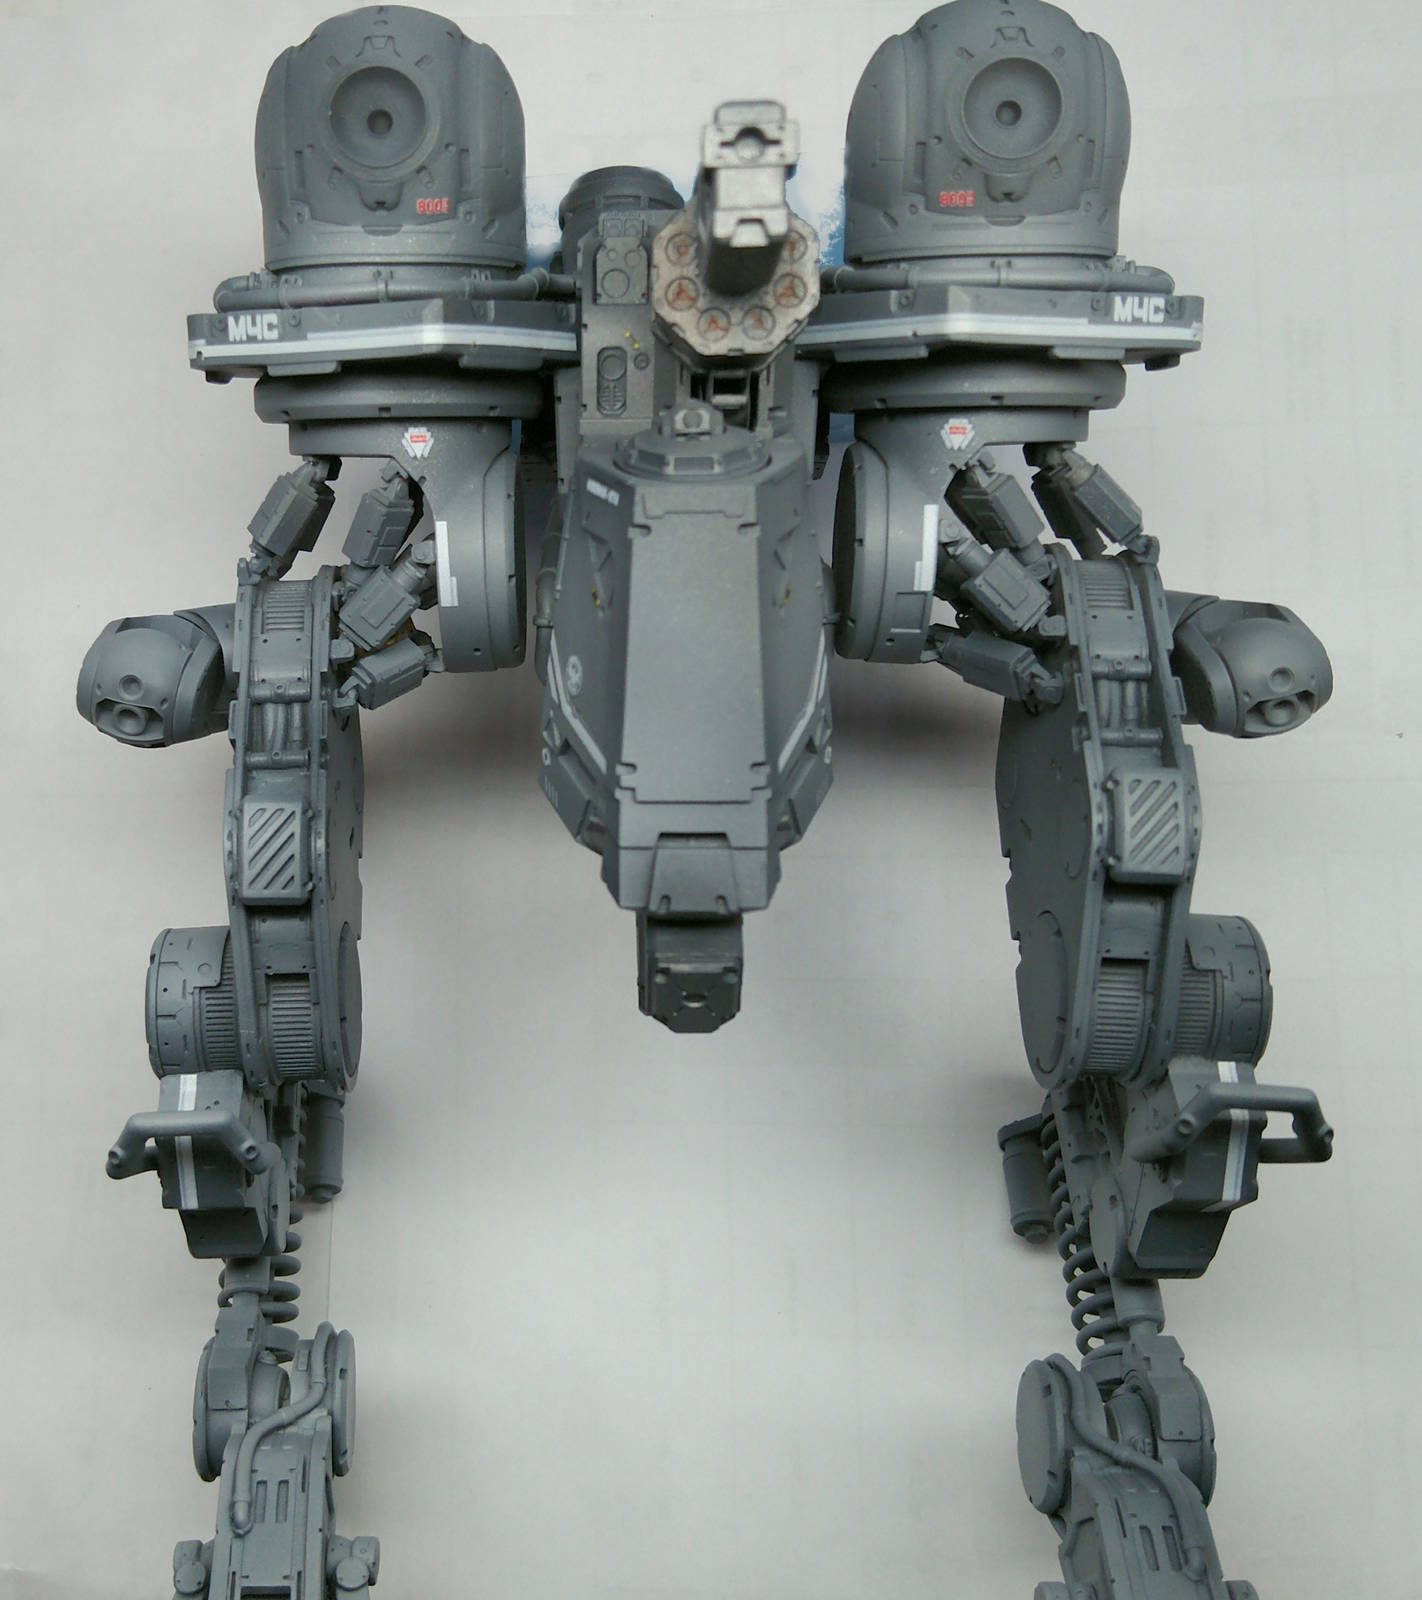
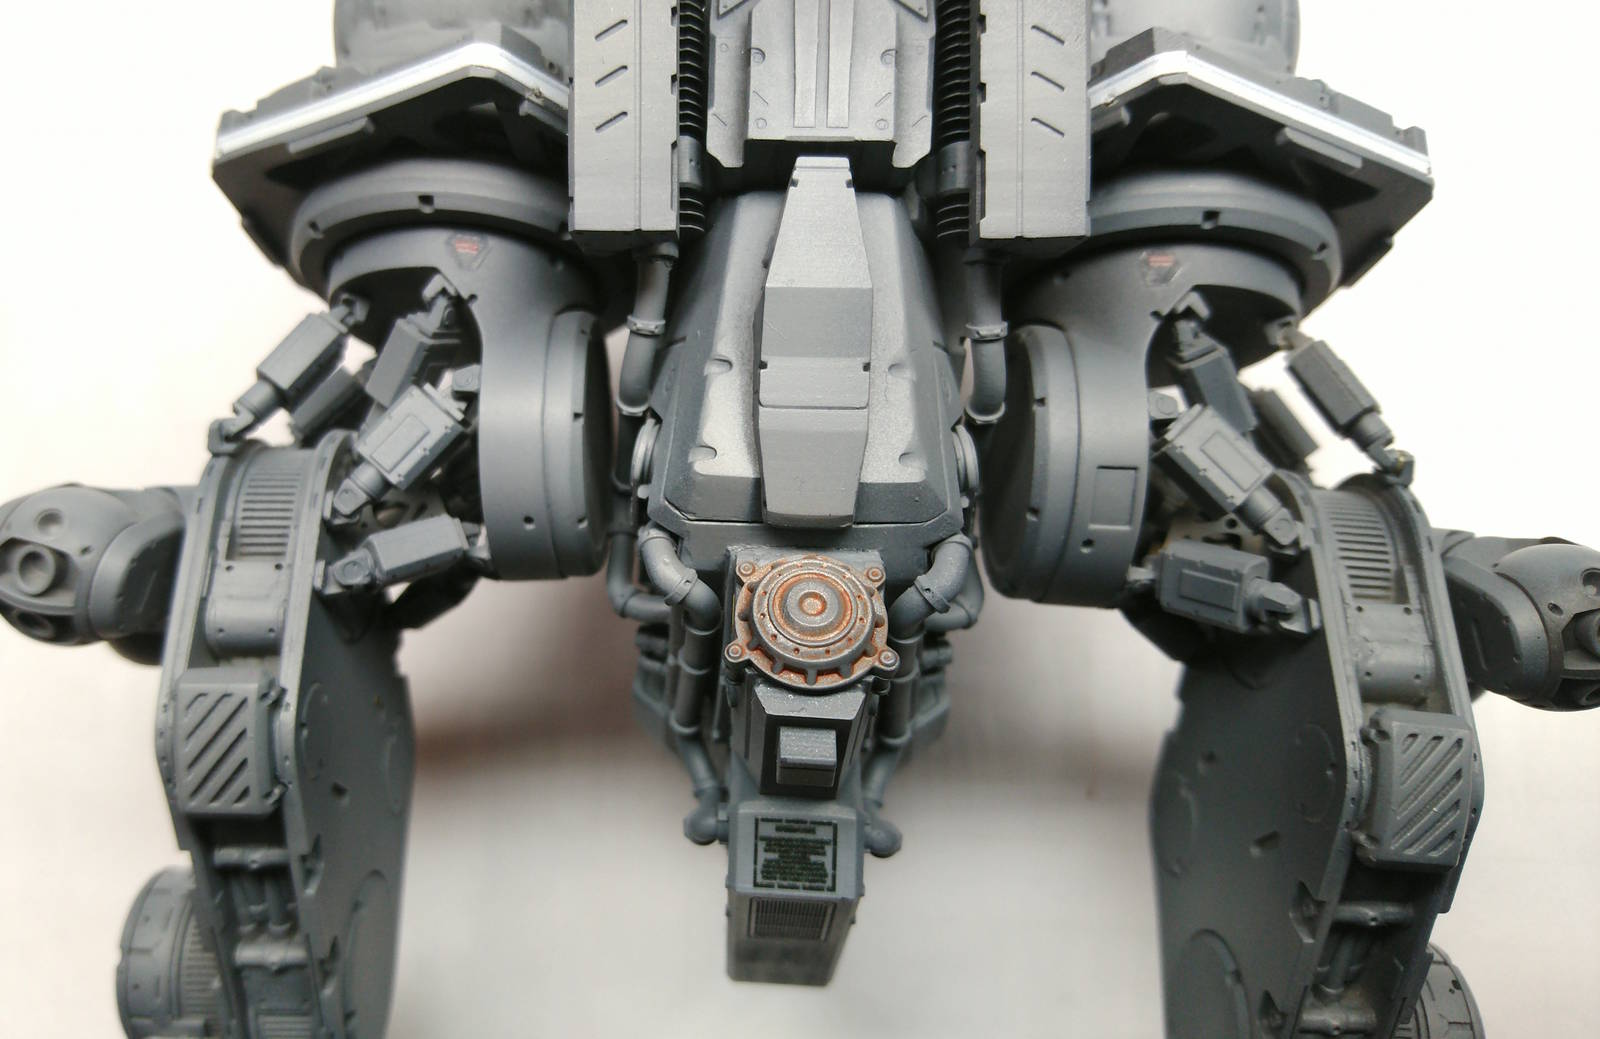
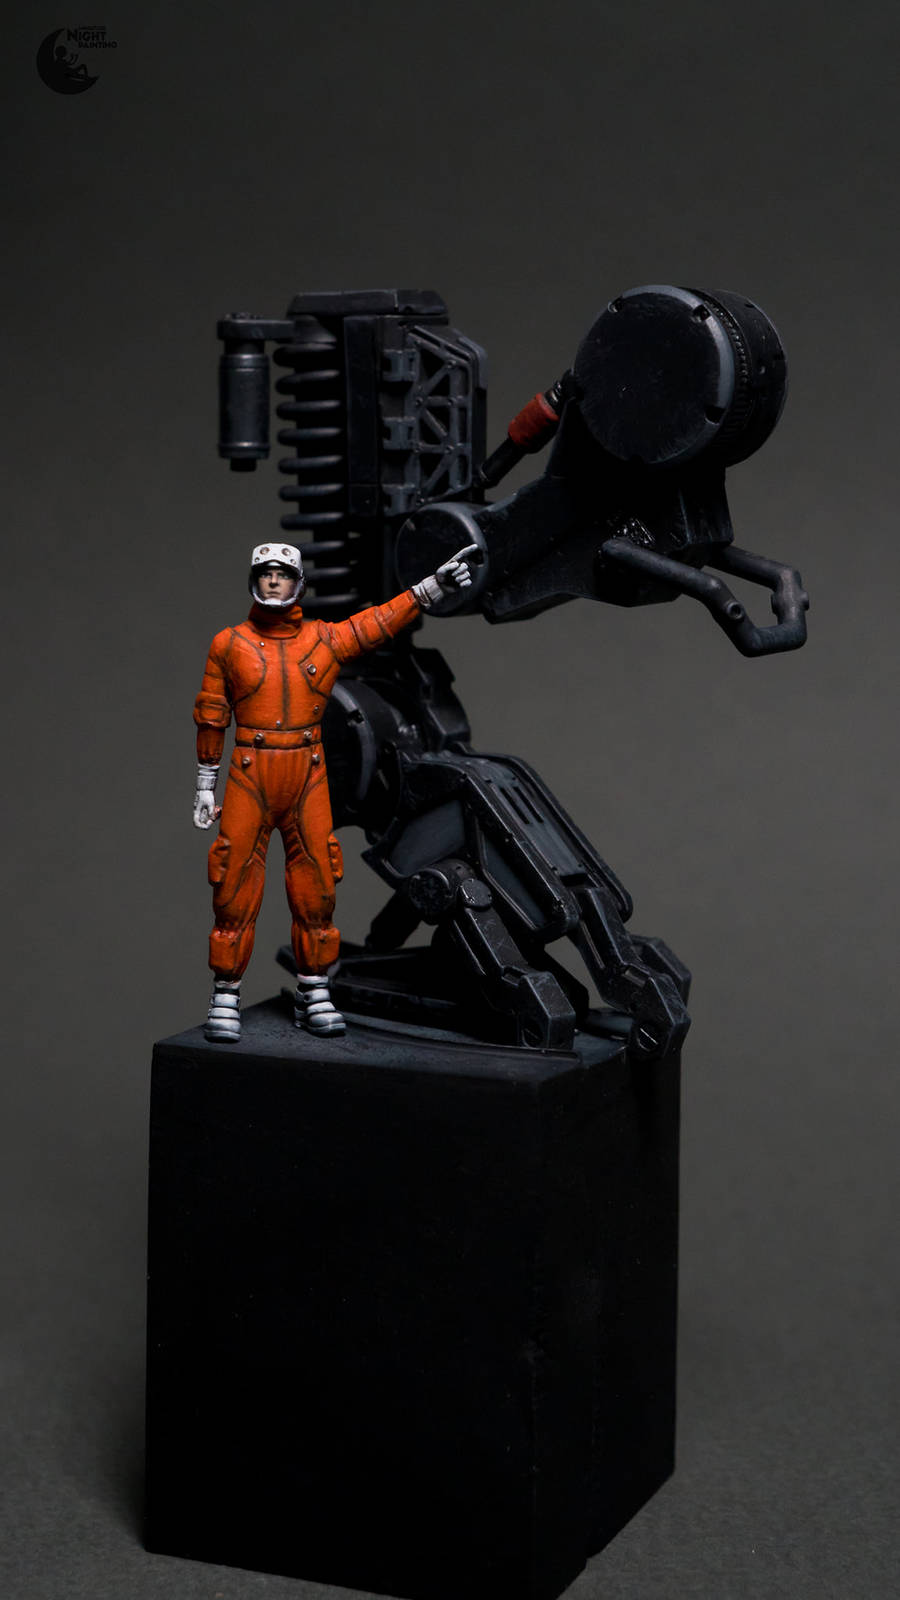
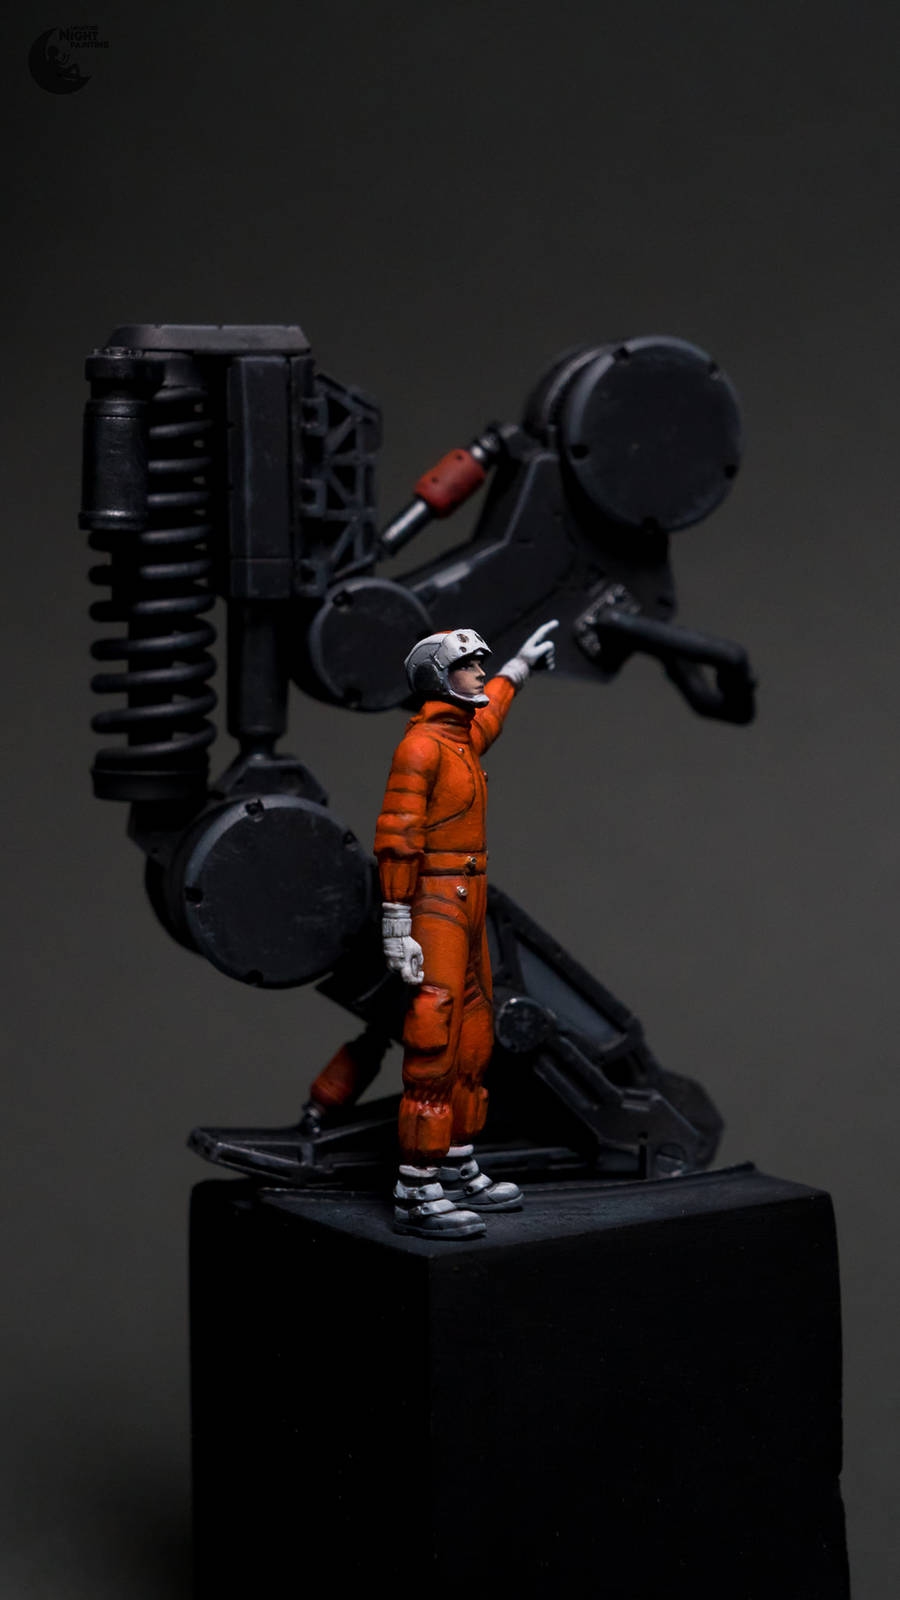
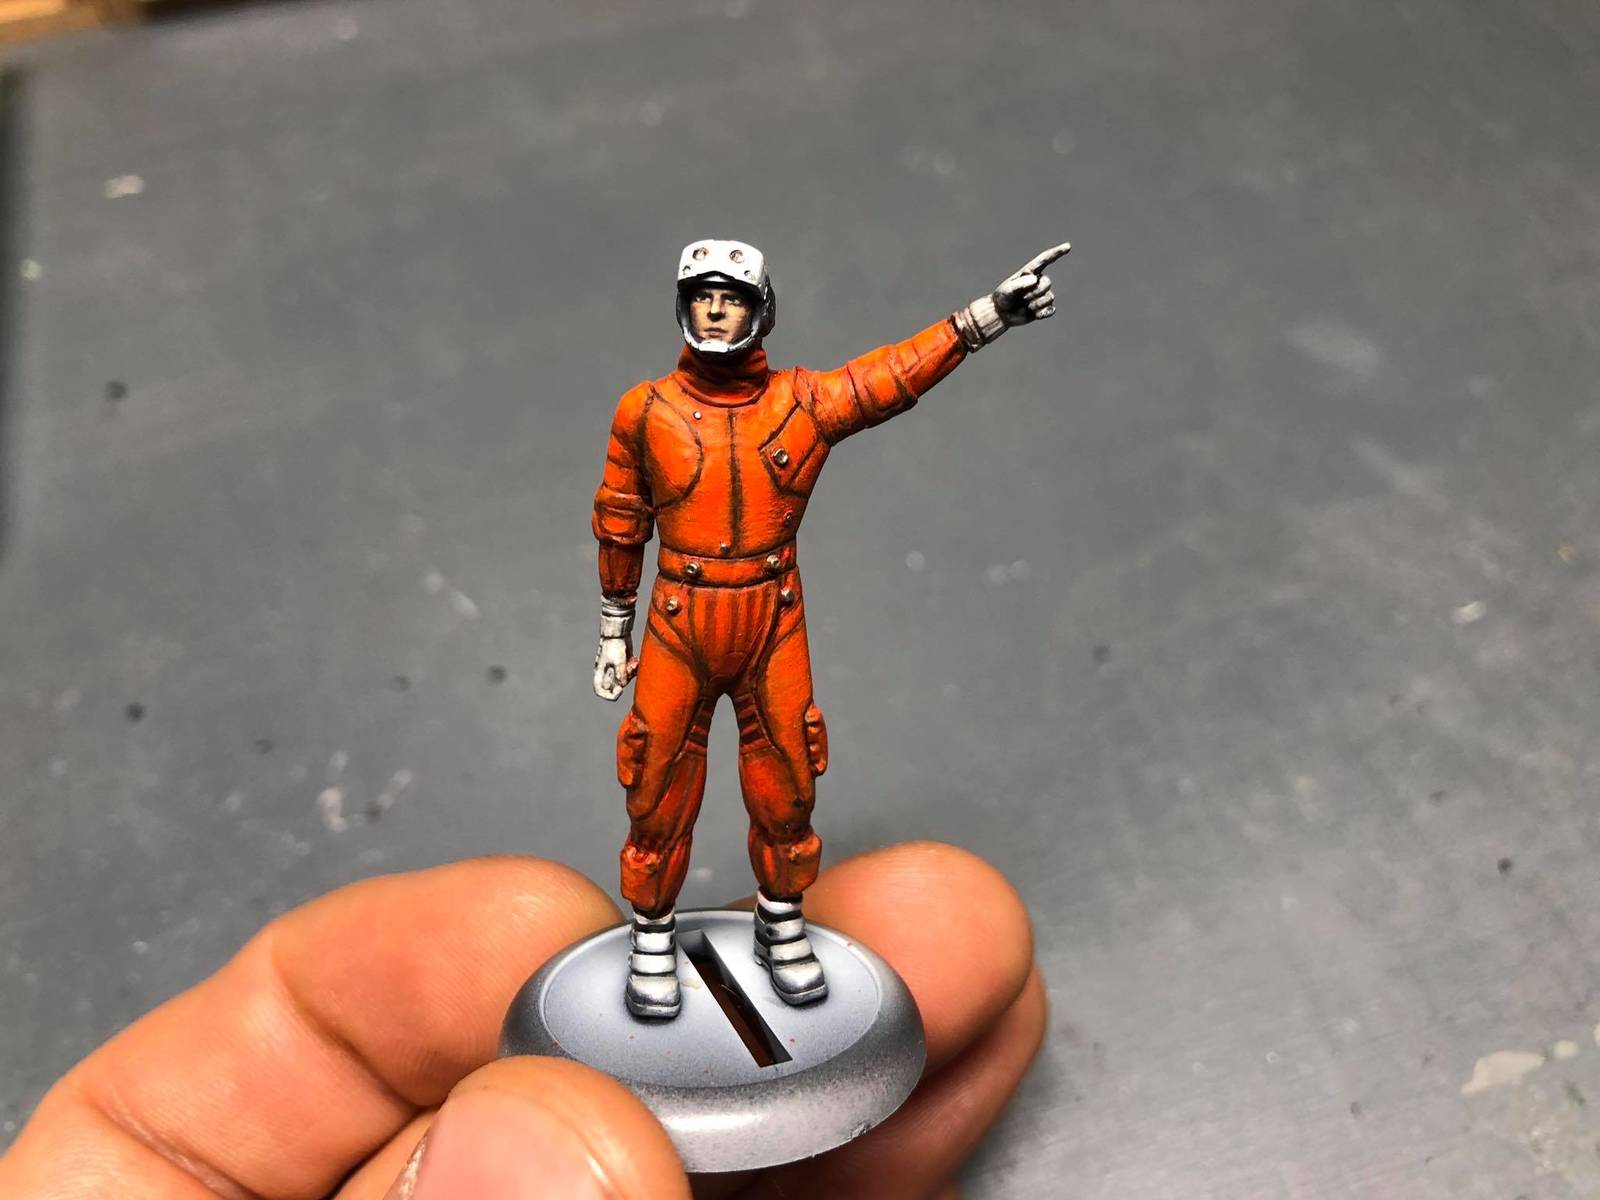
Hello! I am Jared. Non-standard, sci-fi/what-if designs that look believable, intrigue me. Friends convinced me to turn this mech into usable model kit instead of keeping for myself just one copy. Months and months later here it is. A technical rescue machine 5DR code-named "Rescue Labor". It's a unit coming from alternative Soviet universe, which I hope will grow ;). 1/35 scale, 20cm height. 330 resin parts and 95 metal parts, decals and large assembly manual. Not a 3D print, parts have no artifacts or a need for sanding. Miniature of a mechanic is an integral part of the works. Hope you like it. It's a honor to be part of this forum. /Jared/
1 point
-
Wow, I've been so busy I don't know how I got this work done, but here it is, my latest progress from the past couple weeks. All of this is armor again; as well as one car. I'm just trying to get a few things off the bench and on the shelf. I'm getting eager to get back to my Antonov; but I need to clear a few things first. Before I get to them though, here is something I found while I was cleaning the bench up. This was a raffle prize I got that had three Monroe Perdue bases inside for 1/72 scale models. Here they are after priming and painting the black border on them: I won't be displaying my M-1070 or eight-wheeled Russian trucks on any of those, but they will be nice photo bases for my more regular armor. The first model I worked on was the WWI MkI female tank. I finally completed all construction sans tracks: Later, after stretching the tracks a bit, I installed them on this tank: That little thing is now ready for paint. Easy peasy. After finding my clear sheets of plastic, I went ahead and added the windows to my Japanese Isuzu fuel truck: I had also added the windows to the Olympia staff car. I didn't get a pic of that one though. Next I added the inside wheels to my Nagmashot APC: Later I finished off the upper construction of the detail parts and add-on armor: There was a lot of detail on this model to add: I also decided to work on my M-41 Walker Bulldog. I assembled the .50 cal machine gun ammo box. There are five pieces in this tiny assembly: After that I completed the turret and then added the torsion bars and other suspension parts: There is a ton of photo-etch that has to go on this. That's gonna be interesting.... After this, I decided that since I was so close to finishing the AT-1 Snapper, it was time to put it over the finish line. First, I added the rubber tires to the wheel hubs: That meant I needed to add the hubs to the axles to mount these wheels: While they were drying, I added the Snapper missiles to the launch rails: You can see the wheels in the background waiting to be installed. When the hubs were dry, I added the re-loads to the interior. I only put in two since I'd lost the last one (found later, three days after I'd finished the model!) Here you can also see some of the additional detail parts I added: Wheels on and touch up paint done: Then I added the launch rails: Finally a dullcoat, the roof doors and the start of some dusting: That puppy was finished after a little more work. Finally after while, I had some time to get to my spray booth. Despite issues with my airbrushes again, I managed to get some paint shot. First was Ole' Bill, the Type B bus inducted into the Army. I gave it an olive drab coat: Since I was doing buses, I changed to red and shot the other civilian Type B bus: That is a Humbrol red on that bus. Later, this needed some additional paint work so I went on, painting the lower body and suspension: I need to re-paint the dark brown. It is a gloss color going over a gloss color. For now I set this aside to dry. Since I also still had the red available, I pulled out my too-orange Coke Delivery Van and shot it with the red: Definitely a rough job that will need to be smoothed out. Someday that will start behaving and I can finish it. Until then, I'll just have to keep on working on other models. as I do this. That's all I have for now. Thanks all for looking in, comments are welcome.1 point
-
So yesterday I did a couple of small additions that I needed to do before final bits of rigging. First I added some control line horns to the ailerons that were not molded in place, but needed in order to properly add those lines. I made them up from small pieces of aluminum rod then flattened and filed them them to a more airfoil shape once glued in place. I also attached the control line thru the rudder using EZ Line and CA. No rigging today as my fine motor skills are toast after a long bike ride this morning... tomorrow I’ll resume the rigging, and possibly finish it. Then final touch up painting is next on the agenda.1 point
-
This week’s update on the 1/72 Hasegawa P-2H Neptune (P2V-7) I was able to get the fuselage together evenly after many hours of sanding and shaping. I then masked off the white sections and base coated it white. While it was drying I then assembled and detailed to radial engines and propellers. After the fuselage dried the white areas were masked off. I then assembled the canopy and scratch built the overhead console. I used some spare photo etch levers and made some of the panels to match the reference photos. The canopy was them masked with kapton tape and installed. With the radial engines installed I then started to assemble the jets engines. The kit provides nothing to detail the exhaust of the jets. I dug through my photo etch extras and found a set of exhaust details and attached them. The wings were then assembled and detailed. The fit of the wings was very good. I am working on completing the jet engines then a little masking on the landing gear bays and it should be ready to base coat the sea blue. See more photos and details of this build from in my build log at https://davidsscalemodels.com/build-log/hp-2h-neptune-p2v-7/1 point
-
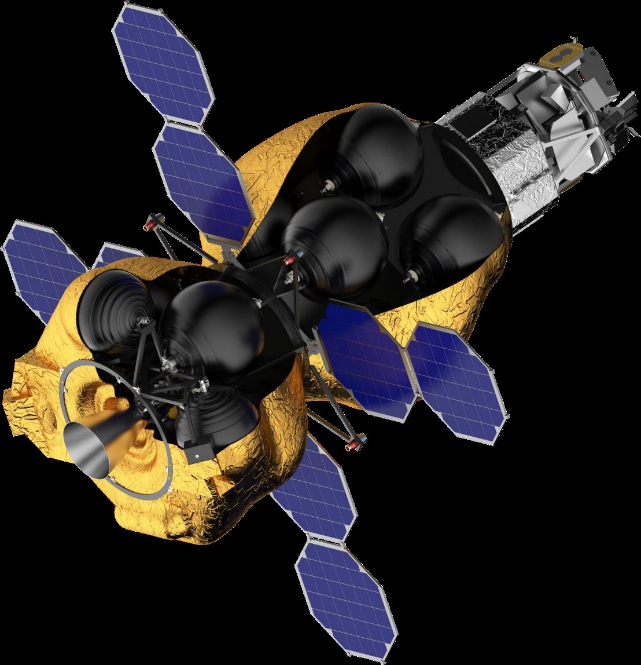
Did someone make a model of a space tug? For example, such as in the picture. Where are you looking for blueprints? What difficulties can I expect? Can I get by with just photos and renders?
1 point
-
Diving back into my stash, I came out with another Fantastic Plastic oldie but goodie. Due to a C&D, all of FP's Star Wars kits are currently retired. The kit is their their Vector Wing fighter in 1:72 scale. It came in 26 parts of white resin, and one clear resin canopy. for the paintjob it was easier to paint sub-assemblies. Tried to shoot the pilot, but ended up illustrating my light weathering. 😉 Thanks for looking.
1 point
-
With so much time at home I was able to finish this one. Additional images can be found here: MK44 SternenKnight1 point
-
This is what I have been working on for the last few weeks. Love these kits. This makes #6. The base kit builds like this: MK44 AmmoKnight. But I glued on a few greeblies and used lots of putty. To get to this point. I'm still tinkering with tiny details but the majority is finished.1 point
-
Needing a break from my figures, I pulled out a relatively recent get from Red Iron Models - it's the Luna 2 . From the site: Luna 2 (E-1A series) or Lunik 2 was the second of the Soviet Unions Luna program spacecraft launched to the Moon. It was the first spacecraft to reach the surface of the moon and the first man-made object to land on another celestial body. On September 13, 1959, it hit the Moon's surface east of Mare Imbrium near the craters Aristides, Archimedes, and Autolycus. From the above, "land" is a relative term. It actually "landed" going full speed. 😉 Inside it contained a capsule of Sodium, so that when it crashed a plume of sodium rose out of the crater, hit the sunlight, and was able to be see from Earth. The 1:35 scale kit comes in 10 parts including some wire and a lunar landscape base. It was a very easy kit to build. I had it finished in 2 hours. The parts break down including one page of instructions After removing the pour plug, an interesting attachment point(s) The bus built and just before the wire antenna added Antenna added After getting the kit built according to directions, I noticed the two "L" shaped bottom parts were too long compared to illustrations. I will have to removed them and shorten the wires. You can see how small the bottom parts were.1 point
-
Wasn't sure where to put this but I had to share it. This photo was taken from the street in front of my house 15 minutes ago. Space X launch out of Vandenberg AFB.
1 point
-
This is a conversion of the Hasegawa MK44 WhiteKnight. I added a few extra greeblies to the rear torso and scratch built a new gun. This is now my fifth MK44 kit. I love these things. The kit is so well engineered and the design lends itself to customization. Additional images can be found here: MK44 Crusader Knight1 point
-
The MK44 Queens 'B' Knight is a variant of the MK44 designed and released as a kit by Takaaki Saito of LoveLove Garden. I was enamored with the design when I saw the first images he posted of the master. I picked this kit up as a Christmas present to myself at the end of 2017. It took a few months before I could build the kit but it wet together quickly once I started. The Hasegawa MK44 line of kits are a breeze to build and the resin add-ons from the LLG kit make this a unique looking mecha. The only change I made was adding the shoulder armor plates from the GrobberHund Altier to the hull sides and replacing the kit hand with an unused claw from the KingKrote kit. A couple of smoke launchers were drilled out and wires are from 0.015" solder wire. The model was painted with Tamiya acrylics and weathered with oils, enamels and pigments. I made extensive use of oils to filter the base colors and add some interest. Additional images can be found here: MK44 Ausf G Queens 'B' Knight1 point
-
I started this one a couple of weeks ago. It's built mostly out of the box with the exception of replacing most molded rivets with after market ones and adding welds made from epoxy putty. I also replaced the plastic tube halves for the tri-tube launcher with aluminum tube. I'm looking at replacing the tri-tube with a box launcher from a prior Goblin build that has fallen apart. Not sure, I like both but only have one kit. :-\ ;D1 point