Leaderboard


Popular Content
Showing content with the highest reputation on 02/27/2021 in all areas
-
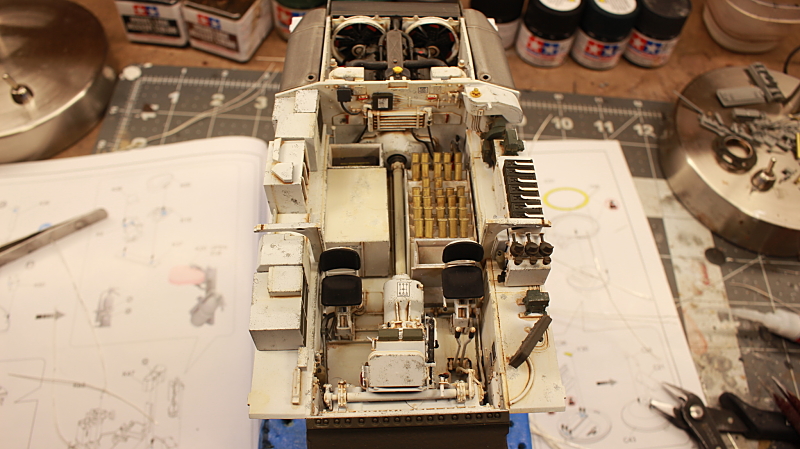
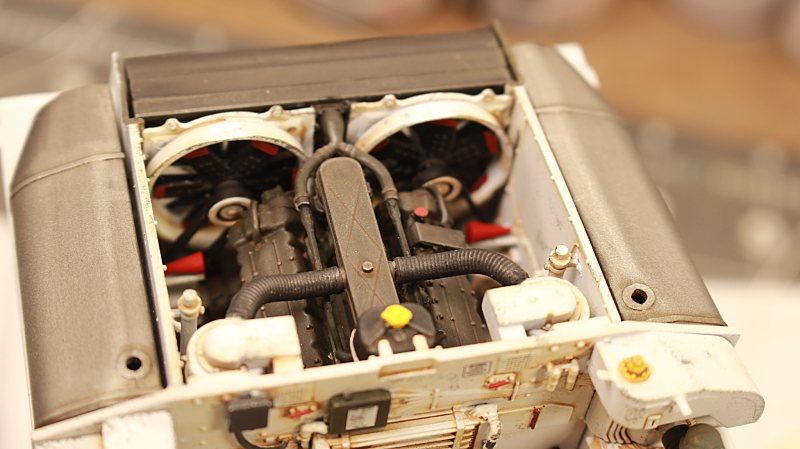
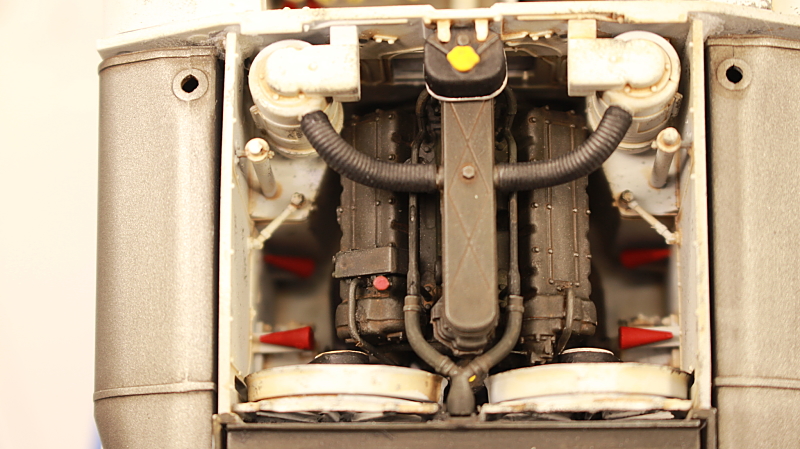
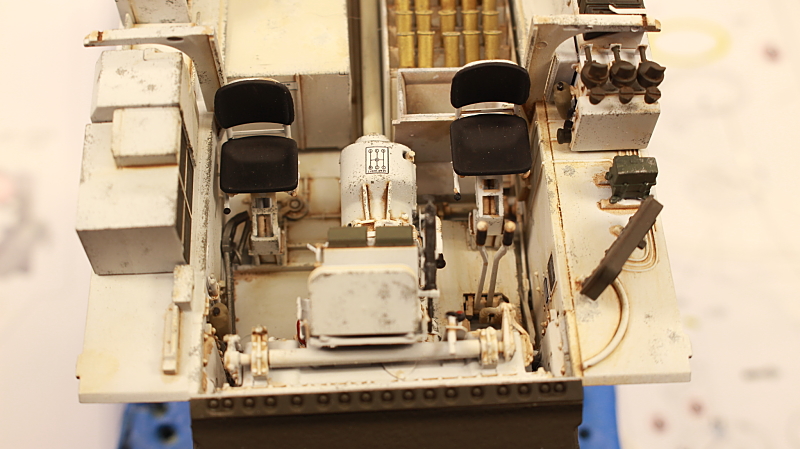
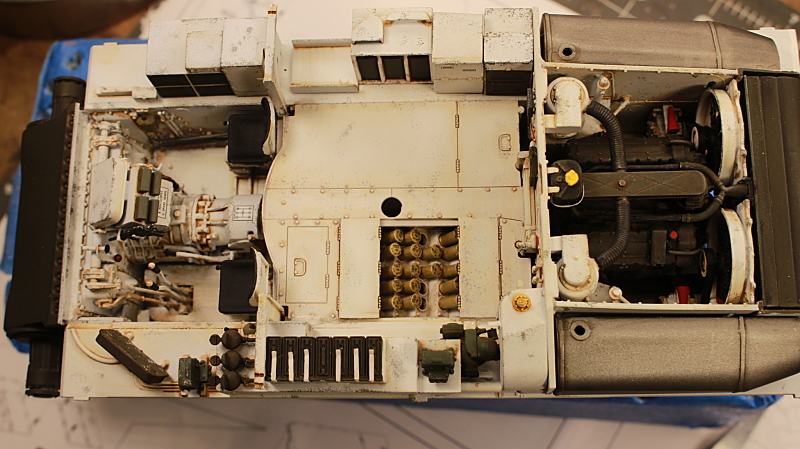
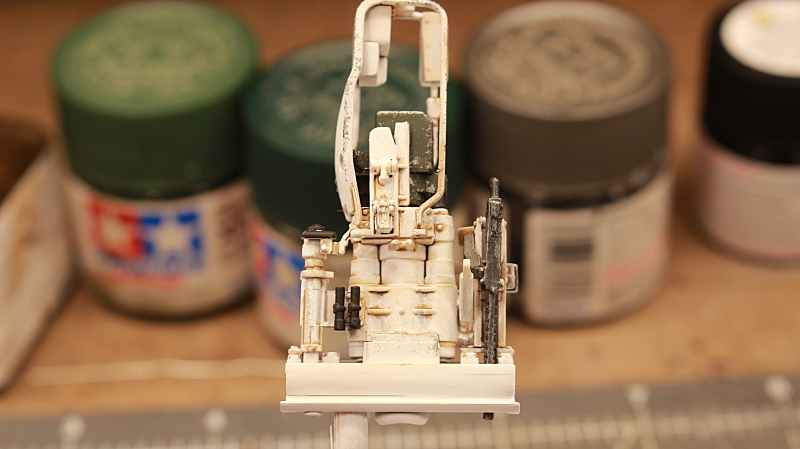
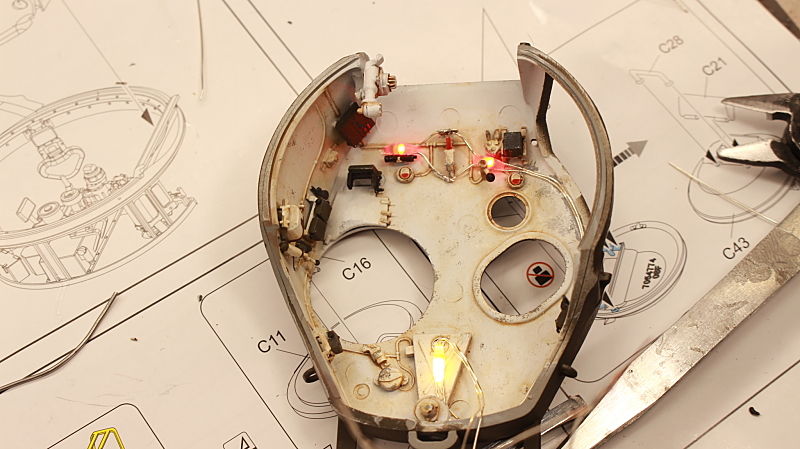
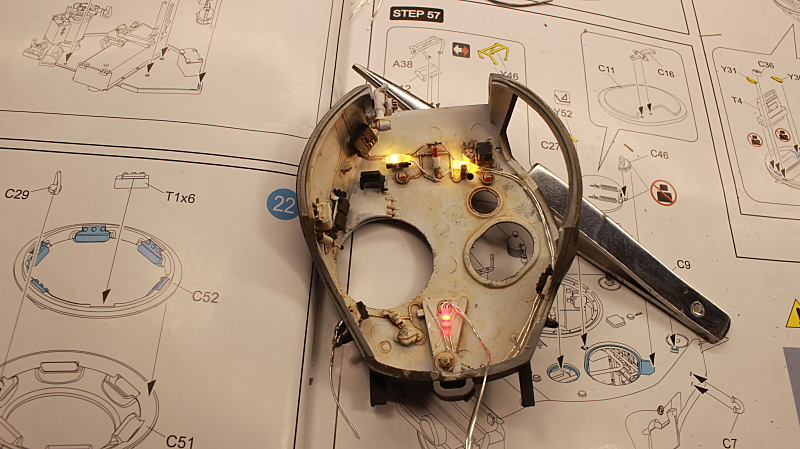
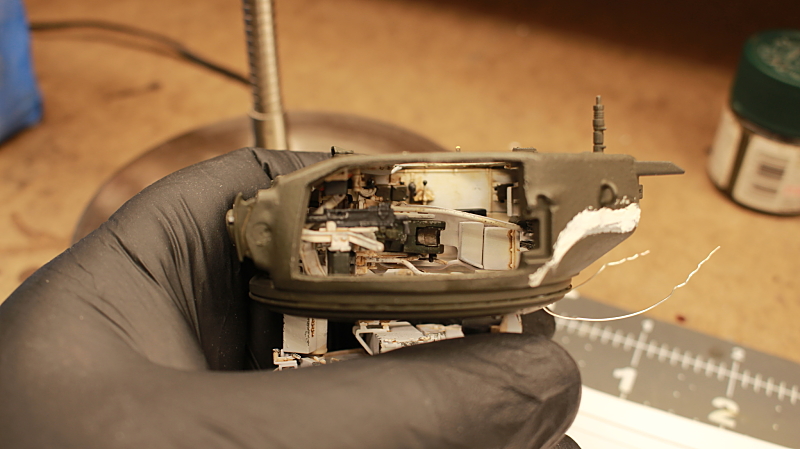
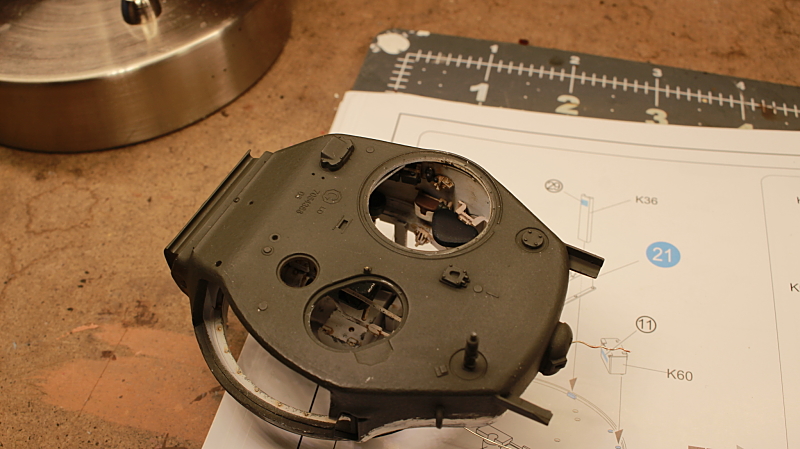
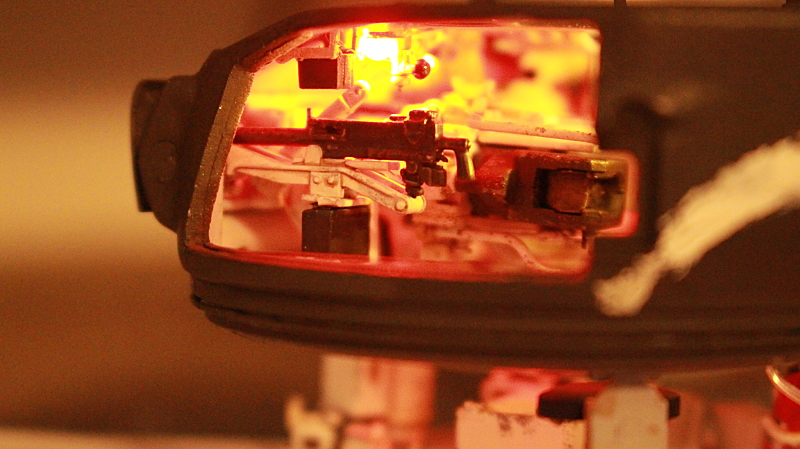
If you want an extremely detailed Sherman, this kit is a must have. The price that I paid (my wife) was well worth it. There are ALOT of parts in this kit. Because I'm going to use this one with the other two that I built in a diorama, I decided to cut open the Turret and Hull so that you can see inside. So that you can see everything , I used a multi-colored mini LED set. I've never added lighting to a model before. With the help of my son, I got a crash course in soldering. The LED's that I am using have two different colors in one "bulb". White for non-tactical, Red for tactical. The controller for the lights, has 8 different settings to choose from. (It even has one setting for Disco Tech). I'm also adding lighting in the hull. I painted the interior Tamiya flat white. I added chipped paint (Tamiya Metallic Grey) with a torn up make up sponge. After it dried, I shot DullCoat on everything. I then applied Tamiya brown accent color to all the detail. Once it dried, I used mineral spirits to scrub away the excess wash. The engine compartment will be open with two mechanics working on it. A third mechanic will be driving a jeep with all their tools. This process has been a long one, but well worth it, I think. If anyone sees anything out of place, or incorrect, please let me know. Chris
 1 point
 -
Clearly, they all do not look the same. To accomplish the appearance in this photo, I would mask on each side of each rib, and paint in between, by hand, with Mr. Surfacer 500 or 1000. When dry, peel away the masking tape. Then you can gently, lightly sand to remove any raised edge caused by the meniscus effect of the paint next to the masking tape. You can also lightly sand to make it less prominent if desired. If you make a mistake, you can easily remove the entire new “rib” and redo it. I use this technique to restore raised panel lines. It is actually easy and very effective. Good luck. Nick1 point
-
Viktor, I consulted one of my references on the Tiger Moth. This is Ray Rimell’s Aeroguide Classics Number 6 on the Tiger Moth. There are excellent closeups of the wing and horizontal stabilizer upper surfaces. On the tail especially, the rib effect is quite subtle and, respectfully, as molded by Airfix, it is much closer to reality than what your rib tape efforts are achieving. In 1/72 and smaller scales, these techniques are inevitably over scale. I have used these tape techniques in scratch-building in these small scales, because there aren’t a lot of alternatives. It’s better than nothing, but not by much. If you want to emphasize these ribs, you might try simply pre- shading them with a dark colour, but I do not think it necessary. Good luck. Regards, Nick Filippone1 point