Leaderboard


Popular Content
Showing content with the highest reputation on 08/17/2020 in all areas
-
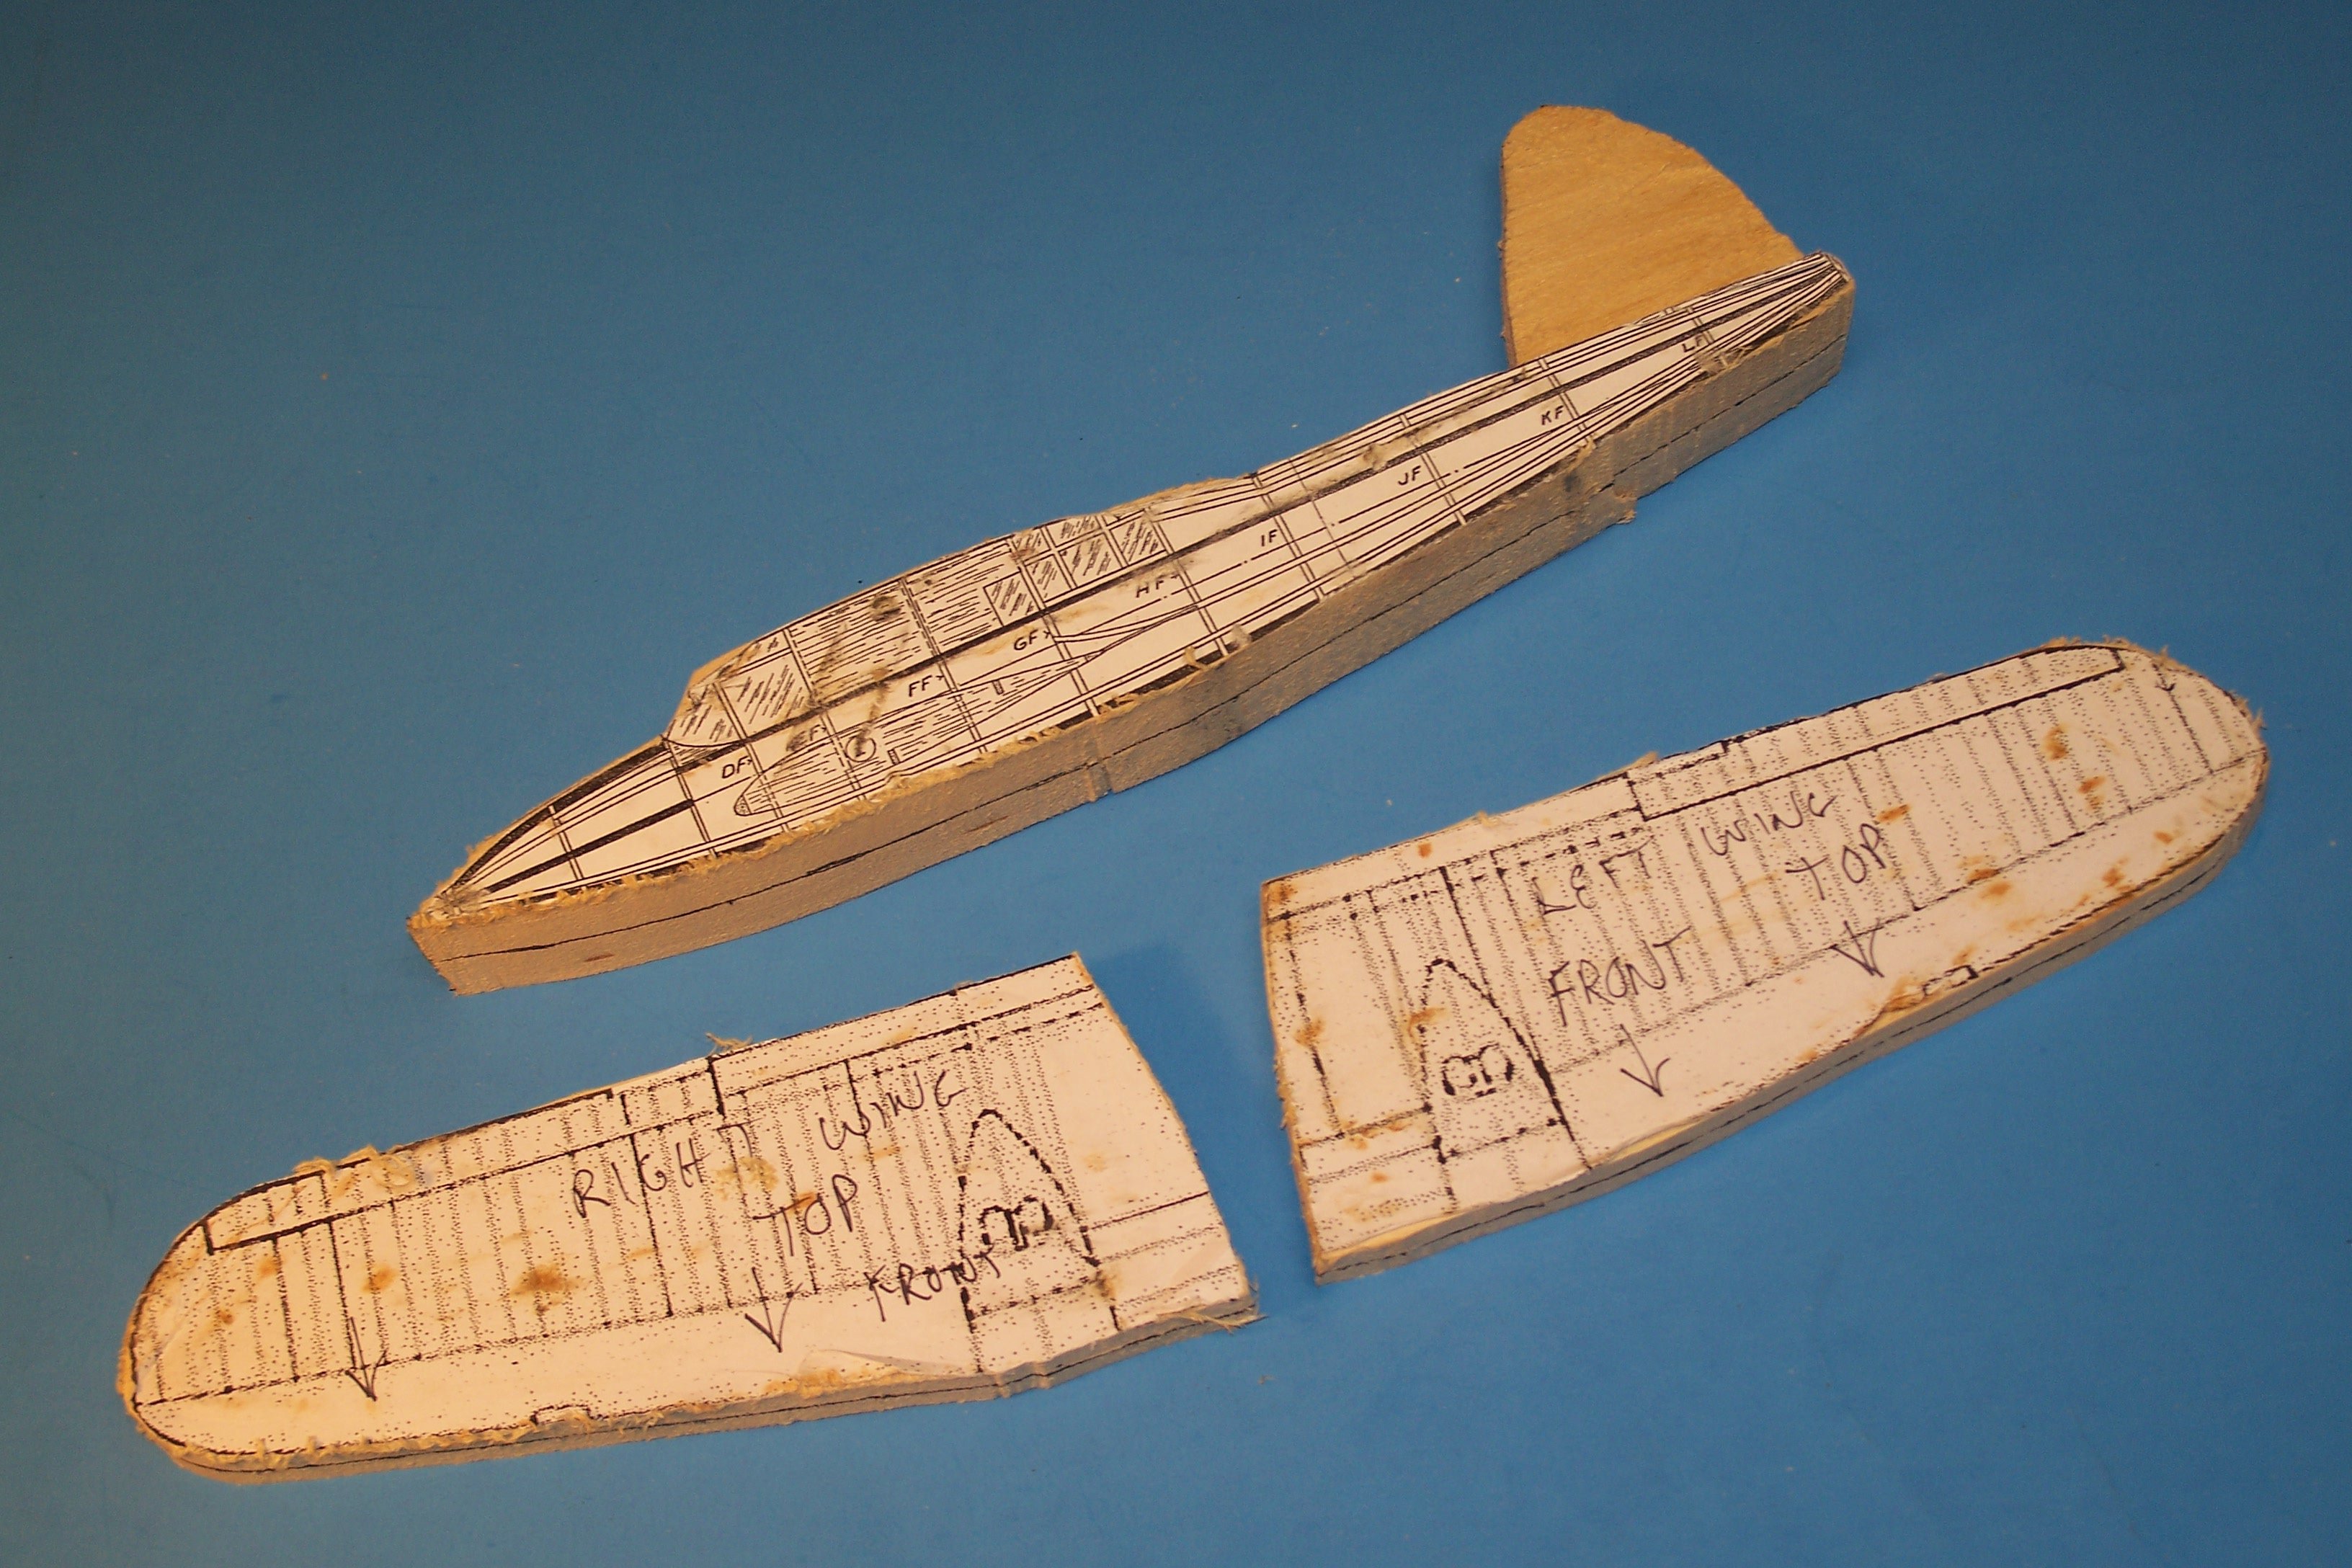
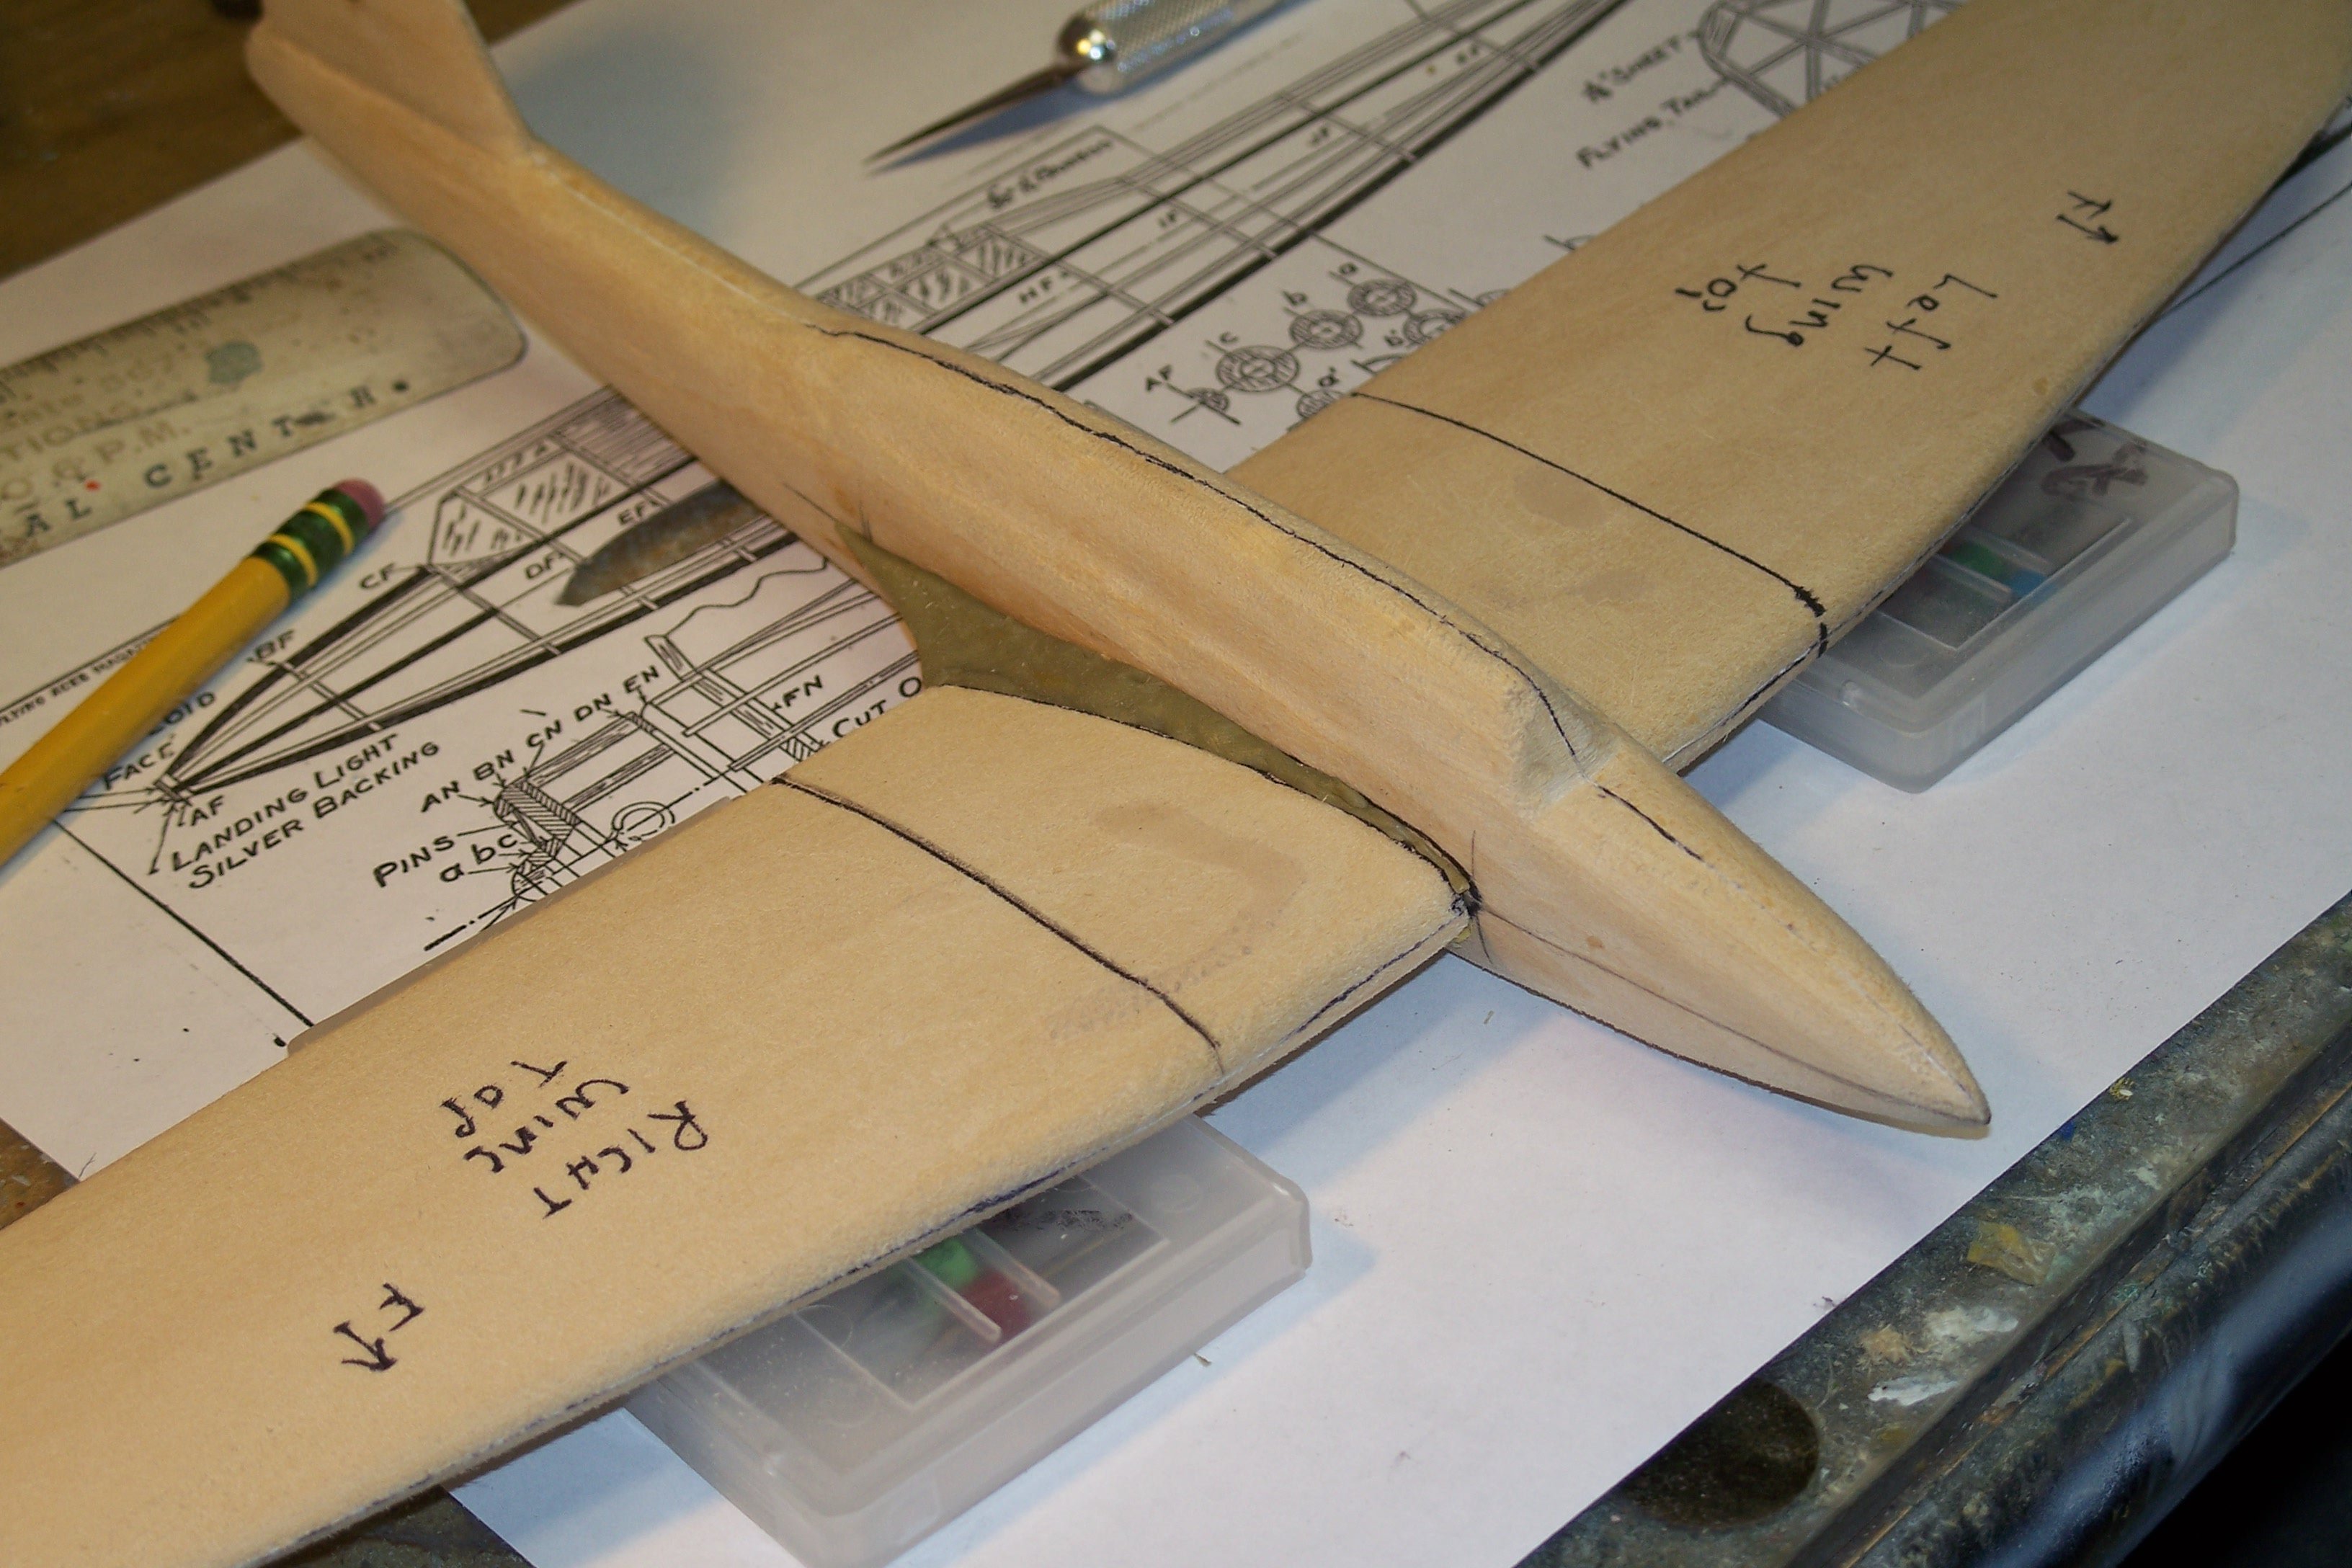
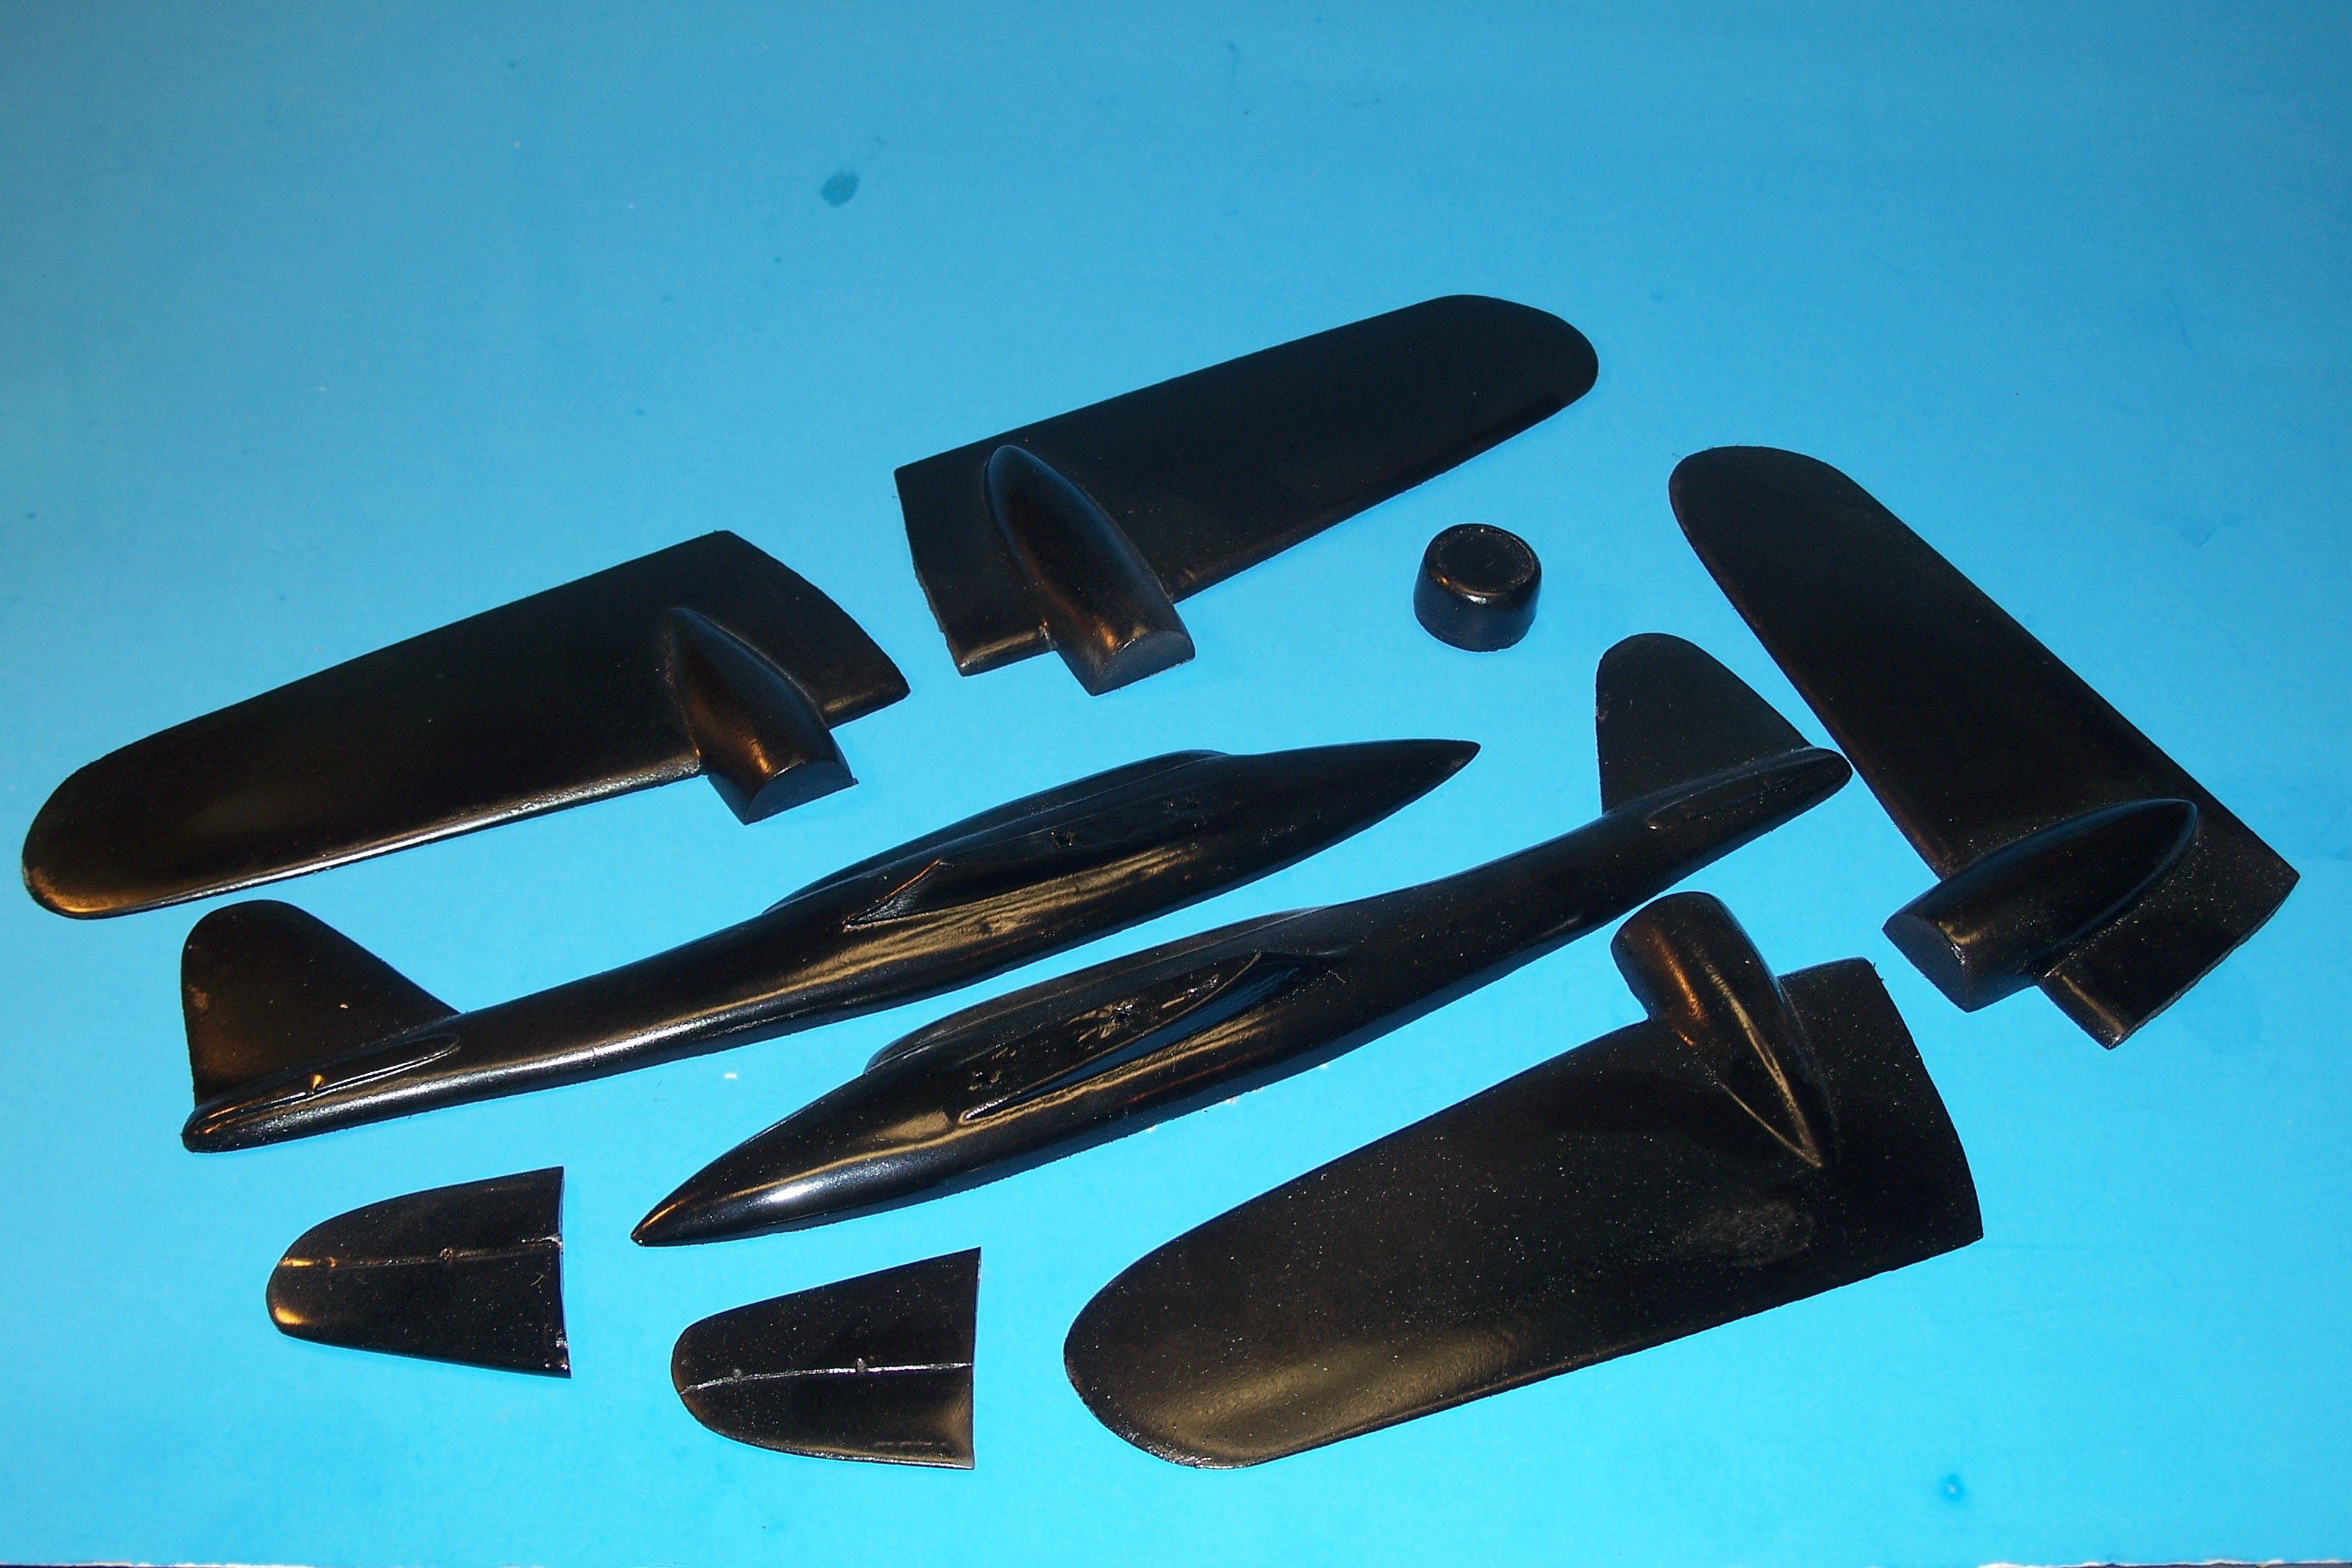
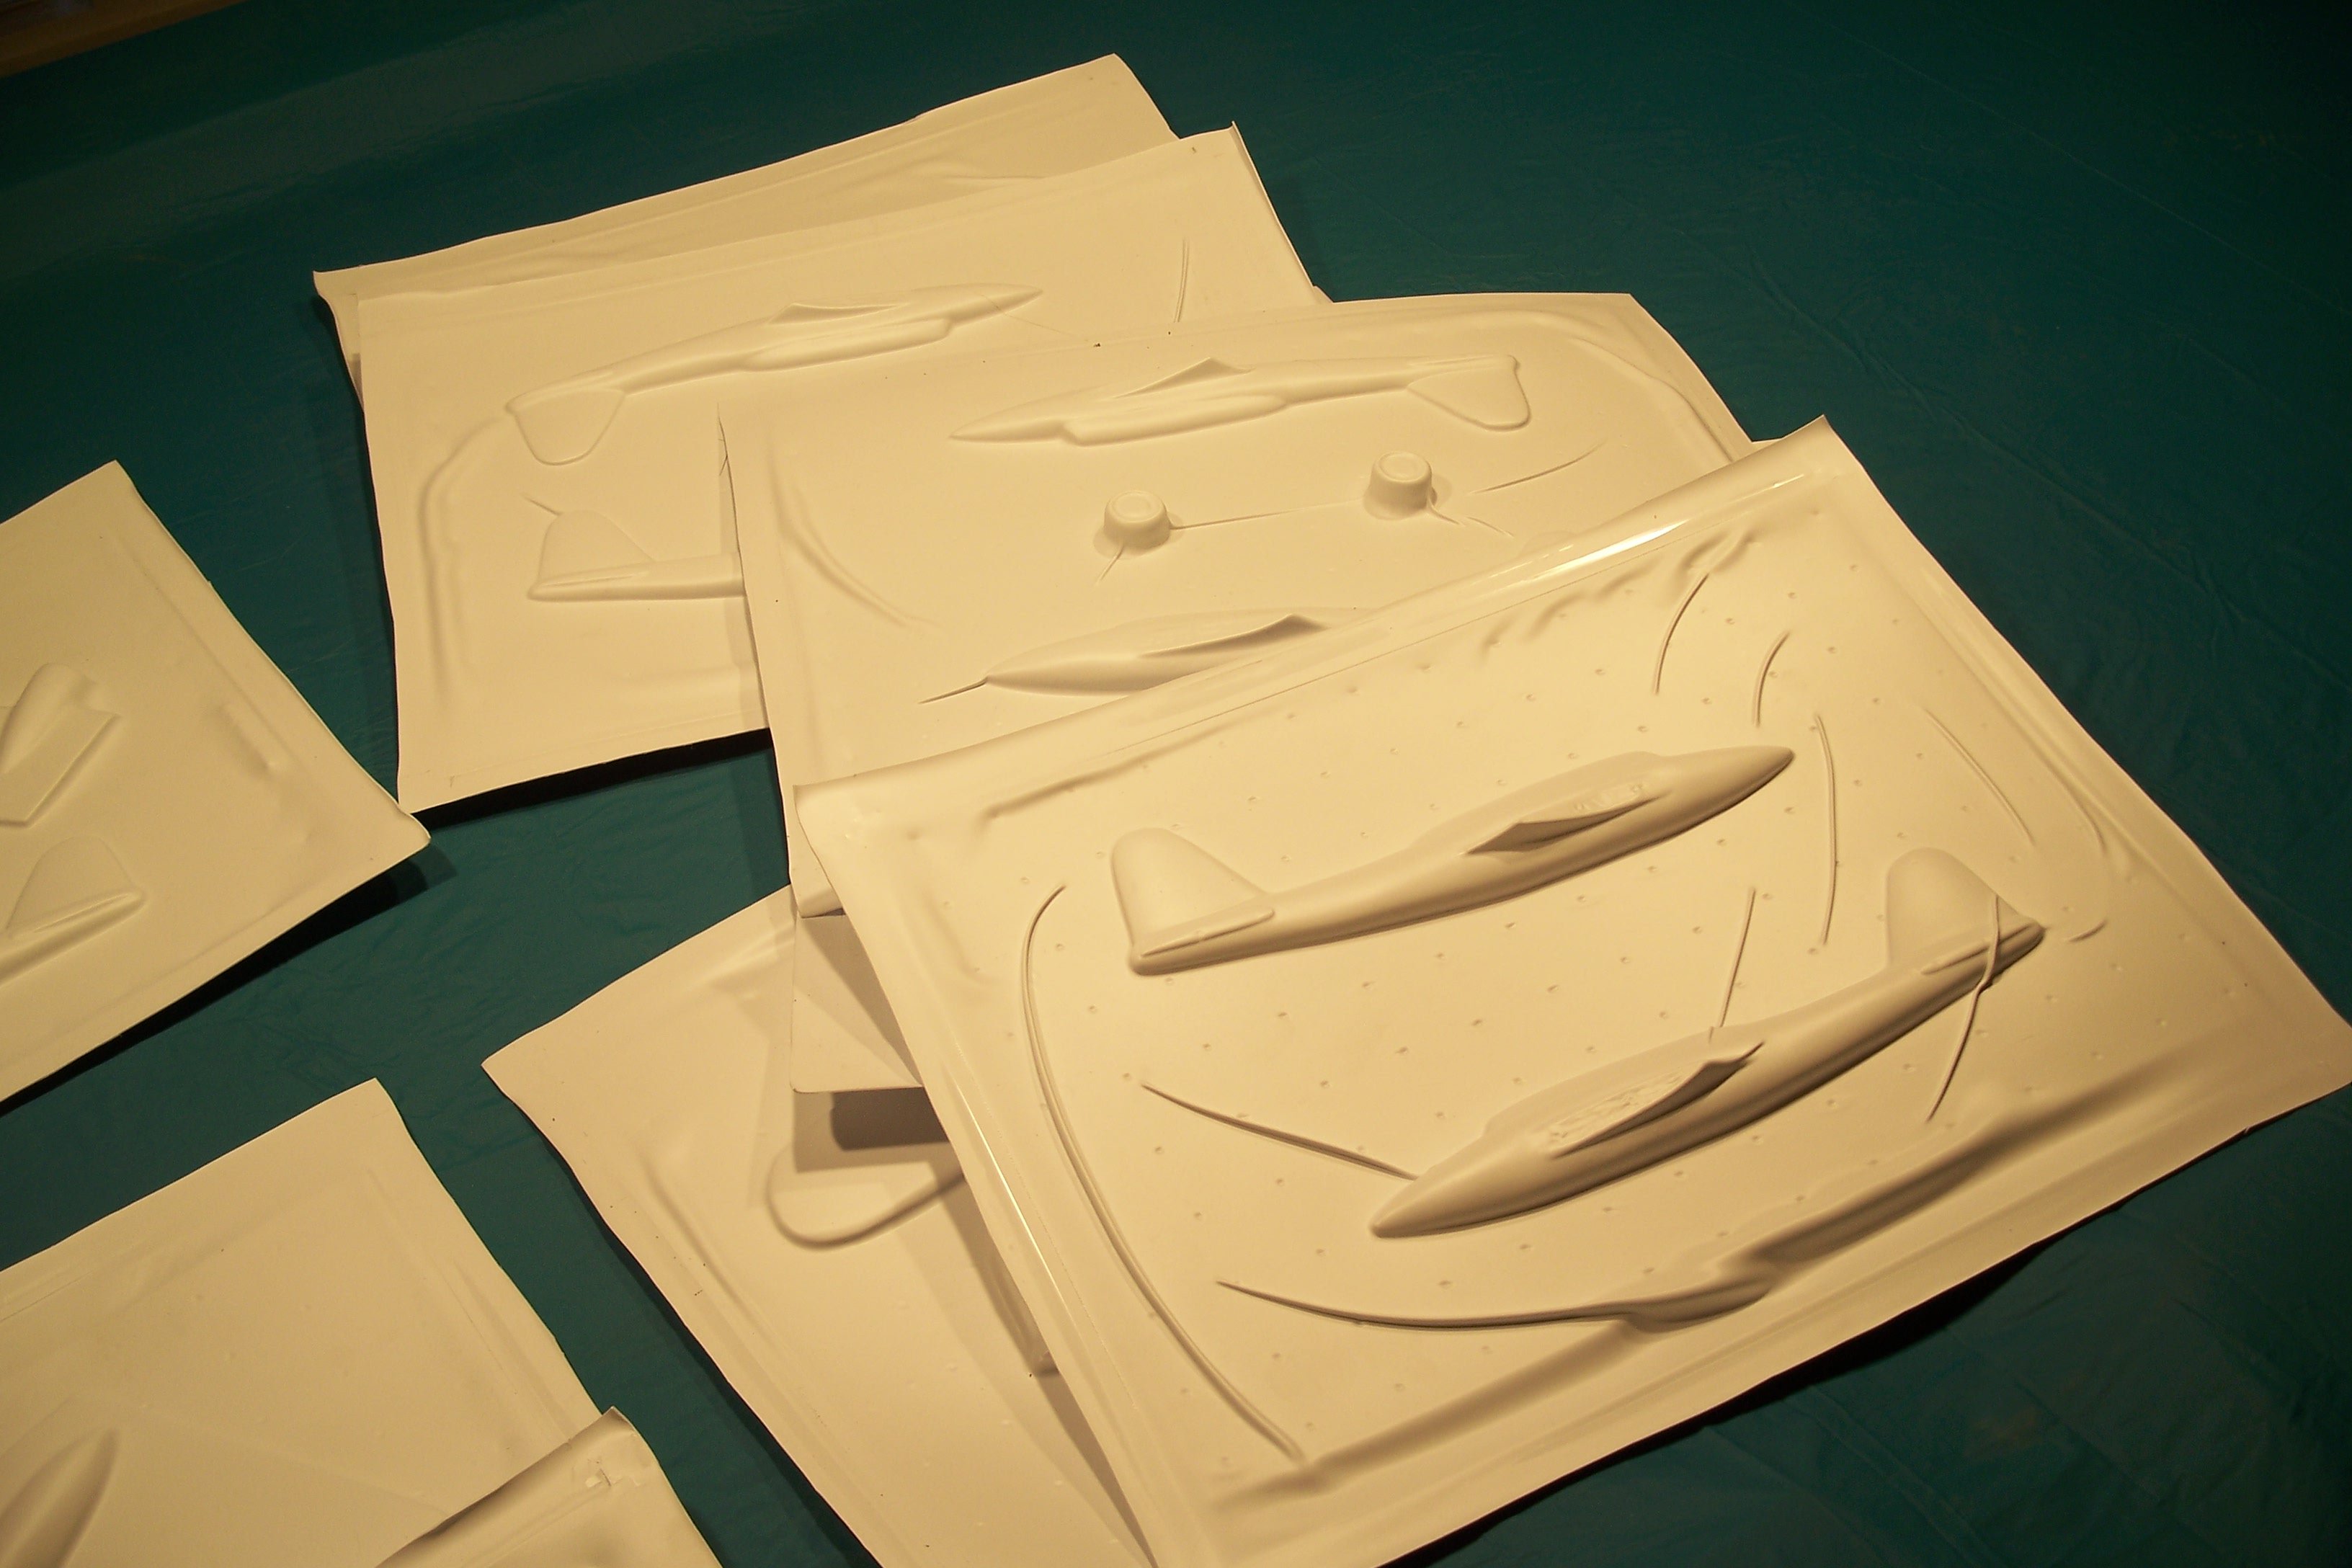
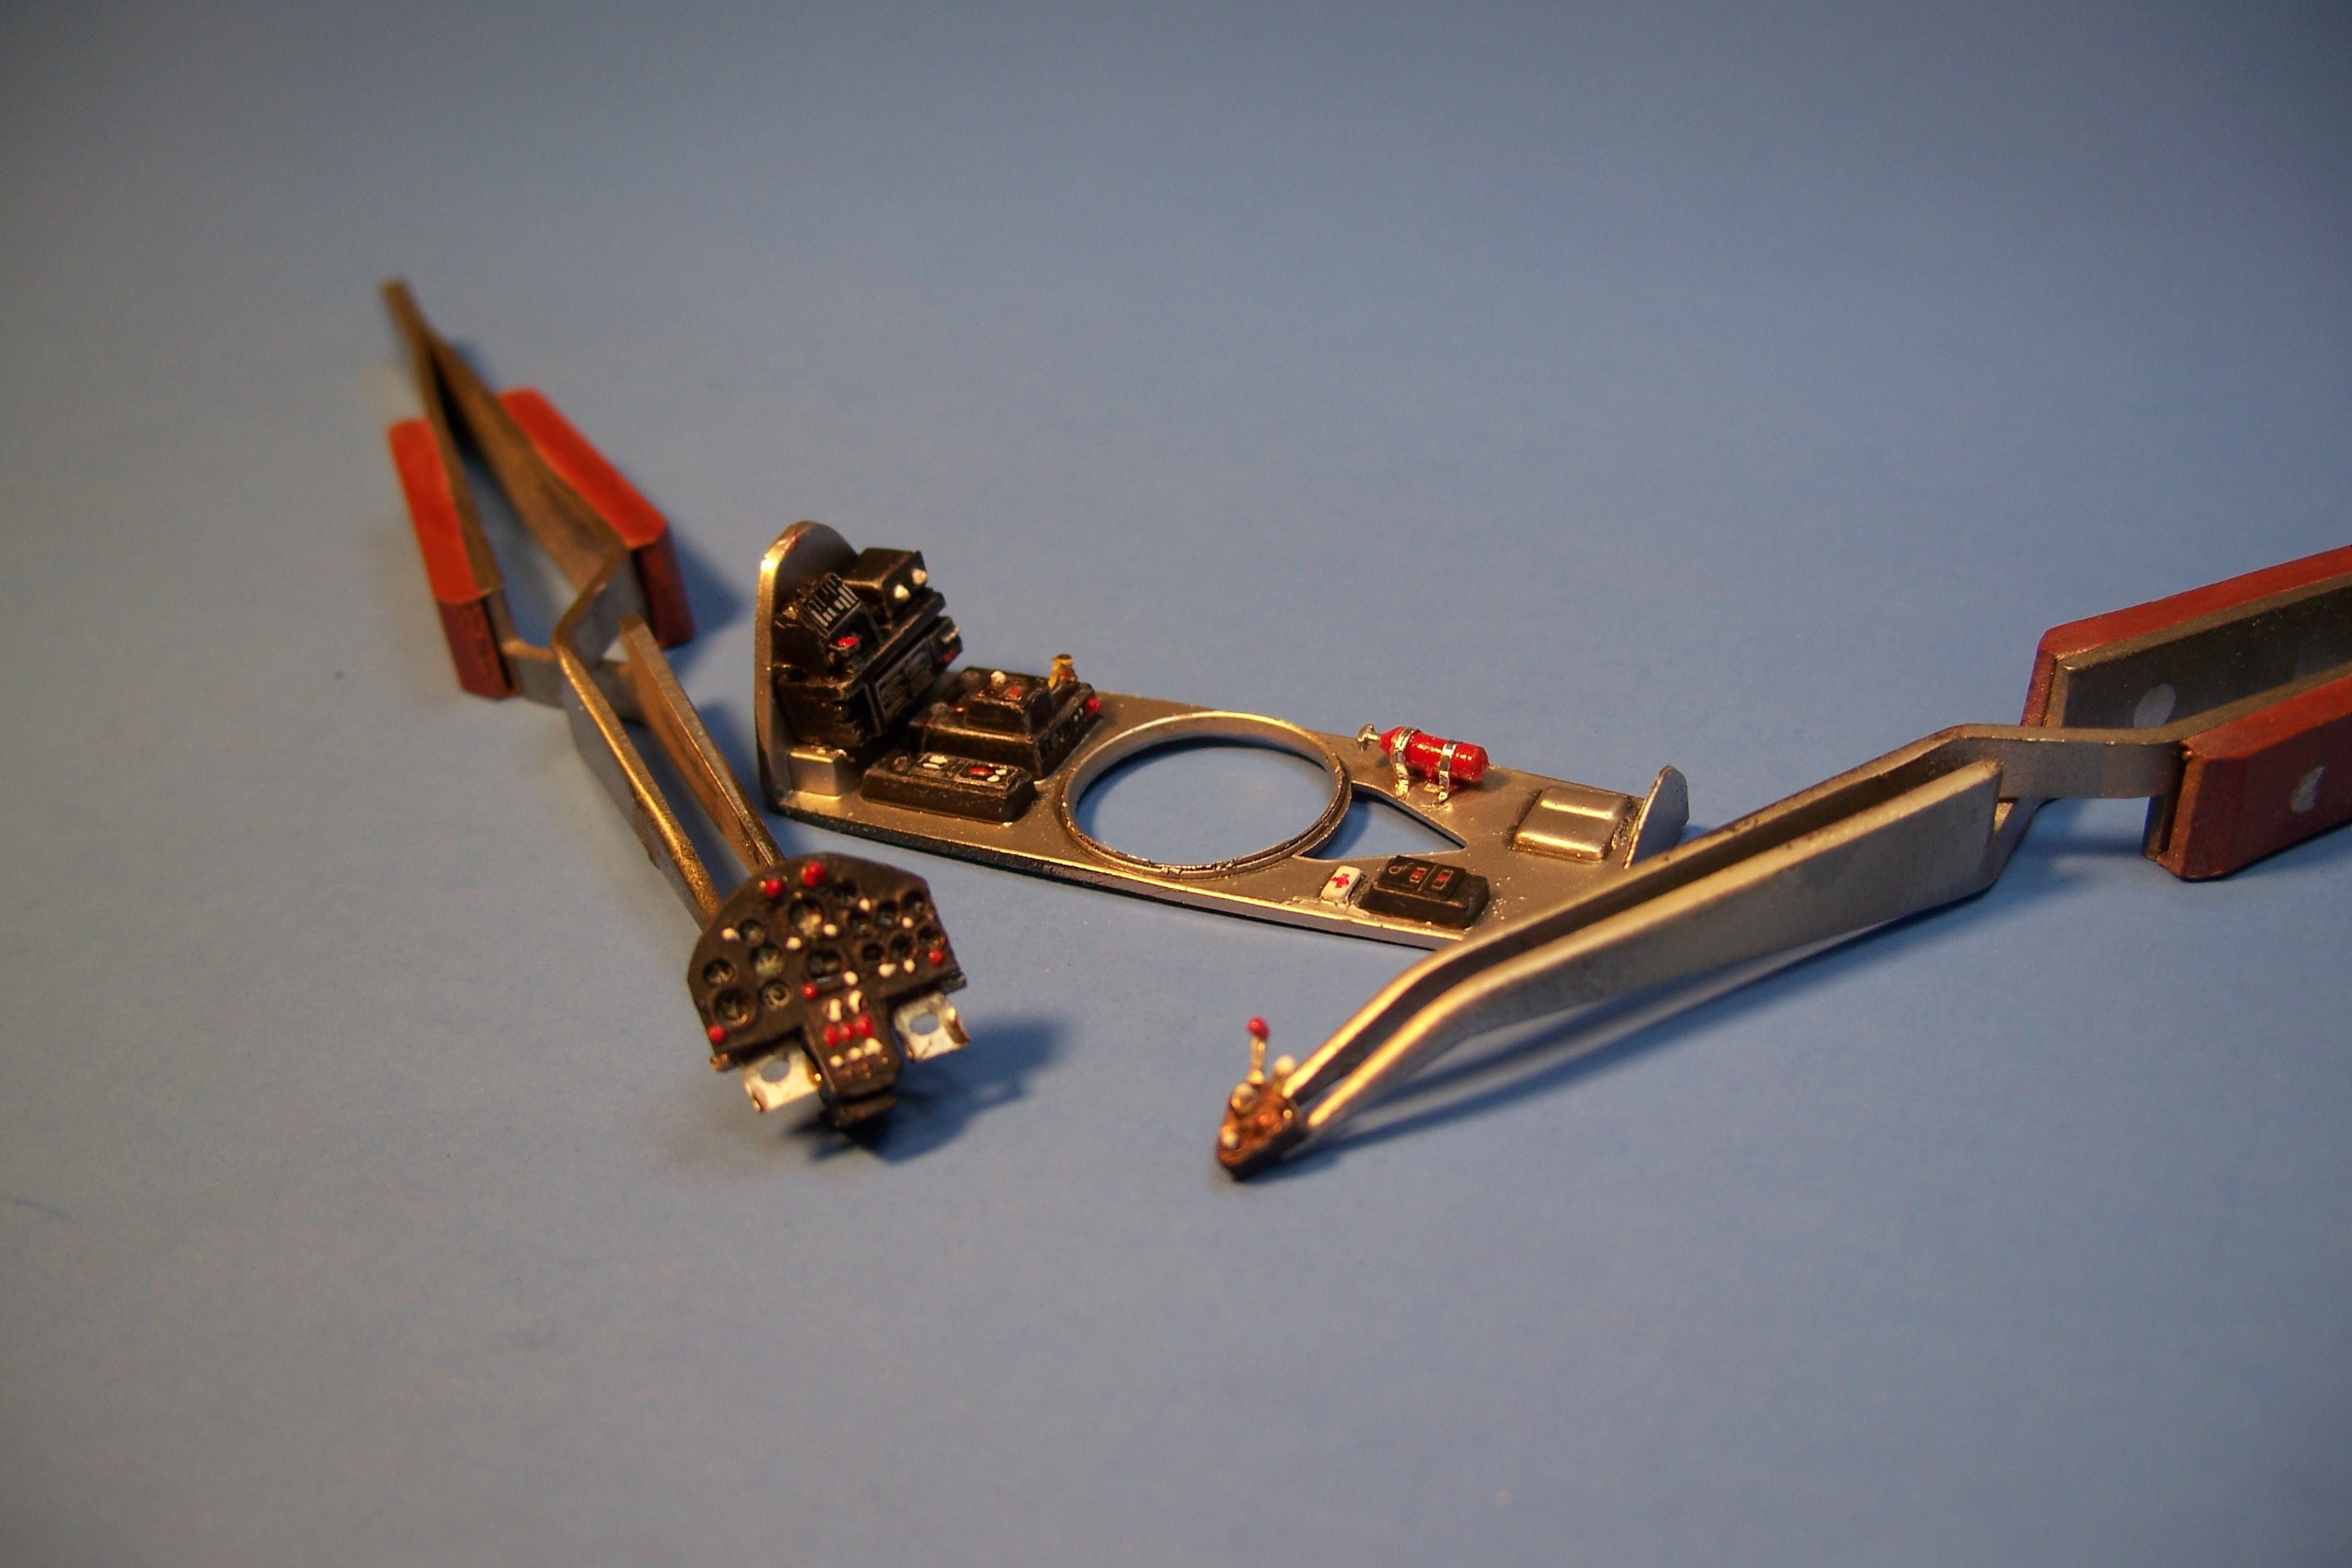
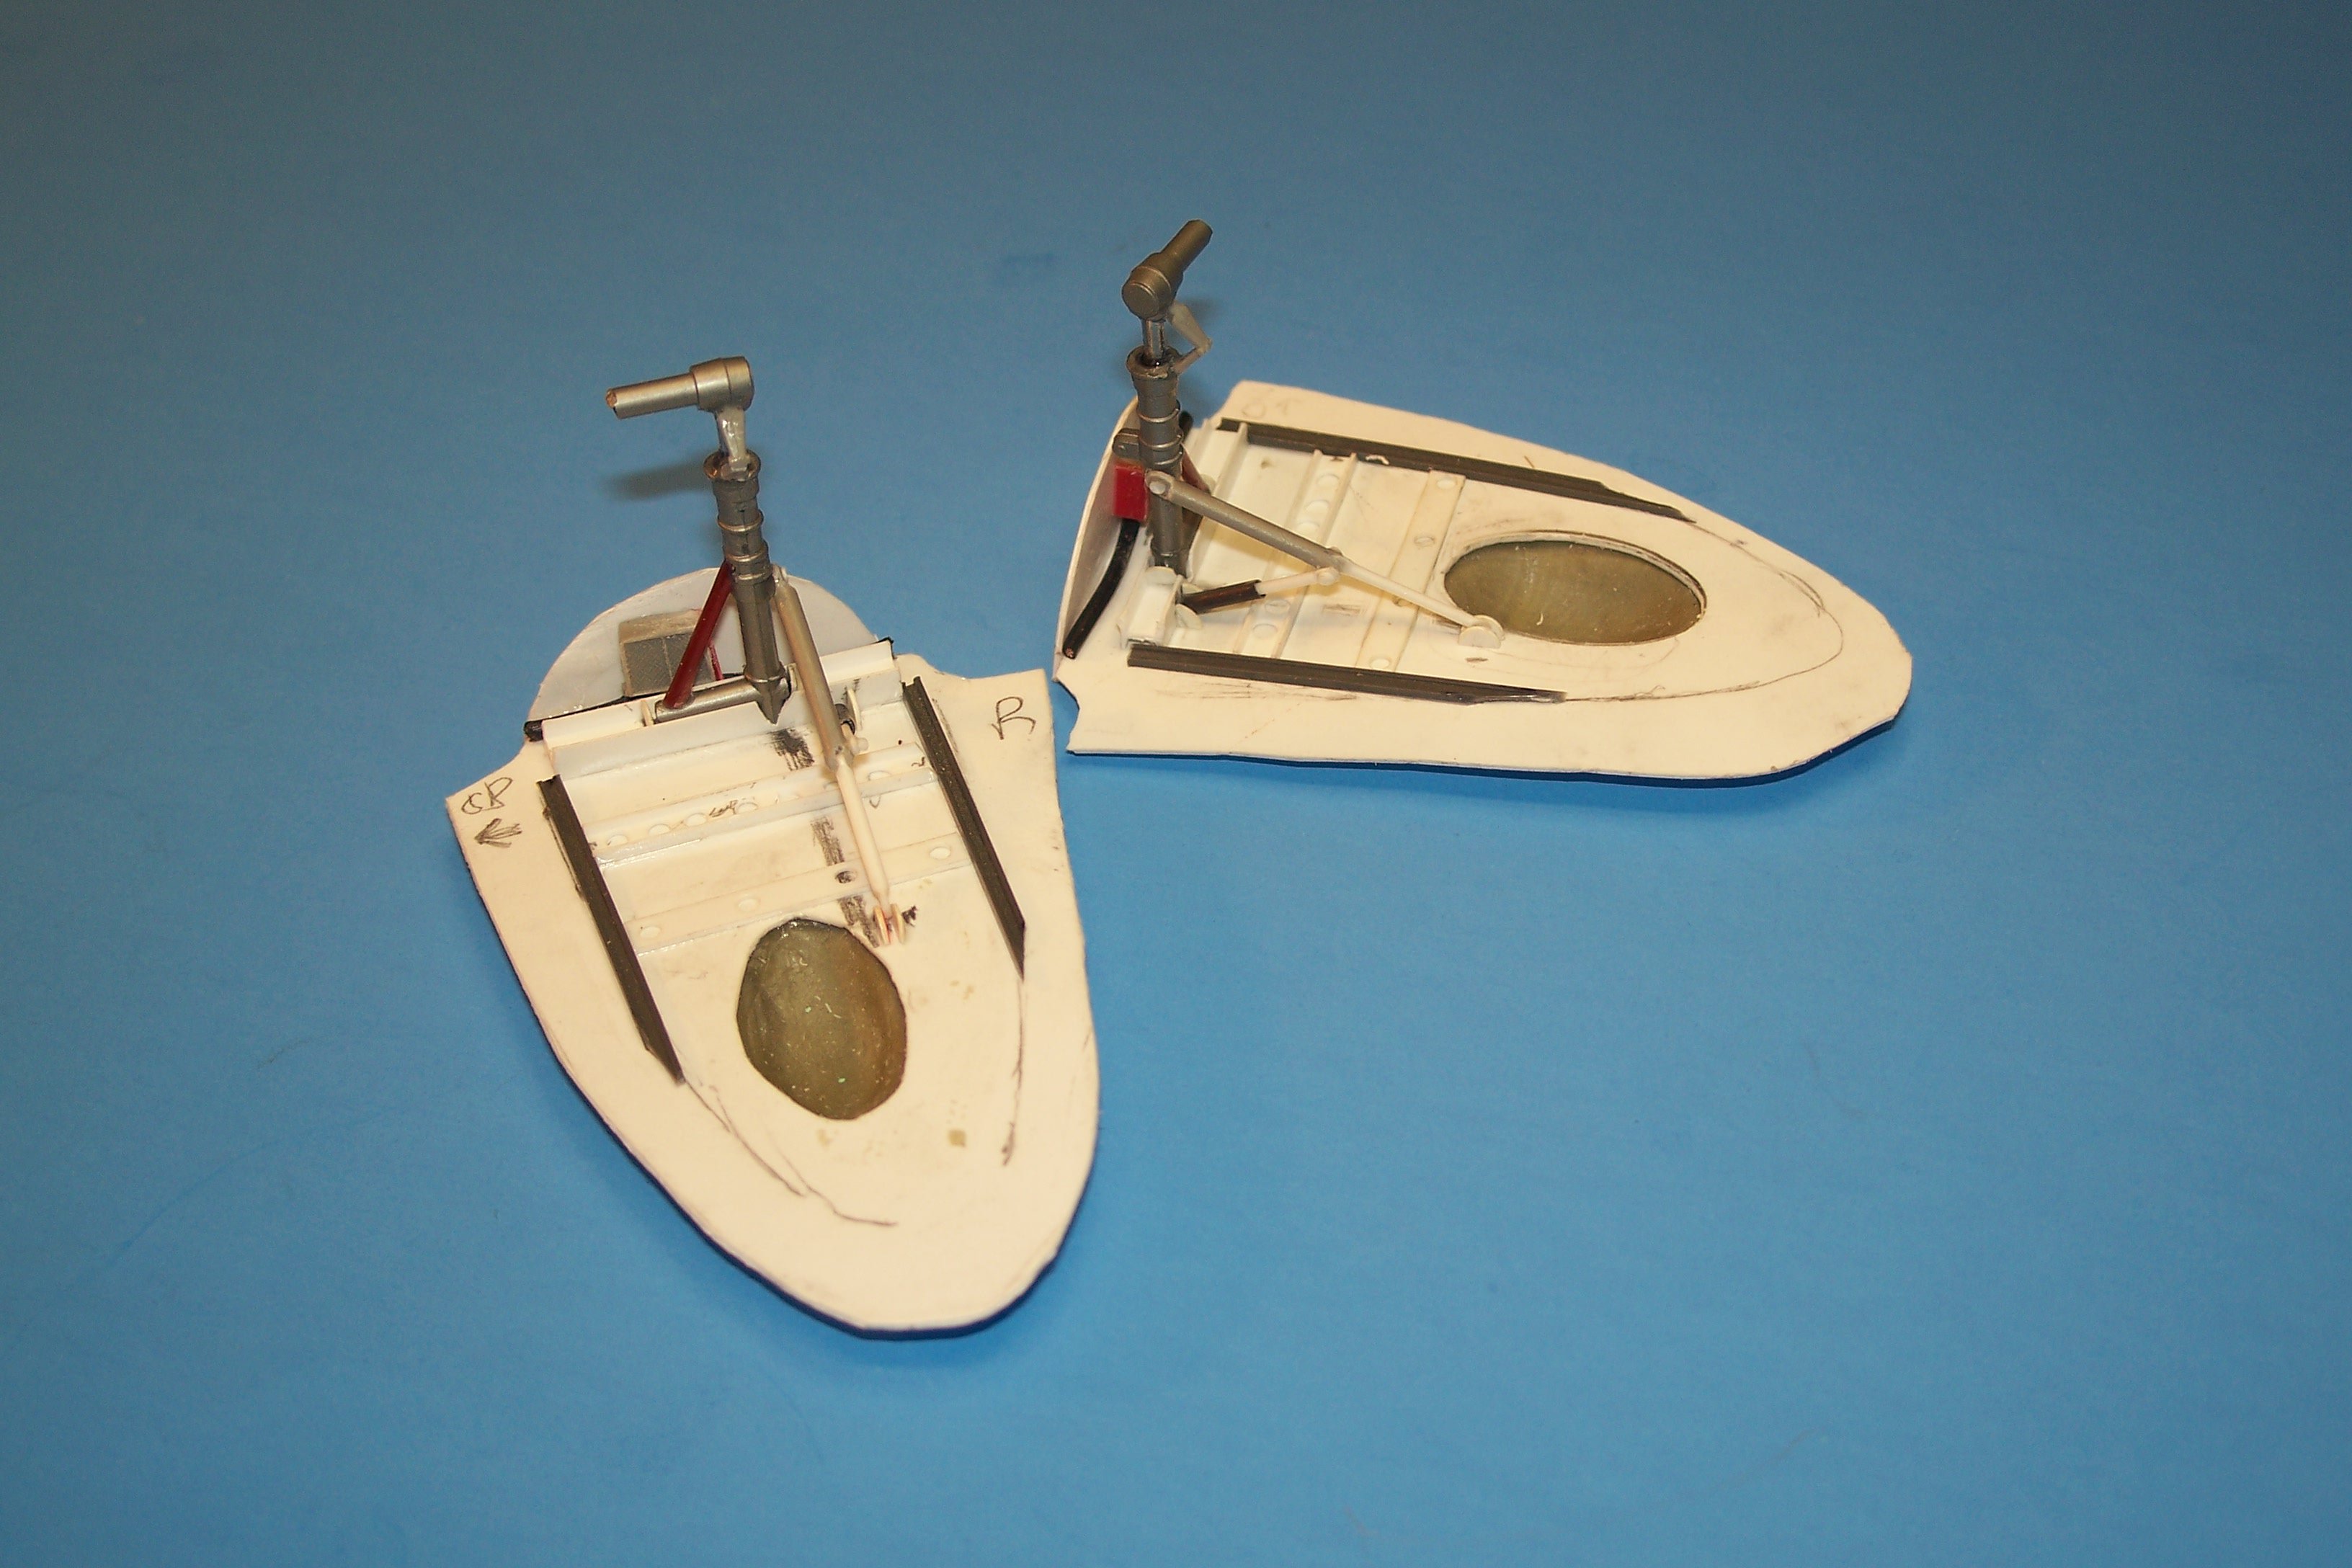
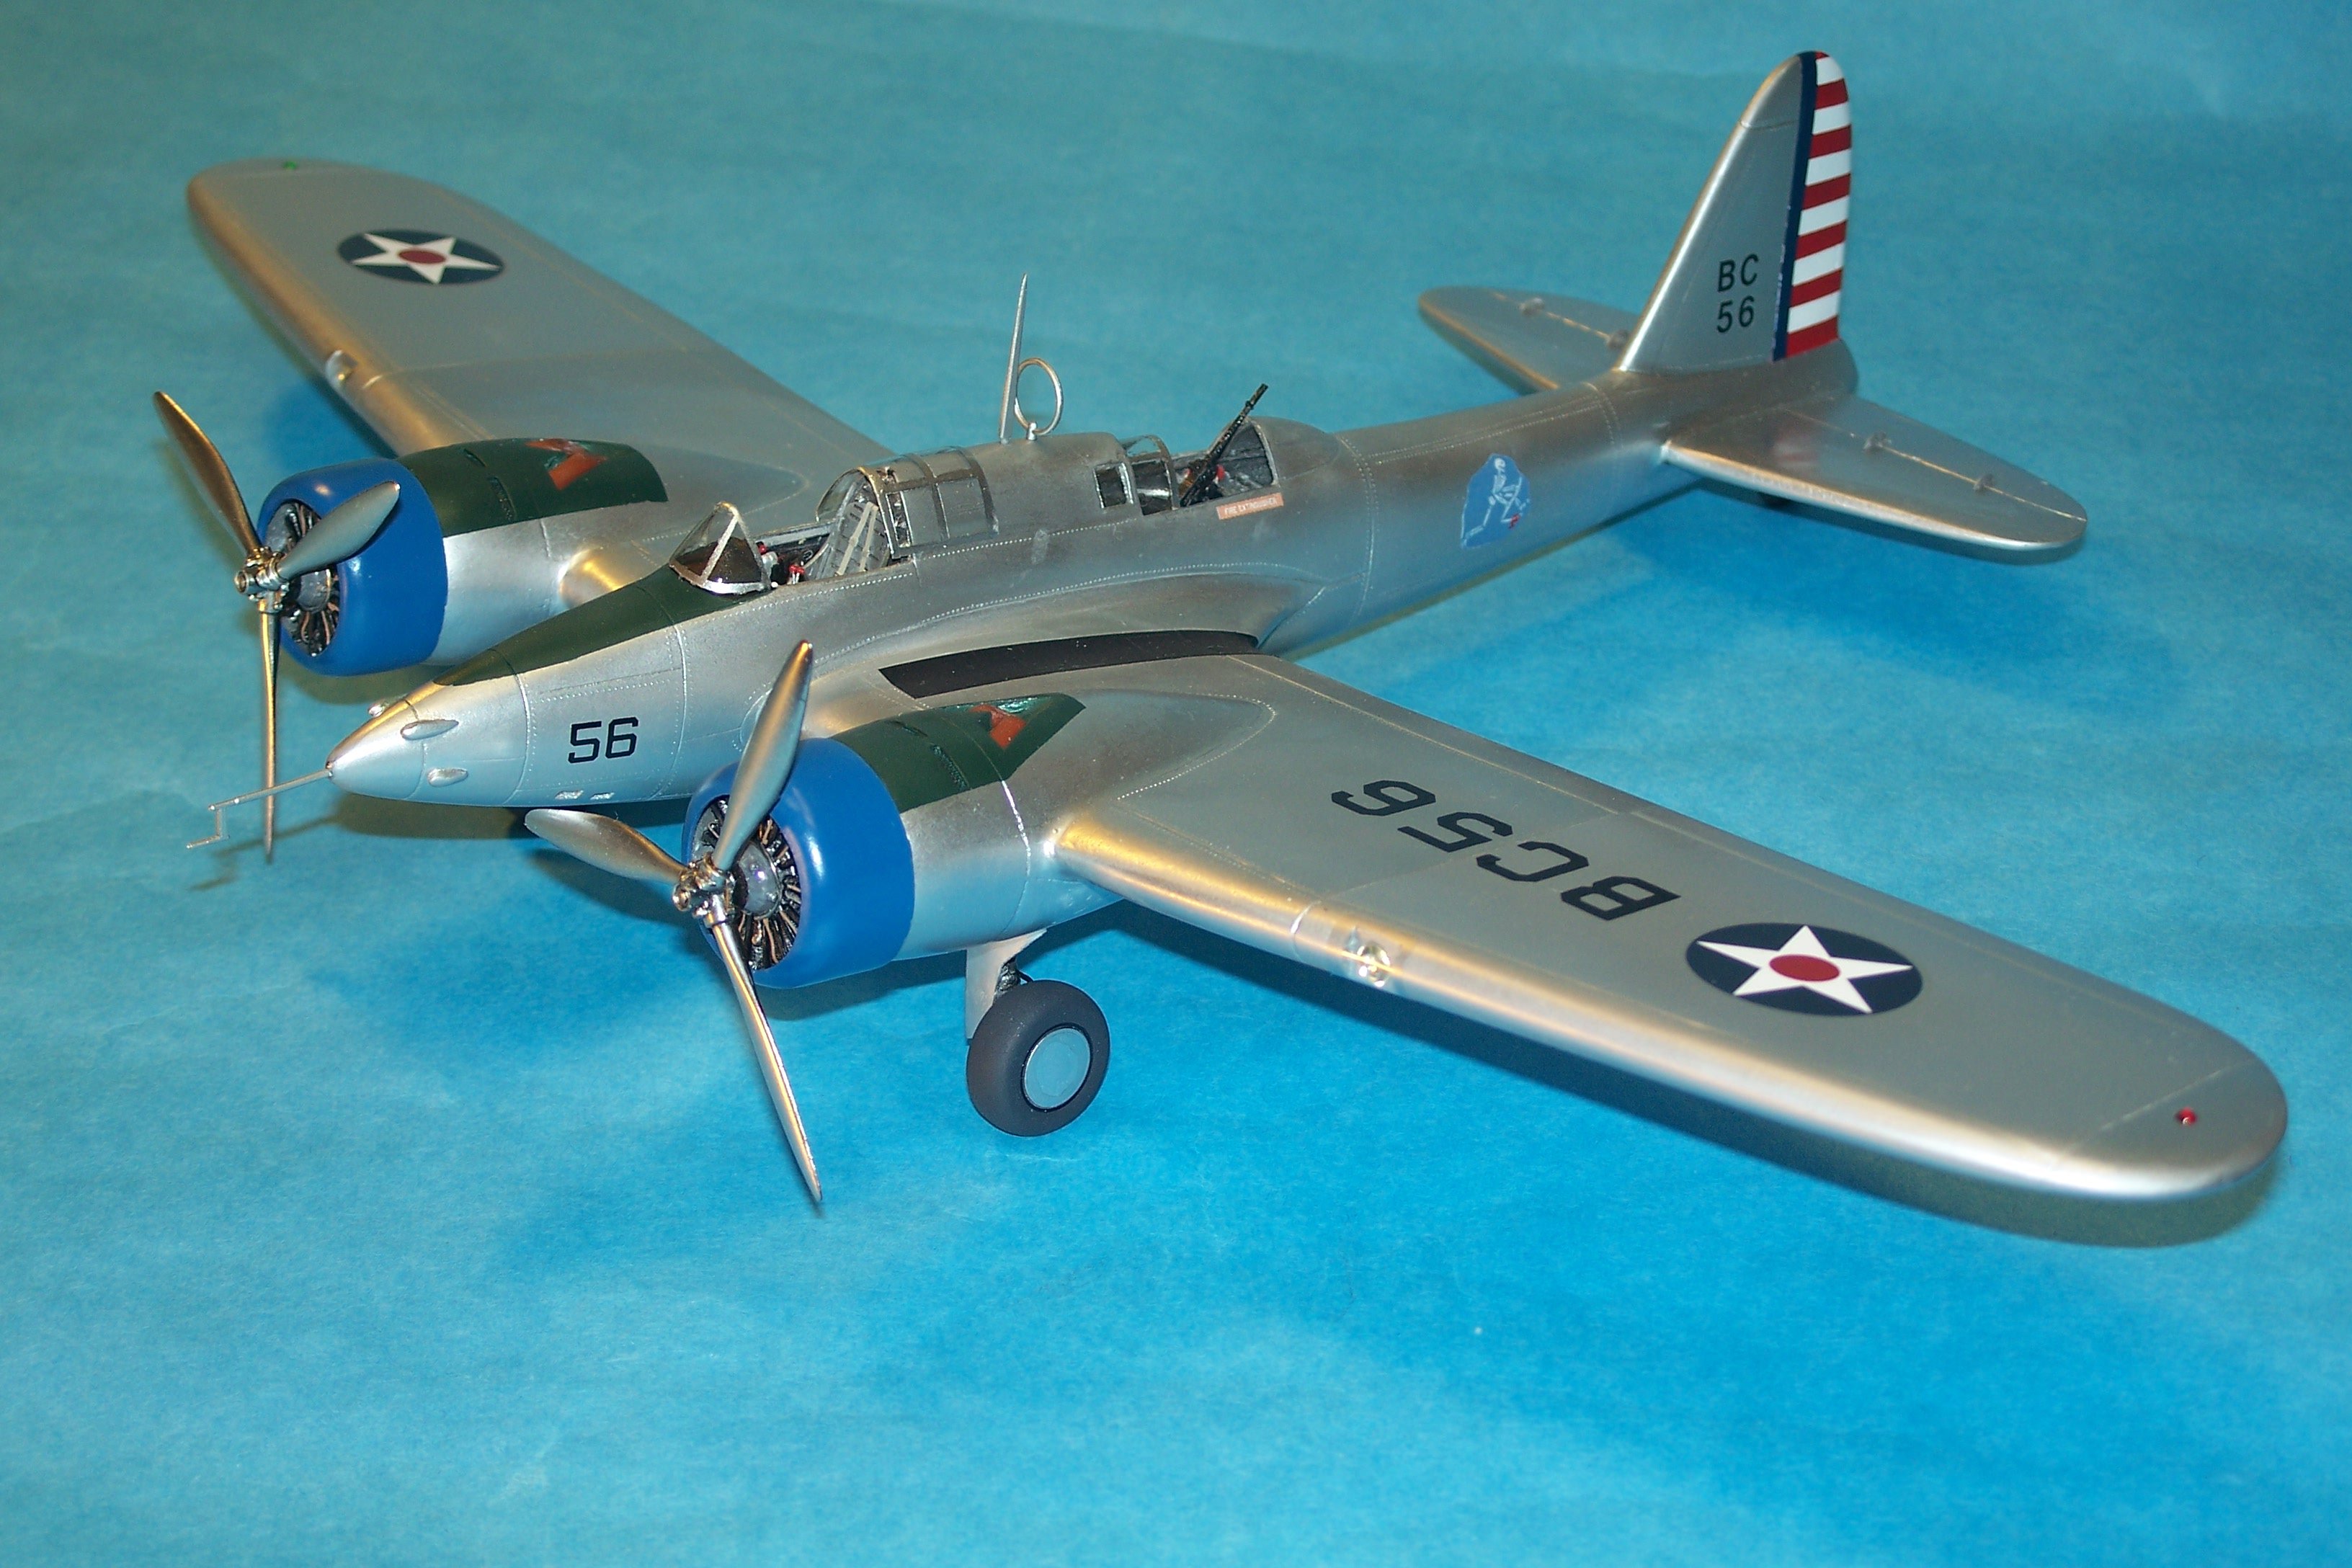
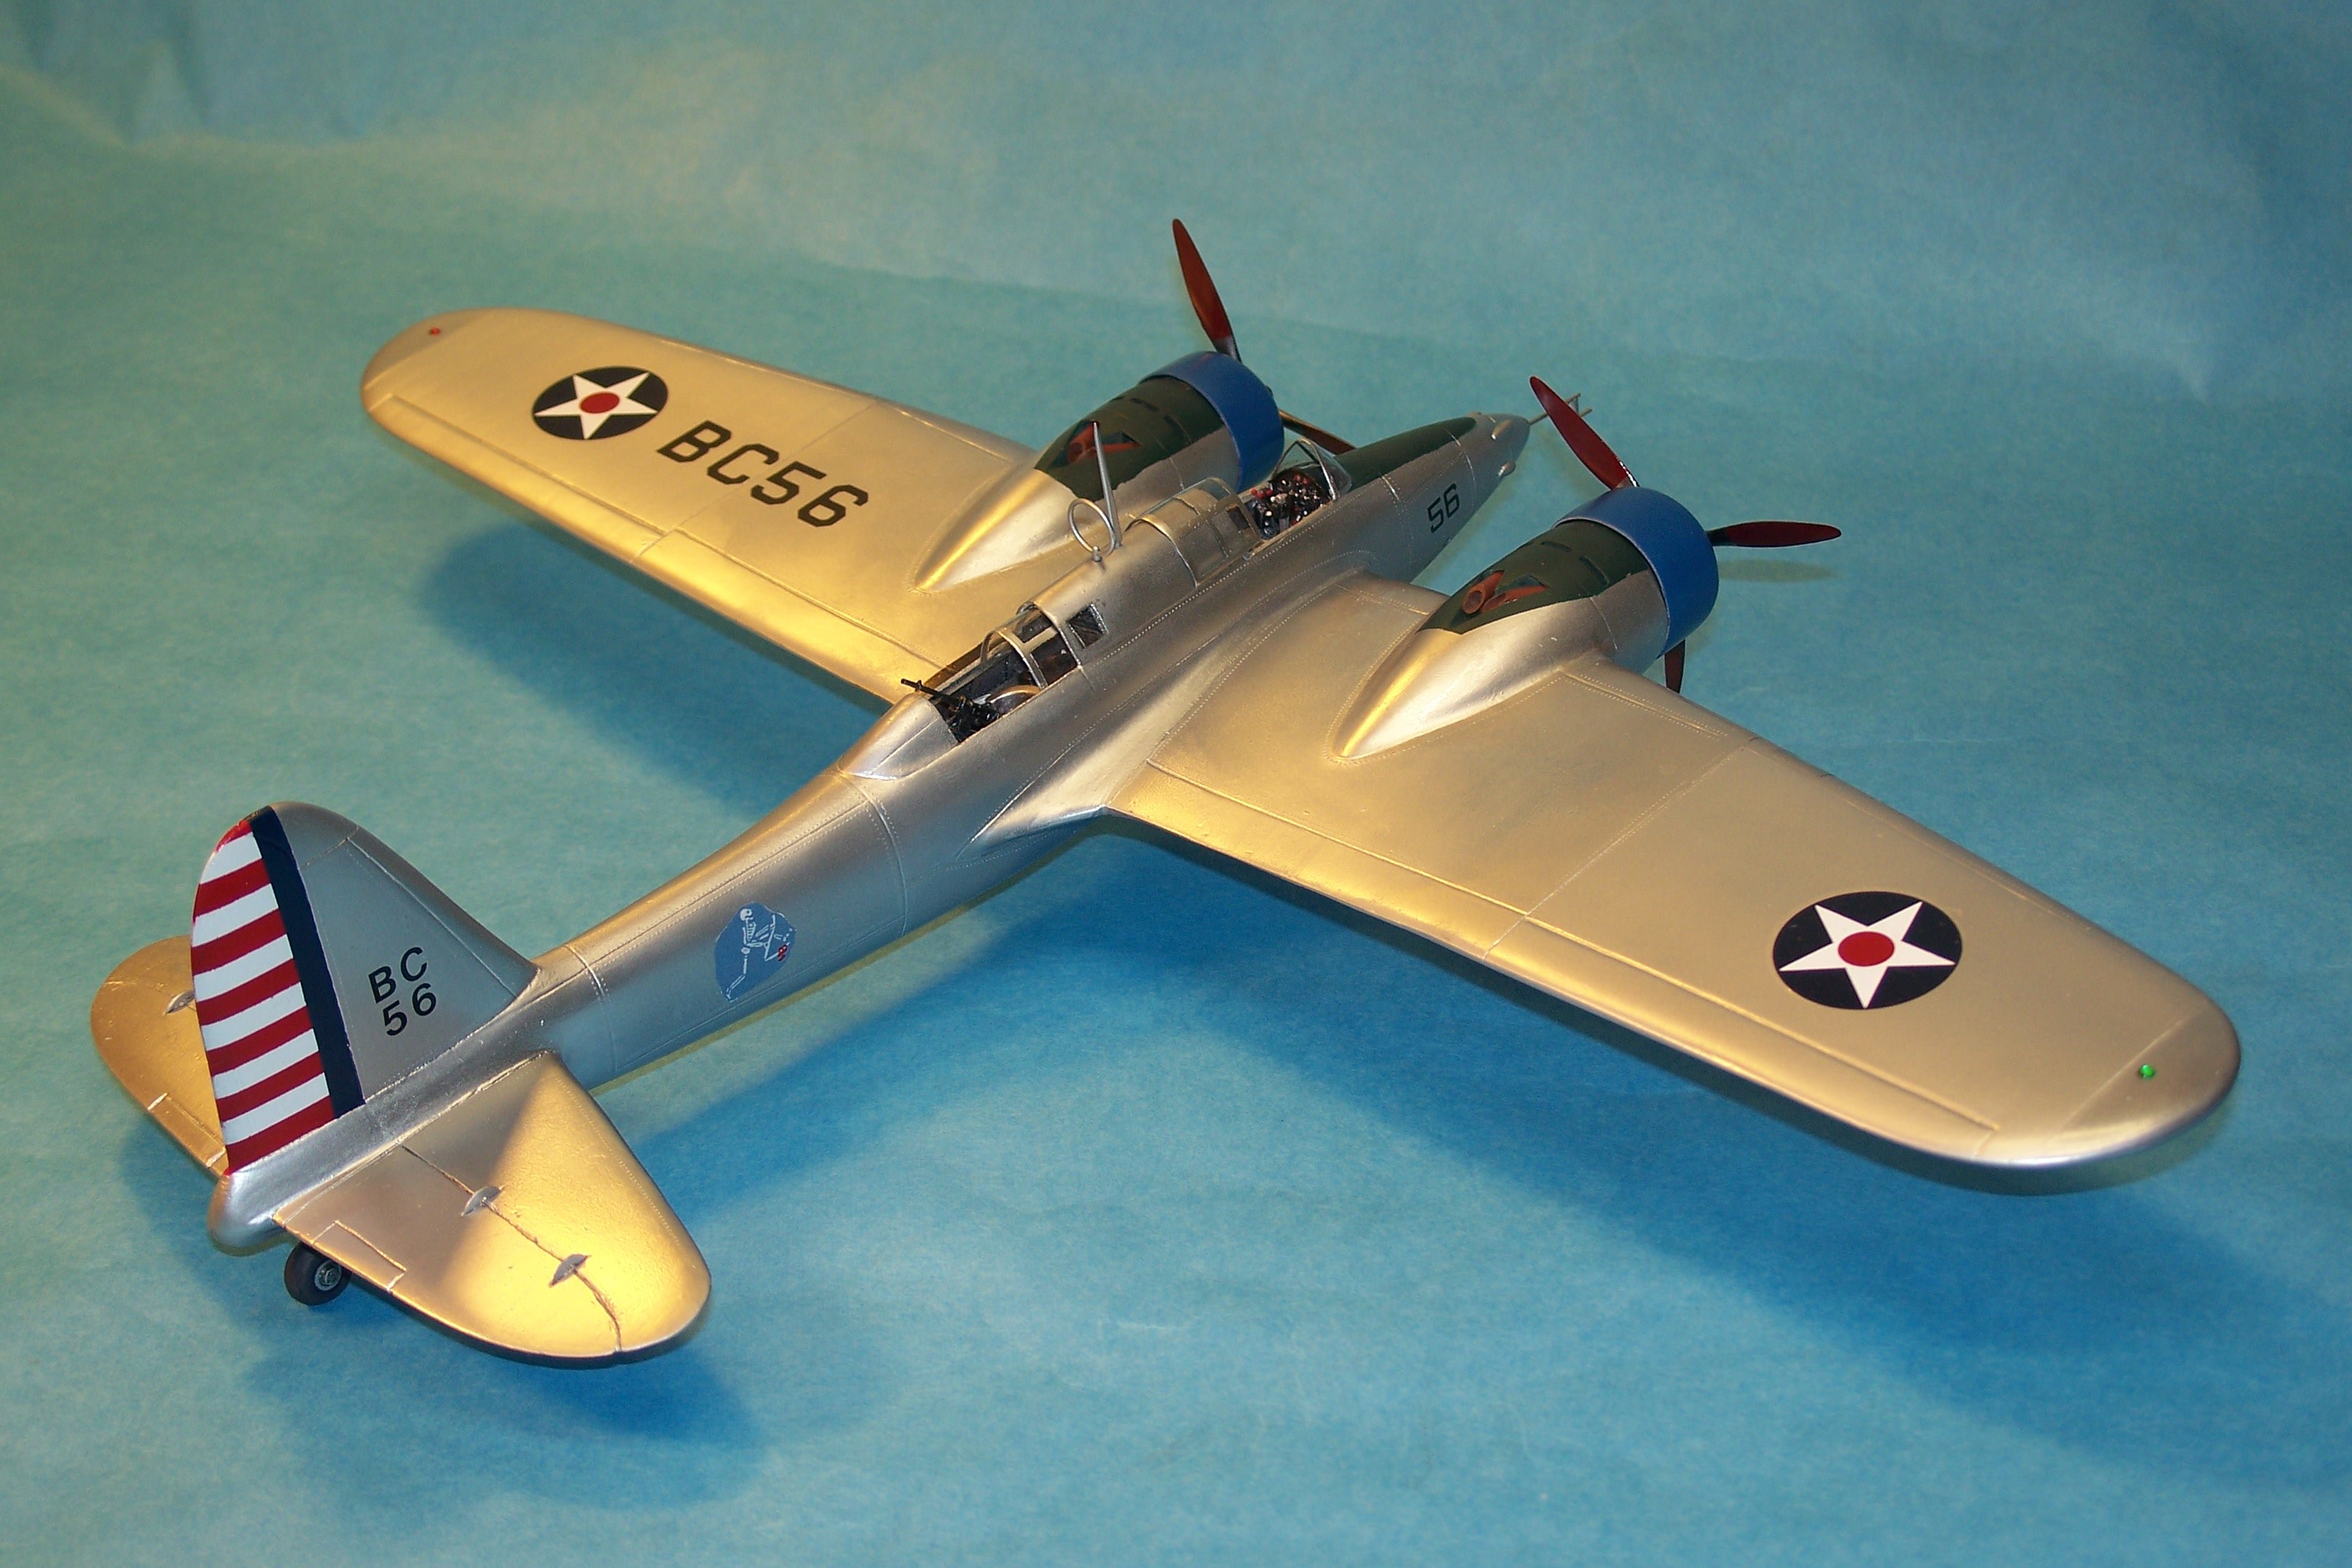
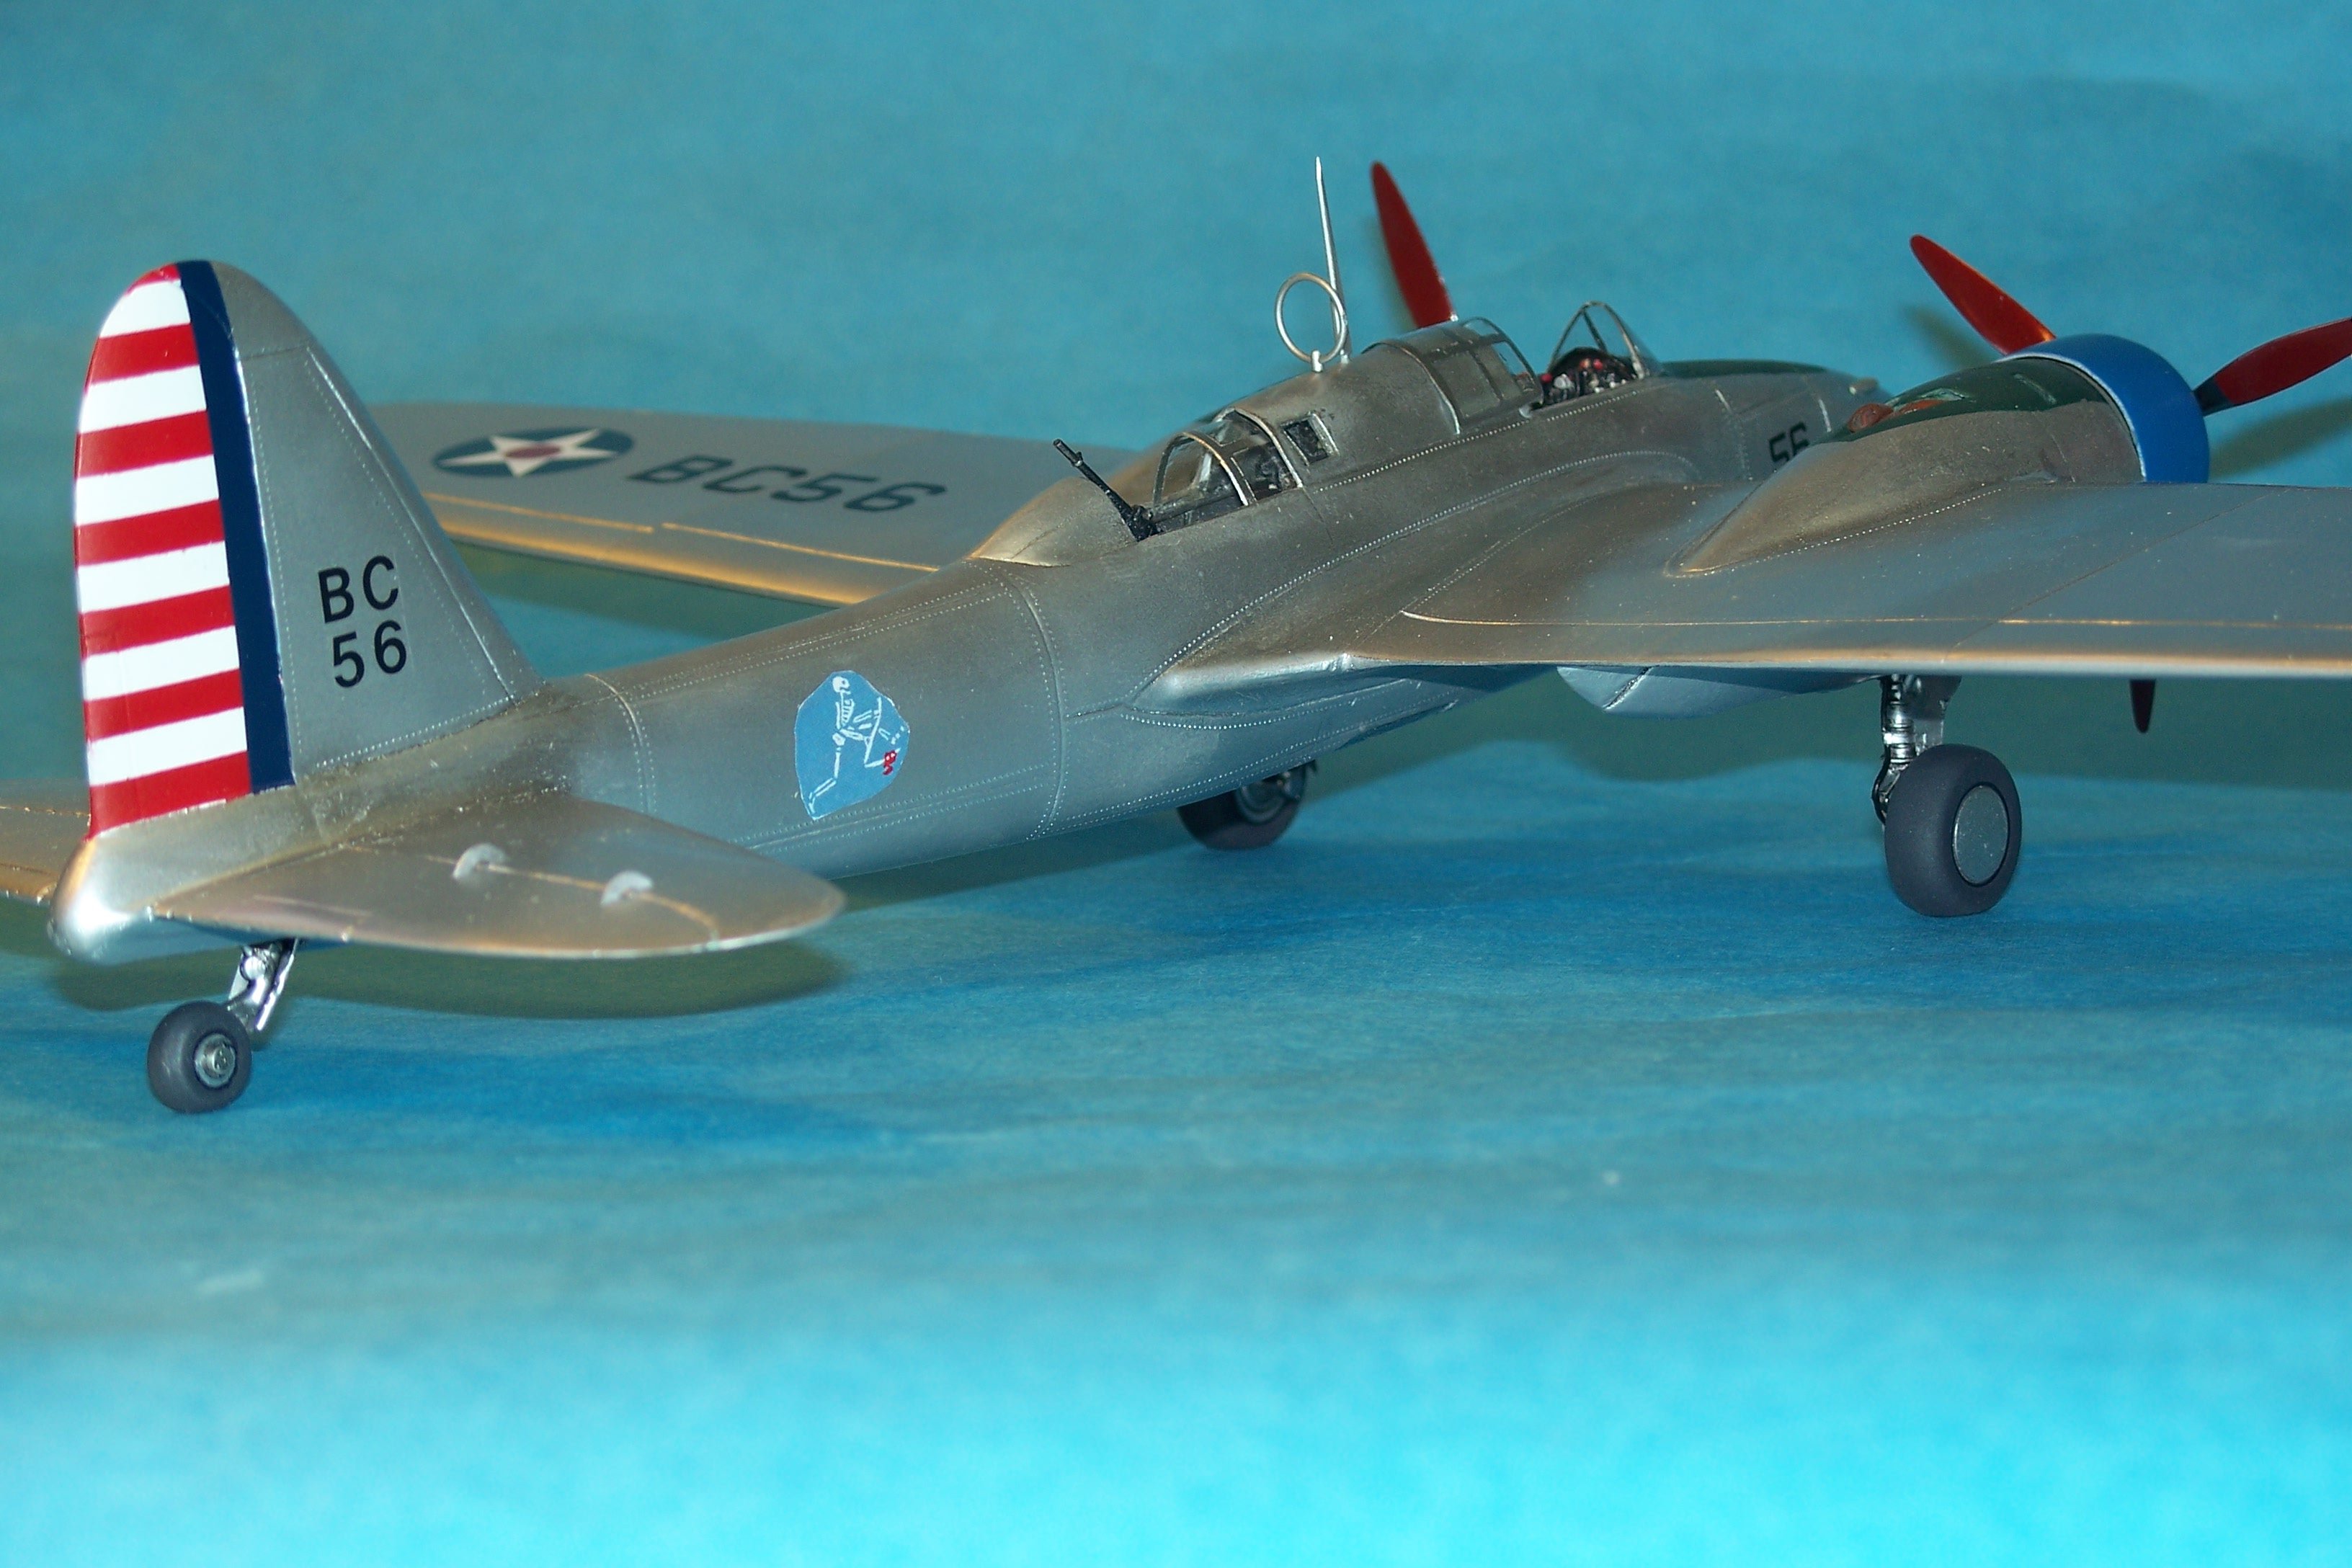
First, the most obvious question....WHY? Well, I had an itch to try my hand at a full scratchbuild, having only done heavy conversions with only portions scratchbuilt til now. Second, I love the Golden Age of aviation of the '30s and many of those planes are still not available in 1/48, even in vac or resin. So, I settled on trying to build the Curtiss A-18 Shrike II, a little known twin-engine attack planes from the mid 30s, figuring it's very unlikely to ever be produced "for" me. Only a handful were produced due to Depression era funding and the fast paced changes to aviation at that time. As advanced as it was for the time it was designed (@1935), it was already being obsolesced by the planes that would replace it a mere 2-3 yrs after it was flown in the mid-late 30s...the A-20 and B-25 , which would be capable enough to carry themselves through WWII. References are practically non existent on the A-18. I contacted the National Archives, but was unable to get anything from them, even though my sources say they have the Curtiss archive material. There are none left in the world, so getting "walk-around" pics is a no-go. What's left is about two dozen decent b/w pics, mostly in flight and on flight lines, and woefully lacking of anything truly close up. Also, true scale drawings aren't available. There are some decent simple 3-views, which I enlarged for my use. I also tracked down some flying model plans from the 30s. Although very suspect in many areas, they at least gave me a second "reference". So, once I had those "sized" to 1/48, I jumped in with both feet. Ill use this first post to show some in progress pics..... The basic plans, glued to basswood and rough cut to shape. There's a sheet of copy paper white-glued between the halves of each part to allow them to be separated after final shaping. Much of the final shaping is done. Note the use of epoxy putty (Apoxysculpt) for the wing root filets. It was also used to make the engine nacelles for each wing. Basic parts after separating and priming. The tailplanes were actually cast in resin, another first for me. The cowl mold was made from the end of a large dowel rod. The basic vacuform parts, shot on a machine I borrowed from a friend. I bought an 4'x8' sheet of .03 styrene, cut it into about 18"x24" sections (to fit the machine I had) and vacked as many copies as I could. Note that not all of the parts on each sheet are usable (about 50% waste) Now it's like building any other vacuform model....only cruder! This project gave me a REAL appreciation for the vac Masters like you get with Koster.... Interior parts....I robbed the spare parts boxes whenever possible, but had to scratchbuild some things like the main panel and throttle quad. With no references, I simply built up the interiors to be "period authentic". I make no claims to "accuracy"! The fuselage finally assembled and scribed Main gear well floors with the depressions for the retracted tire (semi exposed as on the B-17). This also shows the main gear, detailed with various bits of rod and punched discs. Some of the fiddly bits....the props are from the spares box, as are the various antennas and the pitot. You can see how the vacked gear doors attach to the gear, which also now have their brake lines. The R-1820 engines are resin items, detailed with some wiring. Here's a rough check of the fit of the engines, cowls, props, and landing gear to see how (and IF) it'll all look when assembled. Now, on to the finished model pics! Gil
 1 point
 -
I did google it. Every Cougar between ‘71 and ‘76 look the same to me! Regards, Nick Filippone1 point
-
And here's how it looks when done.....seems the site is limiting how many I can post now... This model represents an A-18 Shrike II of the 13th Attack Squadron @1937.... Question, comments, and critiques welcome! Gil
1 point