Leaderboard


Popular Content
Showing content with the highest reputation on 07/01/2019 in all areas
-
This was a bust I found on one of the announcement pages on FB. It's by Grimm. I tried looking for his info for this write up, but after an hr., I could find it. If I do I will make an edit and add it. The kit is one piece sculpt, very well done, in a gray resin - no bubbles, or seam marks. The figured reminded me of one of the villains in a Scooby-Doo cartoon, so decided to make him a ghost. Started with the black primer, and then was working on his navy colored coat. Then added a dark gray drybrush to the face, then added color to the barnicles, seeweed, and sweater. Another lighter gray - I want to make the glow coming from his face and OCL lighting on parts of the beard and coat. A little highlight to the coat and cap. I thought I took a pic of the ghostly glow, but didn't. The bluish,green glow color was made by drybrushing Citadel's Nihilakh Oxide where I needed it. I then highlighted that with V's Foundation White. I touch the Nihilakh Oxide and White to the rips in his coat to make it look like glow was coming out of them, and for a little added color. Thanks for looking.1 point
-
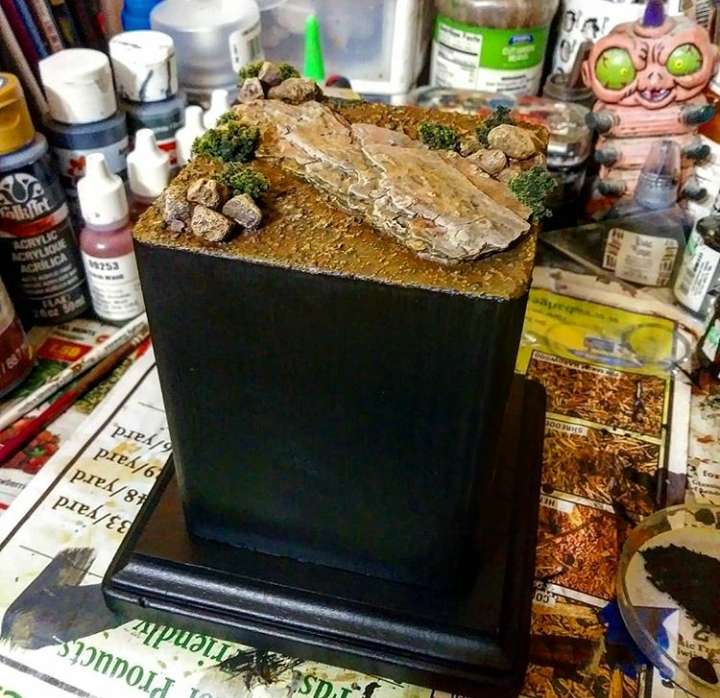
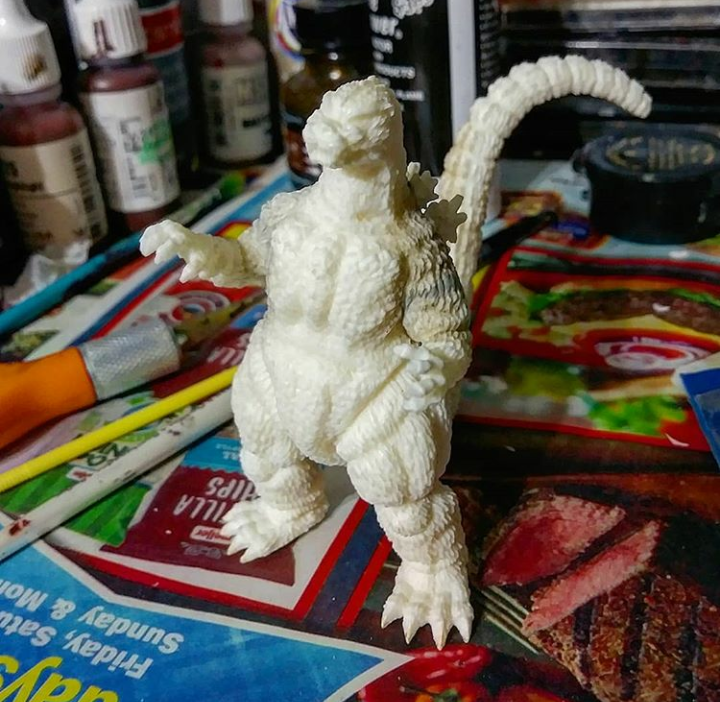
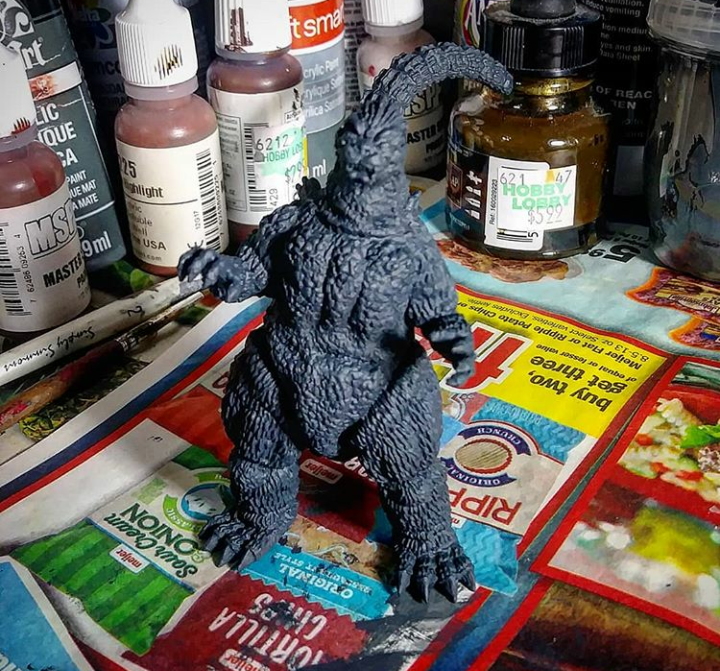
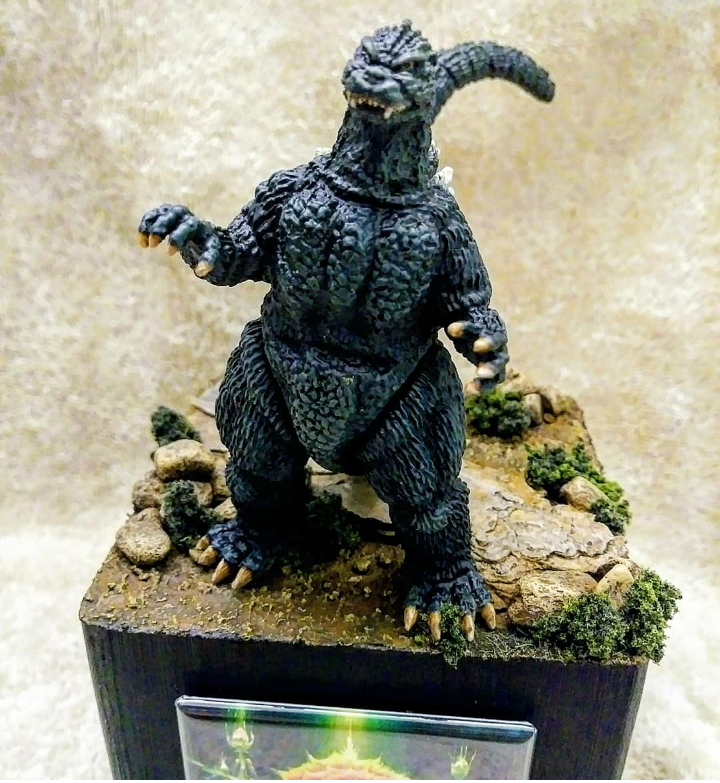
Here's a tiny resin kit from TD Cast. This was a 2015 Wonder Festival exclusive. Included a couple w.I.p. pics this time around. Once again hand finished in acrylics and artist inks with a scratch built base. Thanks for looking!
 1 point
 -
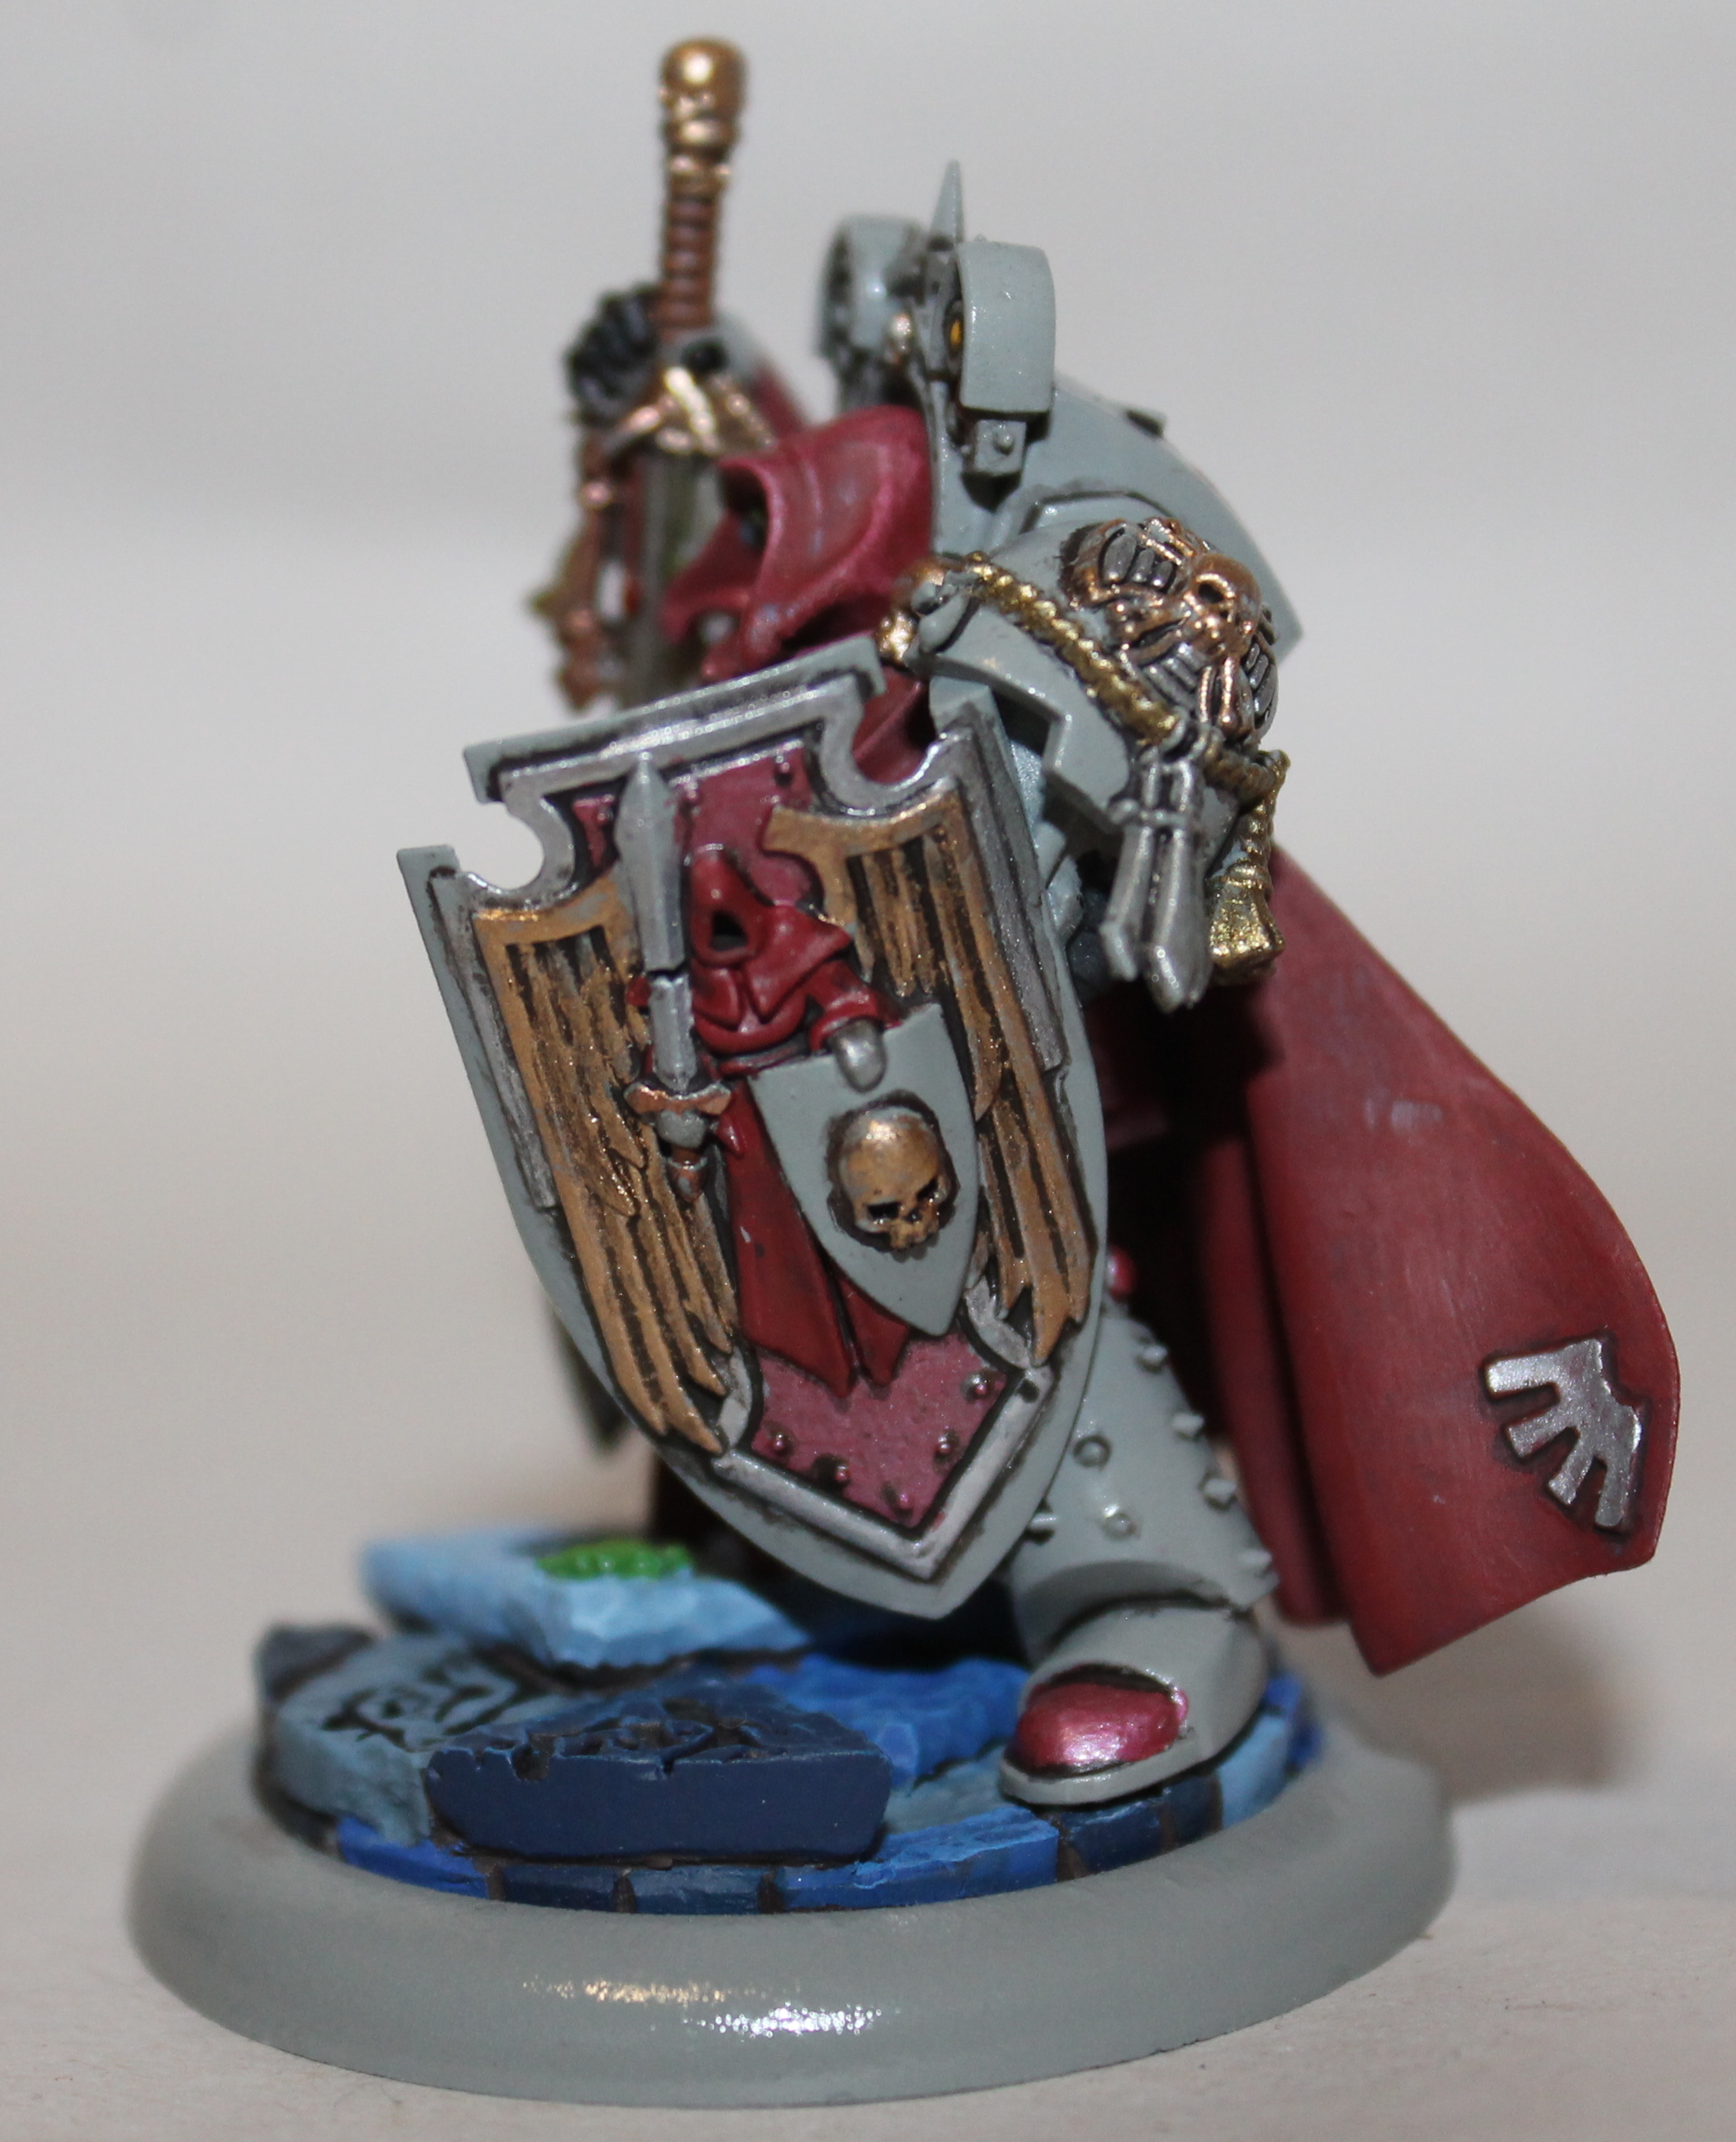
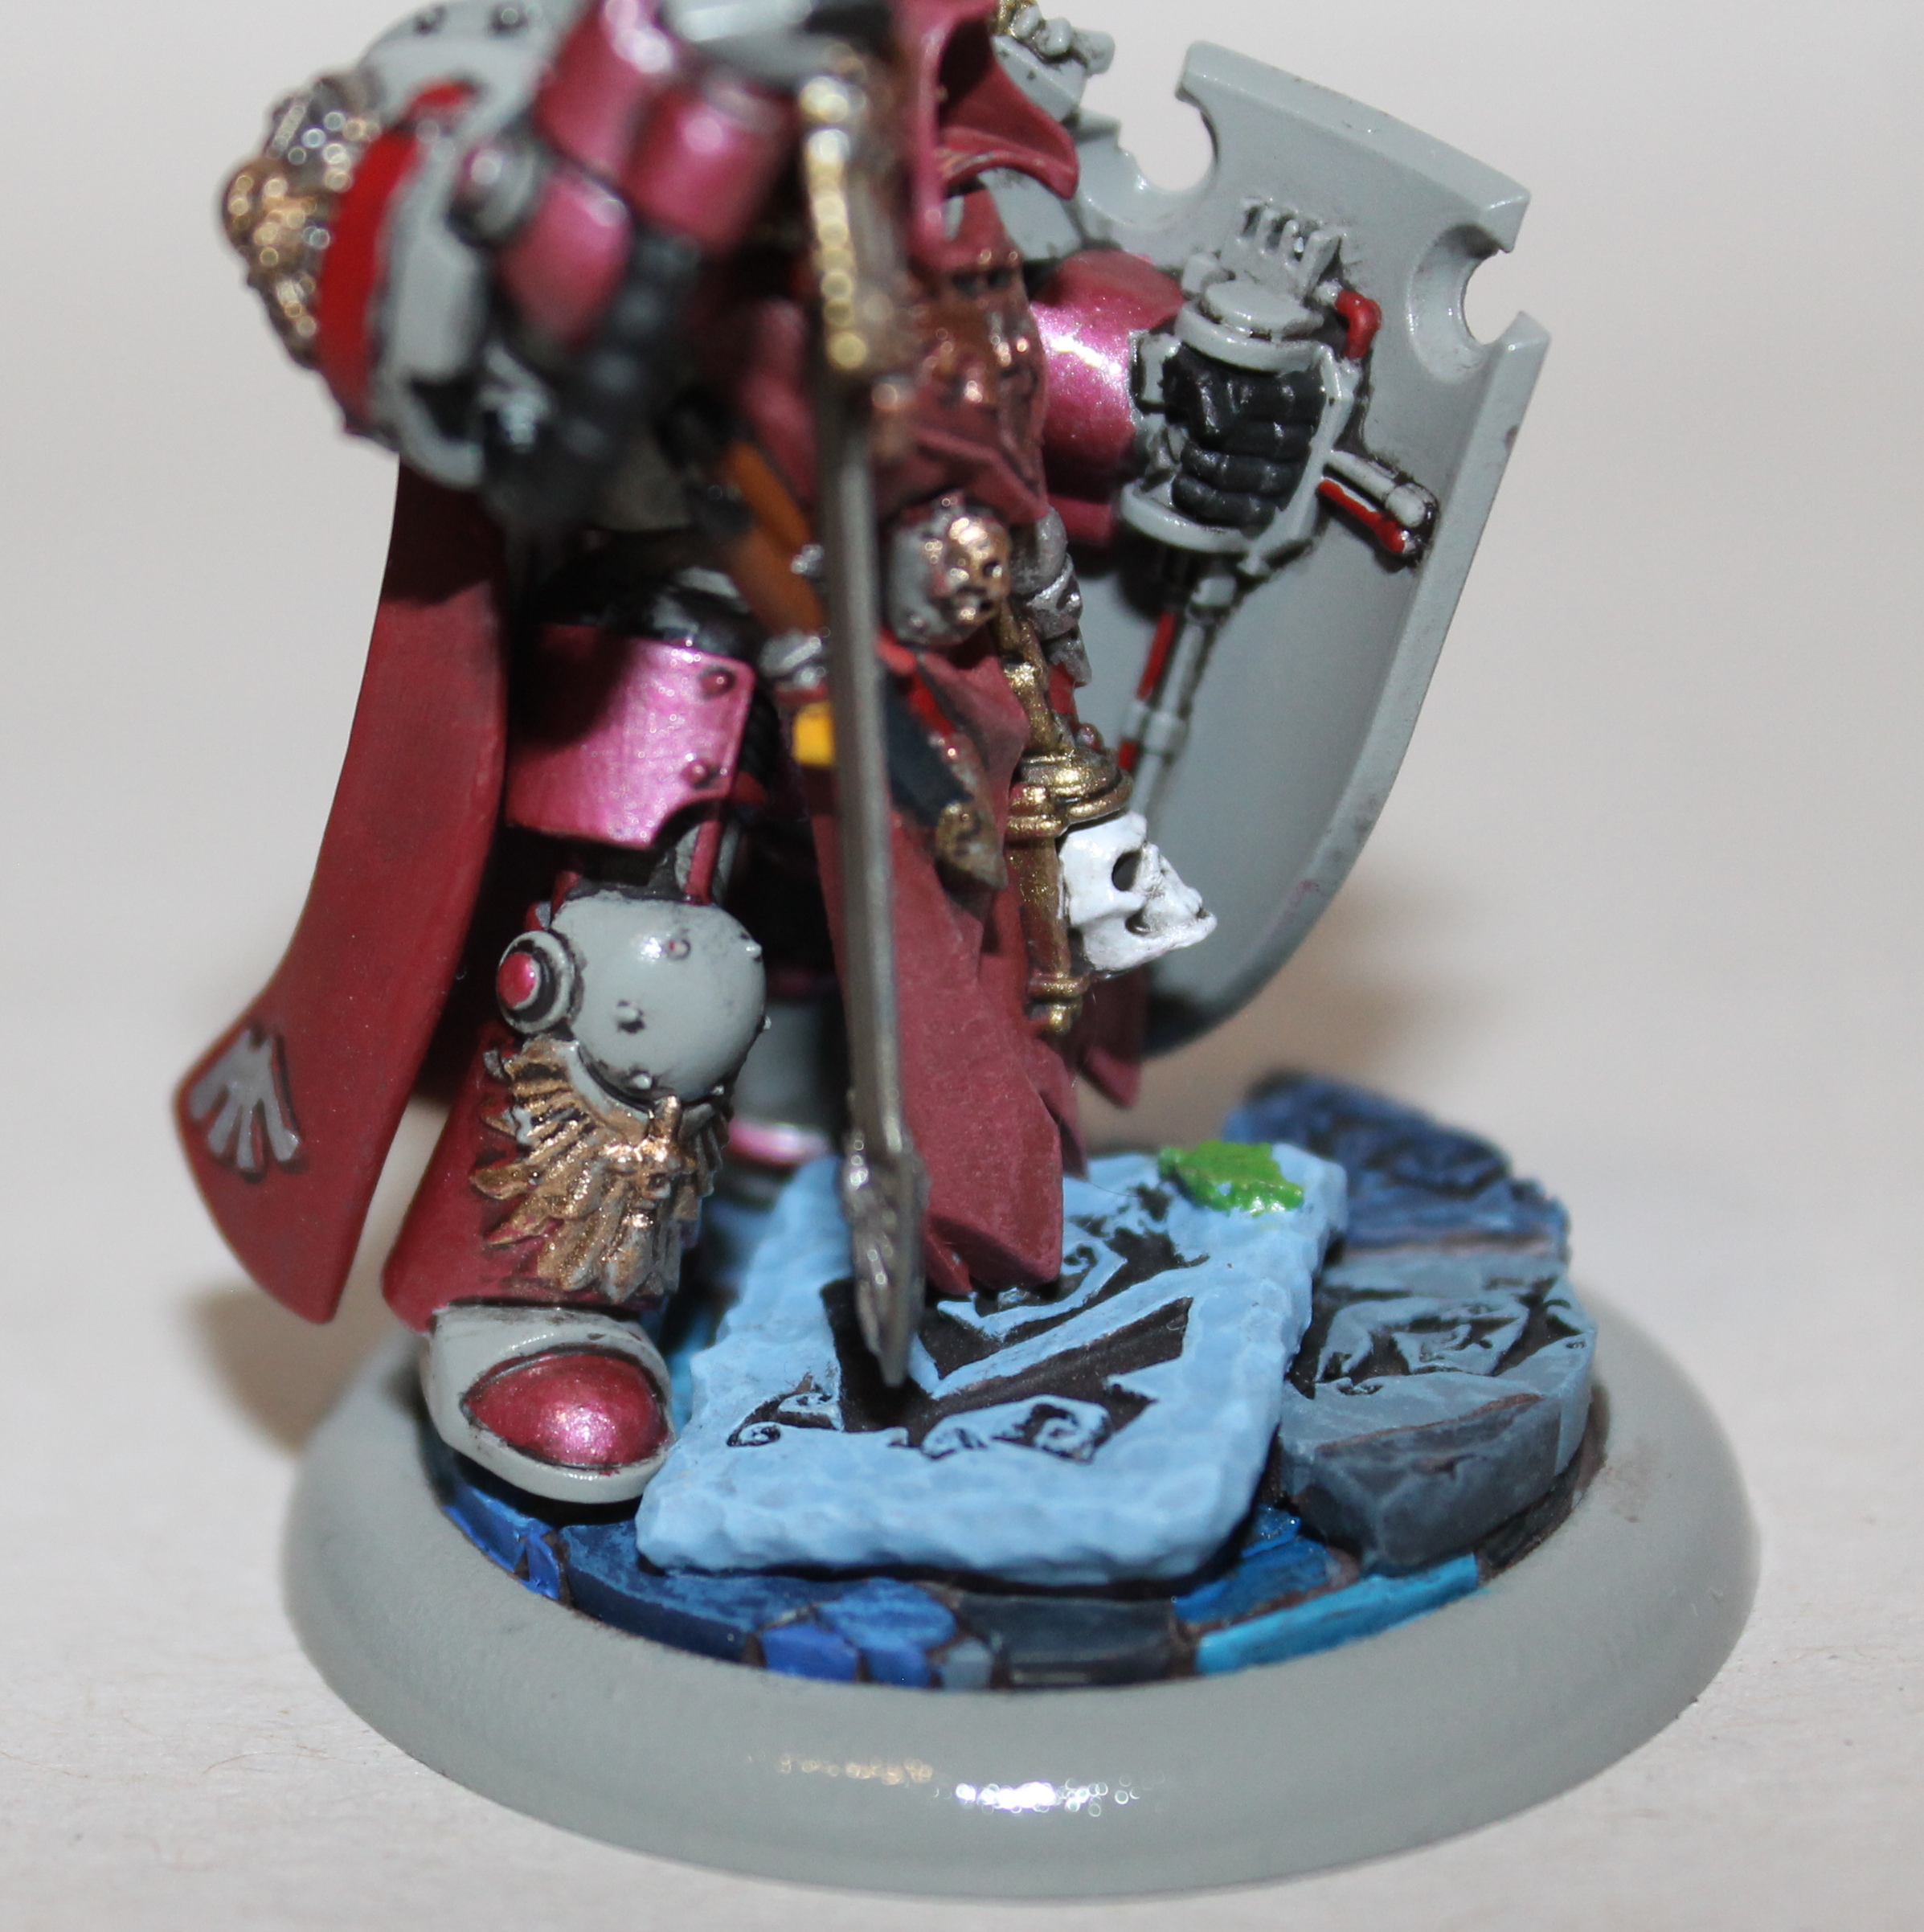
King Brian is a character from the 1959 Disney movie Darby O'Gill and the Little People. From IMDB.com : The kit was sculpted Joe Laudati and came in 4 parts - His head, body, cape and base. While the figure is cast in resin, the base was cast in plaster. My guess is to give the base some weight, and the figure is dancing, and all the weight is on one foot. Looking at King Brian's costume, the main colors are 3 different shades of green, and then an orange tan for the vest. The shoes looked black, but I thought a very dark brown worked as well. The coins (and crown) were painted gloss black in prep for painting them with Vallejo Metallics Gold. The face was next, and it was impossible for me to find out the actors eye color, so I just defaulted for brown. Most all the colors were painted and when I went to glue on the cape, there was some filling needed. So I broke out the Aves and blended it in. To attach Brian to the base I added a rod thru his heel into the base. To save some weight the cater made part of the base hollow. No worries - the rod will still hold. Thanks Joe for autographing this. For safety, I added a rare earth magnet to his sole and the base. A few tries and it worked fine... until I added the cape. With the cape in place, the balance was lost and wanted to tip over backward. I figured I needed another rod, and to play it safe I thought that I should fill the void in the base with resin, and then add that rod. Check back for the conclusion. Thanks for looking.1 point
-
I have to say that this movie is in my top ten of favs. The roll of Harry was played by Kevin Peter Hall, a 6'9" actor whose other character of note was The Predator. Our kit comes in 2 pieces- the bust and the base. Molded and casted by Gillman Productions, there is only the smallest of evidence of a seamline across the back of Harry's head. There were no obvious bubbles anywhere on the kit. On the bottom of the base, sculptor Mark Van Tine was kind enough to give me an autograph, along with a little illustration. 🙂 The only negative on the kit was the build in rod to hold the bust to the base somehow got curved backward. So it couldn't just sit without falling over backward. No big deal a brass tube/rod or wooden dowel easily solves the problem. I primed the bust in the tan Stynylrez primer, and then set out to paint the figure. While Harry shows a lot of gray hair, I started off, as usual, with a dark brown. In the pic you can also see I started the lighter first highlight. The teeth was painted with Army Painters Skeleton Bone. This is close to both V's Dark Sand, and Iraqi Sand - it falls in between actually so if one is too dark and the other too light I have my remedy. While that was drying I turned my attention to the base. I knew I wanted to paint the name with the multi color look and I found an example where they used just red and yellow. But first I painted the rock V Gray Black. Sculpted in the flat part there are some leaves, a fern and some twigs. Here you see the leaves and the fern painted. Turning back to Harry, I finished off the first highlight, and then turned to the eyes. All evidence said Harry's eyes were blue, so I started with an Azure circle for the irises. The lines of light and dark blue, and finally a black pupil completed the eyes. I also washed the mouth in Citadel's Reikland Fleshshade, and then highlighted in Ivory. In all the pics, Harry has quite the bright smile. This session, the most obvious change is all the gray hair Harry has. It was actually a surprise how much there was in the mustache area. Next I added a little more dimension to the exposed skin. IIRC I remember added two more levels of highlight. Then final step was attaching it to the base. Rather than go out and look for a brass/plastic rod, I filled the hole in the bottom of Harry with Aves, and then when dry drilled out both Harry and the base. The rod I had was superglued, and held in place until dry. Finally he was finished. Thanks for looking.1 point
-
She's from the Reaper Miniatures Mousling series. Thanks for letting me share!1 point
-
In an effort to collect Medusa kits whenever possible, I came across this kit at a not so recent JerseyFest (or was it the old Resintopia?). The kit came fro the Morland Studios. The kit comes in 6 parts plus a 60mm round base and the figure is scaled to 32mm. Following the card, I tried to copy the image. The small size of kit was a real trial to my limited abilities. The sculpted base comes in 2 parts, and they are made to attach together, but sitting on the round base, there was extra room. I decided to fill the black base. In the pic you can see gray Aves to fill the basesplitting the difference between rocks and sea. I also used V's Plastic putty to fill the seam between the monster/sea and the rocks. I made the tip of the snout of the monster shades of gray as if it was turning to rock, again a la the Clash of the Titans remake. Don't know how well that comes across being so little of the monster is seen. From there, I concentrated on the TINY details for the figure. There was no decal for the shield, so I tried my best, thinking of the Clash of the Titans remake, and painted on a scorpion. Finally adding some gloss to the scene, and gluing Perseus in place, I was finished. Thanks for looking. Size comparison to a Quarter1 point
-
This is an approx 1/3rd scale kit I obtained from Mark Warthling. It comes in 9 parts - the head/body, the stone arm, 2 sets of horns (long and short - I chose the short), a base and two name plates. The arm, base and one of the name plates are in translucent resin in case you want to light the kit. Once again it was a case of me jumping into things before taking the start image, but you'll see the clear resin along the way. I started with a tan primer, glued the horns in and then painted the face red. Reddened the face, and painted the hair black - When it came to the arm, I looked around and it was no where to be found. I contacted Mark, and for a little fee he was able to get me another. How can something that big go missing? I have no idea... Here you can see the translucent hand. Anyway, in the background you may be able to see I added a darker brown shadow to parts of the jacket. What I did to highlight the black hair was to use a little blue in it. All shirt references showed it was black, so I mixed a little blue into that to compliment the hair. You can also see the translucent base and the arm with primer. I also painted the zipper steel, and the little emblem on the pull the new Molotow Chrome. That stuff is amazing. Next was tackling the Dark brown leather collar and straps. You can see in the background the arm got it's coat of red - While I thought of it, I painted in the eyes. Hellboy had yellow sclera, with a light brown iris, and then the black pupil. With the squint the model has I just left of the sclera color... I fixed up the coloring on his head and now I'm happy with it. Hellboy is now complete. I didn't mention the base, but being translucent it calls out to be lit. Never having done lighting, I left it open for lights down the road. What I did tho, was dremel out more material in the symbols, and then seeing a miniatures trick I got some matte Mod Podge and mixed it with black craft paint until it was *dark*, then I painted thickly on (avoiding the symbols) the base. Does well with light blocking. It was crazy how many images I went thru before I found an definite image of the emblem on his sleeve. Only found one. Thanks for looking.1 point
-
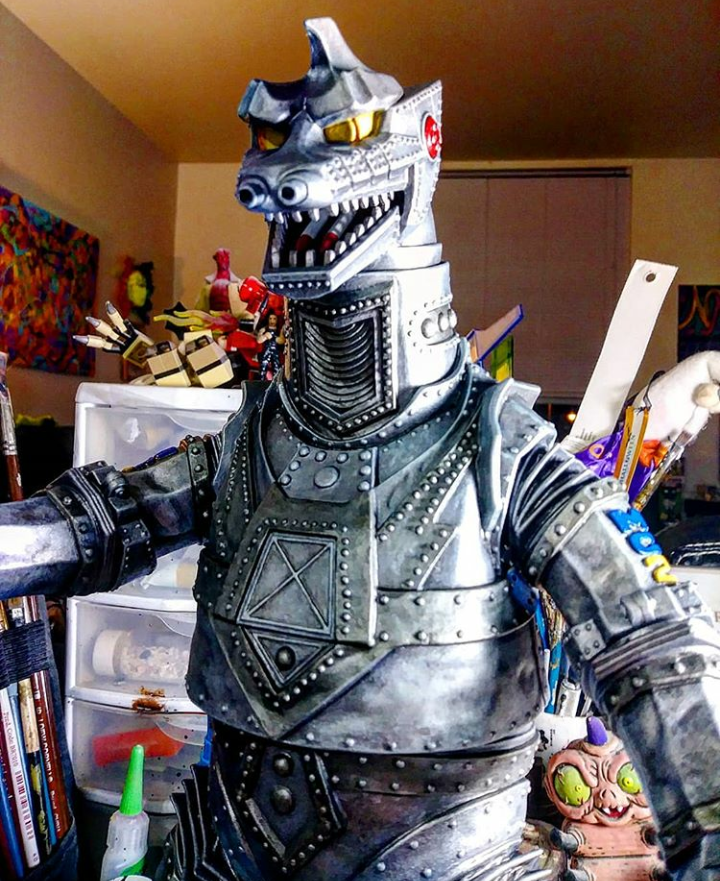
Here's a couple shot of my Billiken MechaGodzilla 2 kit. This is a vinyl kit that includes white metal parts for the "fingers". Once again hand finished in acrylics and Tamiya Weathering System palettes. Thanks for looking!
1 point
-
Here's another recent bust just off the work table. verybody's favorite painter, Bob Ross. He's approx. 1/4 scale and done up with Vallejo paints. Over on the Resin Maniac's page on FB, they are having a Bob - Off. Anyne who bought one is urged to paint it up for the show. On tv Bob used a clear palette that was scuffed up to prevent glare from the TV lights. I saw a few guy's WIP and they all used gray for the palette, so I naturally had to go completely the other way and got to practice my wood grain at the same time. Thanks for looking.
1 point
-
In the mood for another bust, I had Daenerys Targareon (sp?) sitting on the shelf for some time. Produced in white resin, she came in two parts - the bust/base, and a strand of hair. Cleanup was minimal, and any seam marks hidden was easily spotted and eliminated after a spray of primer. I started out with a base coat of Rose Beige for her skin - Her hair is almost white, so I base coated that with a coat of Beige to start. A highlight of Rose Beige + Light Skin tone. Thinking I found the costume that was sculpted, it looked like a blue, and the cape was blue on the outside and I light tan on the inside. Moving on I highlighted the hair with Ivory, added the dark brown eye brows, painted the eyeballs the same color and then painted the base a Basalt Gray. Her lips got a coat of Cavalry Brown, which is really a dark red brown color. I also speckled the base with a lighter gray for interest, and used V's Burnt Iron Metallics for the emblem. The inside of the cape got a beige highlight. I didn't want her cape and dress to be the same color, so I painted over the blue with a turquoise color from Army Painter. On the screen grab, there is a design that looks like lots of little arrowheads. The sculpt doesn't have that, but only ridged stripes. I added another layer of turquoise to them, and then over painted the stripes with a Pearlescent paint to create a little added dimension. Also her green eyes were painted in. You can't really tell but the strand of hair was also added. There was a gap, but some Aves filled the gap with nor problems. I sculpted the Aves to match the existing hair. I added a 3rd highlight of white to the top most part of the hair stands, and after looking it up, painted the dragon on the emblem a red color. Her bottom lip was painted Rose to brighten it. Then I tried something new, I used Vs Metallic Varnish to the lips and eyes. It went on a little thicker than the others and made the eyes look deeper. She was ready for her final matte coat. After a day, I looked at the bust and there was something wrong. She looked ... sweaty. I must have sprayed her with satin instead of matte. There was also something else with the skin tone. It was still too dark. I mixed Light skin tone with Ivory and gave a highlight to only the upper areas. That looked better. Then I made sure I sprayed a matte coat to seal it all in. Thanks for looking.1 point
-
Staying with the sculpts of John Dennett, I picked up his new release in the form of Ebeneezer Scrooge. This is the Alastair Sim portrayal from the 1951 film. The kit comes in just 2 parts ~ the bust and the base. The first decision was whether to do the figure in B&W or color. Despite the box art being in color the movie was in B&W. I spoke with the sculptor, who sent 2 colorized pics at the same time I found my own. This is the one I went with - Starting to add color - Then once again, I got into a groove painting the facial features and forgot to take WIP pics. I used a splatter technique on the base and then applied the woodland Scenics snow with a few layers of PVA. Thanks for looking.1 point
-
Right from the start, I must admit I'm not the biggest Fantastic Four fan. But I thought the plan for the kit where Susan herself could be cast in clear resin was ingenious. The kit was sculpted by Tony Spangler, and molded and casted by Mark Kaelin. The kit comes in 5 parts - the head and shoulders, the body, a "4" base and a nameplate. Looking at the kit the clear head and shoulders casts was an excellent idea. Pulling it off I'm sure was problematic. Giving it a close look small bubbles can be seen inside and there was one under her nose. Now with it clear, it can't be filled. But with a bath of Future, many of the bubbles became invisible or at least less emphasized. Next up, looking at the colors for Susan's uniform, between the comics, cartoons and now the movies + fan art there are a multitude of colors and styles. So in the end I chose a simple light blue color and a dark blue stripe. I also added a steel color and medium blue to the emblem on the chest. While all that was drying, I turned my attention to the base. Both were colored in a light Steel color, and then then highlighted in blue. Masked up for the blue paint. I felt something else needed to happen with the seams in the clothing. I have some Gundam Markers and thought I could run some blue into the seam lines... no blue. I wanted to do this, so in the end I used the black pen. They are very easy to use, and fairly simple to clean up if you go outside the lines. With that I was all done. Thanks for looking.1 point
-
The best place I've found to "hang out" is a forum called The Clubhouse ( www.theclubhouse1.net) . They have a bunch of sub forums, but it's majority is figure kits. Three sub- forums in particular are the "Sculptors Forum" where guys show off their sculpting work, many of which go on to become kits. Susan was discovered this way. I actually watched the sculpt come together. The other one is "New Kits, Special Offers, Coming soon" is a place where you can talk to the sculptor/producer to make your purchases of these new kits. The 3rd is "Members Swap and Sell" where members of the group sell off kits they no longer want. The admins take special care to keep ppl from getting ripped off, in that one has to be a member for a certain amount of time, and is active in the forum community to become a registered seller. Two other places are for those who go to Facebook. One group is Figure Model Kits. It's a Show and Tell type of group, but the admins also allow sales. Another similar group is called Resin Maniacs. Both have friendly people who will give advise when asked, and you see kits for sale from time to time. HTH.1 point
-
This one came from DcDevitt Studios exclusively for member of his Patreon page who opted for a certain level. Troy does some outstanding work. Anyway here he is. First is the raw resin. Thanks for looking.
1 point
-
Nuts planet bust. mostly done in enamels. Dak
1 point
-
1/35th Stalingrad beach girl series. The accessories are mostly from Meng. All painted with enamels. Dak1 point
-
Old figure I finally finished. Mostly painted with oils. Dak1 point
-
This model is another model from deep in the stash. I remember buying the model from the Buy and Sell section of a forum. The sculptor was Chris Lynch, and looking at Boba's size, I'm guessing it's around 1/10th scale. I have no further info on it. Even doing a web search, that title gets exactly 1 hit from a guy on a Star Wars Models website who had it listed on his "wants" page. It's not from one of the movies, but maybe a comic or some book? The kit came in about 10 parts. Boba's body and the bird; Boba's head, his two arms and rifle, the two sand people heads, a gun in a holster, some bag that had no apparent place to go, and the two parts of the birds restraint. It also came with a length of cord, and a length of "pleather". The resin was mostly in good shape, but it did need a little work. I didn't think to take a pic before starting, but here we are with most of the parts attached - The bird was tackled first. With it supposedly from Tatooine, I figured it was to blend into a sandy, rocky background. So the bird was made up of browns and other neutral colors. I figured the model needed a splash of color, so blue was added to the bird's crest and around his eyes. This color choice will come in handy later. The ground work is just a dark sand and and an orange ocher Next turning my attention to Boba, I started filling in the colors that I remembered. There was a few times where I had to look up exactly what color went where. At this point I also painted in the Sand People heads with Iraqi Sand and White Aluminum for the metal parts. Around their mouth was a brown leather color and the bottom of the mouth looked really dark. I ended up painting it a German Gray. The blaster was painted with VMC Gunmetal, and then highlighted lightly in silver. The silver was also used to create the scratches around his armor. It was here I thought the bird needed a little more color, so I took the Cavalry Red I used for his gauntlets, and highlighted the birds feathers. This is where I left it for the day. A few days later I was back and it was time to finish up Boba. The first thing to do was paint the backpack. Here's where a little indecision came in. He seems to have changed his uniform between ESB and ROTJ. In ESB his back pack was mostly green (also green gauntlets), but in ROTJ the backpack was more colorful including an ocher color, a red, and even blue! So to harmonize the model; the red is the same color as the gauntlets, and I reduced the saturation of the blue by adding black, and then I lightened it by adding the gray from his jumpsuit. While this was drying, I glued in the restraints to the birds collar. When the CA on that dried, I wrapped the pleather around the collar, and then according to the line diagram that came with the kit, around the saddle horn and back to the other part of the collar. I dipped the cord in Citadel's Agrax Earthshade, glued it in loops and then just hung it around the Sand People heads. This was another model I could fiddle with forever, so instead I called this one done. Thanks for looking.1 point
-
The stencil for the scales hasn't arrived yet, but I'm finished with her besides that I couldn't resist a few pics. Now, I'm reconsidering even needing the scales ... Thanks for looking.1 point
-
Here's a little bust I was doing while l waiting for the paint and/or glue of Medusa to dry. I took this sculpt of Det. Columbo as a sort of sketch, as it's a bit rough, so I just left it that way. The bust didn't come with a name, so remembering his famous line to solve the case - "Oh, one more thing..." So that's what I'll do when I create a proper base for it. I agonized over the 5 o'clock shadow - too much too little - and back again. It was the first time I did it with paint. (vs. pastels). The other hard part was, after all the time spent trying to make eyes centered, was to have his one eye accurate and a little off. The inspiration - All done . Thanks for looking. CCs welcome. (On the shelf with the other lil busts)
1 point
-
This little figure has been unbuilt on my shelf seemingly forever. It's Freebooter's Bad Fairy. I took one of my orchid mounts where the plant unfortunately died, and used it as a "nest" for the fairy. Everything was painted with Vallejo acrylics - except for the Wings where I used Green Stuff World's Chameleon Colors. Thanks for looking.
1 point
-
This model has been sitting on my desk for a while now about 99% done. Lets have a look. The first thing that's noticed is the base that's on the website is quite a bit different than what you get. I don't know (and didn't think to ask) if it was a mistake on Aradia's part or what. Anyway Posideon just sits on this little ledge of coral. No matter I can model a base. The parts are shown below. On the website you had a choice of either a human type face or a sort of fish mask (arrow). I liked the mask, but in person IMO I felt it made him look like he had a tiny head. This is the problem for me when a model sits. You think you've taken pics that you didn't. But basically the skin was done in a Flesh, and washed with Citadels Reikland Fleshshade. Then the fish part was done in a blue, highlighted with a turquoise with some pearlizing craft paint for the wet look sparkle. The base is simply Sculpt -a-Mould over some foam "boulders. Spray with a tan and then the same turquoise with the pearl. Finally I wanted some sort of backdrop for him. I went looking for some pieces of fan coral at the pet stores. But no good. I guess real coral decorations are taboo now. I found some artificial stuff that looked good in the pics and real life from a distance. But it's kind of cheesy look close up. I sprayed that with white primer and then some blue mixed with the pearl. Done. Thanks for looking.
1 point
-
This is one of the Soda Pop Miniatures, Maid Service, part of the Takoashi University game series. Thanks!1 point
-
Latest finished piece.
1 point
-
The major step this session was painting in the eyes. A web check of the eye color of Kevin Peter Hall turned up nothing. Most of the images show him with green eyes so that's where I went. When dry, onto the tree he went. Merry Christmas and thanks for looking everyone.1 point